The orchid can rightfully be considered one of the most exquisite and sophisticated ornamental plants. The flower has earned the love of many fans thanks to its unusual structure and variety of shades. If there are no living beautiful orchids in the house, you can easily make one from artificial materials. Foamiran orchids do not require daily care, but they bring a lot of pleasure to their owner.
Preparing for the creative process
To create a white orchid with your own hands, you will need the following materials: white foamiran, wire No. 24 or No. 26, light or dark green tape, several cotton swabs, a piece of cotton wool, glue (PVA, second glue-gel, “moment crystal”) , acrylic paints, crayons or dry pastels, orchid texture, thin brush, tweezers, scissors and iron.
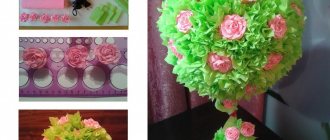
Orchid for gift decoration
As you know, foamiran makes very beautiful hair accessories or interior flowers. But few people thought that any gift could be decorated with such flowers. Today we suggest making a delicate orchid for gift wrapping.
Materials and tools:
- - orchid template;
- — silk foamiran (iveri color);
- - Iranian yellow foamiran;
- - bright yellow silk foamiran;
- — pastel blue, turquoise, yellow;
- - acrylic red paint;
- - gold acrylic paint;
- - needle;
- - sponge;
- - scissors;
- - brush;
- - acrylic varnish;
- — mold of orchid petals;
- - instant glue;
- - iron.
We cut out all the details of the orchid from thick paper - there should be three templates. For orientation, a pattern of an orchid is presented on a piece of notebook paper and all dimensions are indicated.
We attach the templates to the foamiran, trace and cut out the details.
We tint the details of the petals with blue and turquoise pastels, starting to make strokes from the center to the edges.
Apply yellow pastel.
We tint the middle with blue and yellow pastels. Paint the cut blue.
We cut out a mini-strip of 0.5x1 cm from bright yellow fom and make a fringe on both sides.
Dipping the tip of the needle into red paint, we draw rays and dots.
Fold the mini-piece in half and glue it in the middle, without touching the fringe.
Let's return to tinting the petals - enhancing the blue color (in the center). Shade the pastel with a sponge.
We tint the back side of all parts in the same way as the front side, but not so brightly.
After heating the petal on the iron, apply it to the mold and press it with your fingers. We repeat this process with all the petals separately. Place the center on the iron. We wait until the part heats up, takes a convex shape and flies away from the iron.
We form a wave at the edges of the petals. We heat a small area and stretch it with our fingers.
Let's go through blue pastels again. By tinting according to the created texture, we prevent paint from penetrating deep into the surface. This way we get a beautiful marble pattern.
Cover with varnish. Apply varnish to the center piece on each side. Let's dry it.
Apply a drop of gold paint to the sponge and blend it along the petals and the middle (on both sides).
We glue the yellow fringe into the part that will be the center of the orchid. Glue the two main parts with the petals (in the middle).
Glue the finished center to the petals.
We pack the gift and decorate it with a delicate orchid flower.
Foamiran orchid in the interior
A phalaenopsis or cymbidium in a glass vase will look very delicate; a white orchid looks especially sophisticated and delicate - such a flower, made of plastic suede, is quite difficult to distinguish from a living plant. A black orchid branch goes best with white and gray shades.
An artificial orchid made from foamiran is suitable for decorating a hair hoop, hairpin or brooch. It can be attached to a wedding boutonniere or added a small branch to a wedding bouquet.
Many people consider the orchid a symbol of beauty, love, tenderness and perfection. A flower created with your own hands can be a kind of talisman for its owner. Today you can cope with such a task without any problems thanks to numerous master classes from professional needlewomen.
Preparing patterns for work
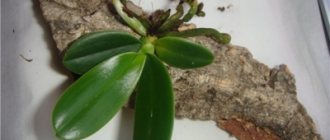
You should start working by preparing templates from cardboard, according to which you will cut out parts from foamiran. Our patterns are an exact copy of the elements of a real Phalaenopsis orchid.
When you carefully examine the flower, you probably noticed that the lower inflorescences are much larger than the upper ones. The patterns also come in different sizes: large (M) and small (S). On one branch, as a rule, there are 2-3 small flowers (S), 3-4 large ones (M) and 2-3 buds. The pattern for the buds is designated No. 4, it also has sizes M and S. Pattern No. 5 is cut out in size 6x6 mm with teeth on opposite sides. For convenience, copy our patterns and proceed to the main work.
Making a pattern for a future orchid
There is probably no person who doesn’t like orchids. These colorful flowers of unusual shape are considered to be a symbol of the tropics.
Orchid petals vary depending on the type of plant. To create a pattern you will need:
- flower core;
- "sponges";
- petals (five pieces);
- stamens and styles (for some subspecies).
The most common variety is phalaenopsis; the flower size of this plant ranges from 5 to 15 cm. You can make a stencil of just one petal and the middle (sponges) to assemble the phalaenopsis from plastic suede. Even a beginner can easily make a template for an orchid; you just need to listen to the advice of professional craftswomen.
To make a pattern for a cattleya orchid, you will have to additionally create two different types of petals, and in the case of a cymbidium, you will need a template for the middle of the flower.
Templates (stencils) are prepared from thick cardboard or very thick paper. First, choose the type of flower, then make templates and transfer them to sheets of plastic suede.
The main stages of making cymbidium from foamiran
Before collecting a cymbidium flower, you need to prepare a column, a tongue and five petals. You can use your own imagination, use the ideas of other craftswomen, or use the following recommendations:
- Draw a vertical line 6 cm long, then at a height of 3 cm you need to draw a transverse line perpendicular to the vertical one and mark 1.5 cm on it in both directions. Connect the resulting points with a smooth line - you get a leaf.
- For the column template, you need to draw a rectangle, the width of which will be 1 cm, and the height will be 6.5 cm. The corners are smoothly rounded and an incision 3 cm deep is made on one side.
- To create the tongue you need to draw a heart and a circle. The width of the heart is 4.5 cm, the height is 3 cm. The radius of the circle is no more than 1.5 cm, and the circle is placed above the heart so that the figures touch each other. Trace the outline of the resulting figure - that’s it, the tongue is ready.
The finished stencils are placed on foamiran plates, traced along the contour with a special stick (knitting needle) and then the details for the future flower are cut out. The color of the cymbidium can be any; everything here depends only on the imagination of the master. Most often, the most striking element of an orchid is the “lip”; the remaining petals can be tinted using pencils or acrylic paints. And now we invite you to familiarize yourself with a step-by-step master class on creating a delicate lilac orchid branch.
Preparing parts from patterns
Lay out white foamiran in front of you. Transfer the prepared patterns onto it and cut out the parts with scissors. For one flower you will need the following supplies:
- according to pattern No. 1 (lip) - 1 pc.,
- according to pattern No. 2 (side petals) - 1 pc.,
- according to pattern No. 3 (sepals) - 1 pc.,
- according to pattern No. 4 (bud) - 1 pc.,
- according to pattern No. 5 (part of the lip - “chair”) - 1 pc.
For beginners in working with foamiran, we recommend that you outline the pattern with a needle or awl so as not to leave pencil marks. Fold the cut out parts of the plant as in the photo.
Experiments with foamiran
Charming orchid flowers made of soft, plastic foamiran look very beautiful. This material is more voluminous, stretches easily when heated, and products made from it are very “real” and textured.
With the right colors, a little perseverance and artistic skills, you can create a spectacular gift for your loved ones.
White orchid lip tinting
Using an applicator and dry crayons, apply bright yellow or purple pigment to the lip (pattern part No. 1). Tint the workpiece on the reverse side with less bright colors, which will give the element a translucent effect.
Tint the “chair” blank (pattern part No. 5) purple on both sides in the same way and place it in the middle of the lip.
Apply specks of acrylic or oil paint to the lip using a thin brush. Receive: the back side is tinted, the front side is stained.
Note!
DIY feeder - step-by-step instructions for creating a feeder + detailed diagrams with photo reviews- Do-it-yourself rugs - TOP 120 simple patterns with master classes on how to make them yourself + photo reviews of finished rugs
- Do-it-yourself dolls: a master class on making a beautiful doll. Simple instructions with photo examples of ready-made options
For what event should you give a bouquet of orchids?
Thanks to the variety of shades and shapes of buds, flower arrangements made from orchids are perfect for any celebration. But most often orchids are used in the following cases:
- Wedding. For such an important and unique event, orchids will be an ideal option. They look very gentle and can emphasize the lightness and beauty of the bride;
- Birthday. Another great reason to give a composition of orchids. On such a day, you can experiment with colors and choose bright buds that will set the tone for the entire holiday;
- Relationship or wedding anniversary. On such a special day for a couple, it is definitely necessary to choose a special bouquet. An original composition with orchids will perfectly cope with this task and make the holiday truly memorable;
- March 8. On International Women's Day, you can find several bouquets of beautiful flowers in every home. Compositions with orchids will be a real find for those who are tired of traditional roses and tulips and want to show imagination and creativity;
Formation of side lobes
To shape the elements of the orchid inflorescence, heat the iron by setting the thermostat to the second position. First, shape the buds by placing the piece on the surface of a heated iron for a few seconds. As soon as it heats up, immediately remove it from the surface of the iron in the shape you need.
We attach the side petals to the iron one by one. We apply the first, protect the second from the hot surface. We quickly press the warm petal onto the mold to get a textured print. Then we apply the second one, and protect the finished one. We also press the heated second one onto the mold to obtain an impression.
Finished petals with veins must be slightly pulled by the edges and with your fingers, form indentations in the center to give a natural effect. The petals will look like in the photo of hand-made orchids.
How to make an orchid sprig from foamiran?
In this master class we will make an orchid sprig from foamiran. It will decorate your room and complement the flowers that have already faded.
To create it you will need:
- green, lilac foamiran;
- purple pastel;
- damp foam sponge;
- awl;
- scissors;
- thin and thick wire;
- black beads;
- iron;
- foil;
- glue gun
We cut out the templates for the orchid, which are given above in the article. Choose the color of foamiran that you like best, and to tint the middle, take a darker shade of art pastel. For one flower we prepare one blank of each template. We trace all the templates using an awl or a toothpick. We outline petal number 2 once, and then its mirror image opposite. That is, you should get a double part that is connected in the middle.
Let's make two unopened buds: one from green, the smallest, and the second, a little larger, lilac.
Using purple art pastels, we will completely shade the middle of the orchid under No. 1. Template No. 2 will be shaded only in the center, shading closer to the edge of the petals. We will also tint the blanks for the buds. First you need to moisten the foam sponge, apply pastel to it and then paint the foamiran. After this, let the paint dry.
Let's give each piece a shape. Heat up the iron and lay out petal No. 1 for about five seconds. At the same time, constantly press down on the middle and the foamiran will begin to bend. Drop the petal onto the table. In the same way we prepare the fom for the buds.
In the remaining blanks, we process each petal separately. Apply to the iron for 2 seconds, stretch the middle with the fingers of both hands.
Let's start assembling the orchid branch. We cut the wire 15-20 cm long, string one bead, which we place in the middle, and twist the ends of the wire under the bead.
We pierce the wire at the top point of part No. 1. Then we pierce the center of the remaining petals. You can fix each layer with super glue.
For the buds, we will make drop-shaped foil blanks of such a size that they fit in the petals.
We pierce the middle with an awl and thread the wire. We connect the ends under the wide base of the drop.
We collect the buds, glue all the petals in a circle to completely cover the foil.
We wrap the stems of orchid flowers with green tape. Then we collect the twig starting from the smallest bud, to which we attach a thicker wire. We gradually move down the branch, distributing the flowers evenly.
This is how easy it is to make an orchid sprig with your own hands.
An artificial orchid, just like a living flower, fits perfectly into any interior; it looks natural in a flower pot, being a worthy decoration for any window sill. The only disadvantage of such a product is exposure to sunlight, under its influence the petals may lose their color.
Shaping an orchid lip
We form the lip by placing the entire workpiece facing the hot surface. After which the workpiece will take the shape you need under the influence of heat. Before it cools down, you need to make a groove with your fingers and pull the antennae, as in the photo.
Note!
- DIY satin ribbon bows - step-by-step instructions for creating unusual bows + detailed diagrams with photos
- Do-it-yourself furniture restoration: step-by-step master classes on restoration at home (120 photo ideas)
- Do-it-yourself rack: step-by-step instructions with photos and descriptions on how to make an unusual rack
For the logical conclusion, it remains to fix the “chair” in the center of the lip (oval on pattern No. 1). Take the blank, form a fold parallel to the teeth, and glue the element onto the lip. If necessary, tint the “chair” in a more saturated color and paint the teeth yellow.
Material selection
There are a lot of materials for implementing this idea in the modern world of decor and handicrafts, as well as types of this unique, excellent flower.
An orchid sprig can be made from beads, fabric, paper, foamiran, satin ribbons, felt, and even from such simple materials as cotton pads or threads.
Before you start making an artificial orchid, you need to carefully study the structure of this unusual flower by looking at a photo, or a live original, and most importantly, choose a specific type of orchid and decide on the color and shape.
Assembling an orchid inflorescence
Collecting an orchid inflorescence is simple. First you need to create a column. To do this, take a little PVA glue and apply it over the entire fleecy surface of a cotton swab. Then immediately dip this edge in starch, shaking off excess to obtain a velvety surface. Let the glue dry and cut the edge of the stick to about 8mm long.
Take the wire, make a loop on one side and coat it with glue. Place the prepared velvety head onto the glued loop. Allow the column to dry for a secure fit.
Using fast-acting gel glue or instant glue, glue the lip, side petals and sepals to the column.
To bring the flower to life, apply a little glue to the lip wings and fix them on the surface of the side petals, leaving the column in the very center. And your handmade artificial orchid will be almost as good as the real one.
Little tricks for creating an orchid
An orchid is an unusual plant that has a structure that differs from other, common flowers. It has two side petals, three sepals and a petal in the center of the flower, reminiscent of baby lips. Color ranges from white to deep purple and dark red. The most attractive in its beauty is the cymbidium - this subspecies of flower can be made of artificial material, for example, plastic suede. Such a flower is no different from a living plant; it will decorate the interior of any room.
The main advantages of foamiran are the following qualities:
- plasticity - the material easily stretches and changes when heated;
- it can be easily cut with scissors;
- finished products can be washed well with plain water;
- foamiran is environmentally friendly;
- the variety of shades makes it possible to create flowers that are as similar as possible to living orchids.
- Foamiran can be purchased at any store that sells craft supplies.
Assembling orchid buds
To form buds, take a wire with a loop on the edge, wrap cotton wool around it in the form of a bud. Wrap the wire under the bud with tape in the form of a stem. Wrap the cotton wool bud in the blank according to pattern No. 4, gluing all the petals together.
Note!
- Corrugated paper flowers: TOP 100 photos of ready-made options + instructions on how to make them yourself
- DIY family tree: instructions for creating a family tree + DIY design ideas
Do-it-yourself sun lounger: photos with instructions for creating sun loungers + detailed diagrams of the stages of work
The resulting buds need to be slightly tinted with yellow pastel with dark green shadows and red pigment. To set the tint, take hairspray and spray the buds with it.
Where can you find the best orchid bouquets?
If you decide to present a bouquet with beautiful orchids, we advise you to contact our Flor2U store. Our professional florists are very experienced and know exactly which type of orchids is most suitable for a wedding, and which will be indispensable for a birthday gift! In addition, they will be happy to advise you on all questions about caring for your flower arrangement.
Our online store has a huge selection of orchid shades, as well as a variety of possibilities for decorating a bouquet for you.
The process of selecting and ordering a bouquet on our website is very simple: You just need to select a suitable flower arrangement, click the “buy” button and fill out the order form, finally paying for the order. We provide the opportunity to pay for your purchase both online on the website and in cash or by card to our courier!
Delivery of flower arrangements is carried out in Moscow and the Moscow region, as well as other cities of our country! All delivery prices are on our website.
Assembling the peduncle
At the last stage of work it is necessary to form a peduncle. To do this, wrap the wire under the flowers with green tape 0.6 cm wide.
Then wrap the connected two buds down 4 cm, bend the stem to the right side and tie a small flower to it 4 cm down, then bend the stem to the left and wrap another one.
Next, we attach another small one and move on to attaching 3-4 large flowers. Then we thicken the winding of the peduncle and lightly tint it with dark green crayons or paint.
The creative process is complete! Place the finished sprig in a beautiful vase or in a pot you made with your own hands especially for your orchid!
What colors go with
Thanks to the wide palette of shades, the orchid combines harmoniously with almost any other flower. When composing a bouquet, as experienced florists note, it is necessary to focus not on the varieties and shapes of flowers, but on their color.
So, light green or light green phalaenopsis can be complemented with lilac and yellow crocuses. An exotic flower, the petals of which are painted purple, combines interestingly with lilac, but bright colors can be diluted with snow-white callas.
For a wedding bouquet, a combination of a delicate orchid and an exquisite rose is often chosen. In this case, monochrome is allowed or, conversely, a play of contrasts when combining the colors of the buds of the flowers used.
Do you want to give an original and stylish bouquet as a gift? Pay attention to the interesting combination of a white rose with a delicate snow-white orchid, the “lip” of which has a leopard print.
DIY orchid photo
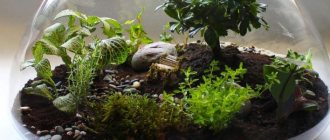
Types of florariums and their use in the interior
A florarium is actually a terrarium for plants.
Other names are also known:
- A composition of flowers (individual flowers), located (placed) behind glass;
- A container made of glass or transparent material with plants and decorative items placed inside it (figurines, multi-colored stones, shells, colored soil, etc.).
Succulents are used quite often. These are plants that can store and retain moisture in their leaves and stems. They grow in dry places (deserts, mountains).
are becoming increasingly popular when creating florariums .
About the features of florariums and the difference from a typical terrarium:
- The presence of a narrowed hole (window) on the top or side of the container. It provides the necessary microclimate for the plants inside. It turns out something in the form of a mini-greenhouse. Plants are comfortable;
- Can be covered with a lid. Fully or partially.
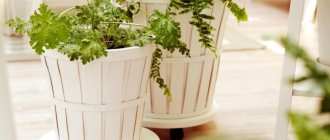
Time changes many things and concepts. Including flowers. Few flower growers will show window sills filled with various flowers. We will be happy to demonstrate original solutions with well-known and rare exotic specimens:
- In vases and flowerpots;
- Various shapes of polyhedra;
- On blocks and in baskets;
- On beautiful tables, bedside tables and shelves;
- Hanging and wall-mounted.
Photo of a florarium in the shape of a polyhedron.
The interior of the premises becomes richer and more interesting with living plants. And the use of florariums provides additional opportunities. The most frequently created ones are:
- Mountain-forest compositions;
- Various desert options;
- And just beautiful landscapes I liked with original plants.
Later in the article we will tell you how to create a florarium with orchids with your own hands.
Paper decorations in the form of orchids
Making your own stylish addition to gift wrapping in the form of a paper orchid is not difficult at all.
To work, you need fairly thick paper that can hold its shape.
We recommend reading:
- DIY pendant - step-by-step master class with instructions. Photos of finished works with an unusual design. Schemes, new items, recommendations from craftswomen
- DIY beaded jewelry - an overview of the most beautiful options (120 photos). Instructions and techniques for making original beaded jewelry
- Hair jewelry - 120 photos of original ideas. Instructions on how to make a beautiful decoration with your own hands (master class + video lesson)
Blanks in the form of petals can be drawn or copied on the Internet.
After cutting them out, just paint and glue them.
Such a flower will complement a gift box or bag, decorate an original postcard, and serve as an effective addition to any gift packaging.
What is an indoor florarium with orchids?
A closed florarium means a completely enclosed container. It creates its own microenvironment:
- To do this, use containers with narrow necks (originally shaped wine bottles, for example);
- There is no air access to the plants. No maintenance or watering. Other landscapes;
- All this is not for orchids. And they grow succulents with success.
In a closed florarium, the orchid will not feel well.
Tools and materials Time: 1 hour Difficulty: 5/10
- printed template;
- scissors;
- plain white paper;
- watercolor paints and brushes;
- brilliant watercolor;
- universal glue;
- 1 wilted orchid flower (optional);
- pink crystal or pink bead;
- small bugles of bronze color.
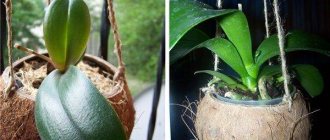
Orchids are luxurious, but capricious and demanding plants. At home, caring for them is not easy, especially in conditions of too dry air and insufficient light. Another thing is a paper orchid that will never wither!
So why not make your own paper orchid? This flower requires absolutely no care, and it will last as long as you want! You can also use it to decorate a gift instead of a bow, include it in a boutonniere, or decorate a bouquet of fresh flowers with it!
Here for comparison is a live orchid and a paper one.
Materials and tools:
To make the paper orchid look more realistic, we divided a wilted live orchid flower into pieces and made a template using these pieces. You don’t need to do this, just download and print the template below and follow the instructions to make a flower.
"Children's applique"
Orchids can also be used in children's creativity. Invite the children to make a paper applique with an orchid. In this case, you will already be conducting a master class on how to make an orchid, so be patient and as a result, your child will have an interesting craft made with his own hands.
Everything is as usual: corrugated paper, colored paper, brush, glue gun, scissors. We transfer the sketches to paper, carefully cut out and stretch the edges. The middle petal should be speckled - for this use colored paints or felt-tip pens. All you need to do is screw the pieces together and attach the core.
- How to decorate clothes | Ideas, types, types and rules of decoration. 145 photos of options for decorating children's and teenage clothing
- TOP best ideas on how to decorate a window: methods and options for simple and beautiful decoration of windows and window frames (115 photos)
- How to decorate a room for a child’s birthday: 130 photos of decor options and the best ideas for DIY festive decorations
As a background, you can use ready-made applications, previously made from multi-colored paper sheets - stems, leaves (for greater realism, you can twist them diagonally). If you wish, you can frame the result with a wooden frame.
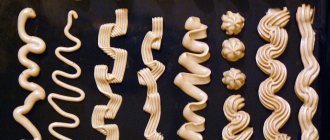
Processing crepe petals
Corrugated paper requires compliance with certain processing rules:
- Crepe is available in a huge range of colors, so painting is an optional step.
- Paper blanks are cut out of the material, which then need to be heated with an iron.
- The heated parts are slightly stretched and immediately released to give the petal a wavy shape.
Crepe orchids have a very realistic appearance, which is why this material is popular in practice.
Processing petals from colored paper
Using the existing layouts, petal details are cut out of white paper. The edges of the paper blank can be slightly bent, giving the petal a corrugated shape. Next comes the painting stage.
The natural color of the orchid is cream with purple notes at the base.
However, the master’s imagination is limitless, and therefore the color of the petals can be chosen at the discretion of the needlewoman. The blanks are coated with several layers of paint, and after drying they are supplemented with a layer of transparent varnish.
Making the core
The core of an orchid, regardless of the technique and material, is made from pink or yellow beads. In practice, the most ordinary small cylindrical beads are often used.
As a backing, use either a felt pad or a thick circle of cardboard. The base for the core is attached to the base of the bud, and the bead elements are glued to the backing.
The next step is to glue the upper edges of the petals together to create the feeling of a closed bud.
Also, do not forget about attaching the inflorescence to a decorative stem, the role of which is played by a strong metal wire wrapped in either crepe or green textile.
Advantages and disadvantages
It is not without reason that the orchid is one of the most valuable, beautiful and unique plants. And florariums with orchids are in particular demand. The price of such gifts is decent.
Creating such a florarium from orchids yourself is a special fashion now among flower growers.
When creating various florariums using them, the habitats of these plants must also be taken into account. Especially the conditions of these places:
- Tropical forests and mountains. High temperatures all year round;
- Frequent rain (high humidity);
- There is a lot of sun around. But under the open scorching sun they are not.
It is not for nothing that flower growers pay attention to the florarium for orchids:
- Small volumes allow maintaining temperature and humidity. At different times of the year;
- Makes it easier to care for some capricious plants;
- Very convenient for small apartments. Where there is not much room for flowers. But a lot of creative thoughts to create amazing compositions;
- Their skillful and non-standard use allows you to enrich and decorate the interior of the premises;
- It is for creativity that there is a wide field of activity : Allows you to create various variations of the tropics, deserts, and mountains;
- You can use very small plants. When used alone, they can look simple. And in composition with others they acquire some kind of mysterious and romantic connotation.
Florariums provide ample scope for creativity.
Important:
- Inside the container, the plants continue to grow. They will probably need to be placed in larger containers over time;
- And create a new composition;
- There are certain difficulties in planting and caring for plants with narrow bottle necks.
But you will have to approach the selection of orchid species quite carefully:
- First of all, because of their size and content characteristics. Their compactness makes it possible to have a solid collection;
- For large and vigorous specimens it will be difficult to find appropriate containers;
- Maintaining temperature and humidity is of particular importance. Installing thermometers and hygrometers allows you to monitor the condition inside the container.
By the way! This is not an obstacle for keen gardeners. Especially orchid lovers.