Every description of indoor flowers from books on floriculture mentions a word such as drainage. Beginning plant growers often neglect it. After all, there is no point in paying attention to a small, incomprehensible word: the flower will be fine anyway, no matter what this drainage is. As a result, if you deviate just a little from the rules of maintenance and care, the plant dies. Let's find out what a drainage system is, why it is so important, and how to make it yourself.
What is drainage and why is it needed?
For healthy growth of indoor plants, you need to ensure the following:
- soil suitable for a specific flower,
- optimal watering mode,
- sunlight,
- air.
It seems that if you took care of the soil, watering and lighting, then there are no more problems. After all, air is everywhere, and the plant has access to it. But not only leaves, but also roots need oxygen.
However, the pot is already occupied by soil, so air can only penetrate into it through small cracks between the lumps of soil. But over time, it becomes denser, and then the root system stops breathing, and the water stops being evenly distributed throughout the entire volume and evaporates. Favorable conditions are created for the proliferation of pathogenic microorganisms, which leads to rotting of the roots and the subsequent death of the above-ground part of the plant.
Drainage, or drainage system, is a layer at the bottom of a flower pot made of rocky or other material that improves the outflow of excess liquid and facilitates the penetration of oxygen to the roots of the plant. A fairly large space is maintained between the stones, allowing water to flow down and air to accumulate there.
Substrate.
Unfortunately, among gardeners there is a firmly established myth that indoor plants need endless moisture everywhere, both in the soil and in the air. Therefore, flowers are often sprayed, and they also try to plant them in the most moisture-intensive substrate. Pots that are larger than what is actually needed are often used. As a result, there is a possibility of an imbalance in the water balance due to the fact that the soil cannot dry out and be saturated with air in time. Plants grow slowly or stop growing altogether, and black spots appear on the leaves. The foliage may dry out and turn yellow, seemingly “for no reason.”
Proper drainage for houseplants must start with the soil. It is best to make your own substrate mixtures from natural ingredients. If possible, prepare turf and leaf soil, humus and sand. The vast majority of plants will grow well in this mixture. If you can only use soil from the store, then it is better to additionally mix it with sand before planting. This improves air penetration to the roots for breathing. Excess water evaporates faster. Accordingly, the drainage system copes with its function better.
Why make holes in a pot?
The holes that you can see at the bottom of flower pots are called drainage holes. They received this name because they are also designed to remove excess moisture. If drainage is a place where water accumulates, then holes are where it comes out. One doesn't work without the other.
Here's what you should know about drainage holes in a pot:
- Moisture does not pass through holes that are too small. Therefore, they should be chosen for plants that need a constantly moistened substrate.
- Water flows well through holes that are too large: almost all of it is removed immediately after watering. These are suitable for flowers that are afraid of excess moisture in the soil.
Important! If you use improvised containers as a pot, take care of the drainage holes yourself. They can be made at home using a sharp metal object (screwdriver, nail, tip of a knife). It needs to be heated over a fire and several holes must be made at the bottom of the pot.
Other elements of the drainage system
In addition to the layer of bulk materials, the drainage system should also include:
- drainage holes of the container itself;
- loosening additives to the substrate, which give it a light, loose texture, prevent the soil from becoming excessively compacted.
They function in the same system and are equally important to ensure optimal conditions. When growing hydroponically, drainage completely replaces the growing substrate; in fact, the entire technology is drainage.
But even in hydroponics, the drainage holes of the container do not lose their importance, because even with an ideal drainage layer, insufficient outflow of water from the container itself will negate all efforts.
Pots and various flowerpots, no matter how attractive and stylish they are, must have at least one drainage hole. But usually the optimal size and number of holes are selected for each plant and each container individually
In plastic or polymer pots it is easy to make holes yourself, but when purchasing ceramic and terracotta pots you need to evaluate the drainage capabilities of the pots more carefully. Any container for indoor plants requires drainage holes that will allow water to drain freely, will not become clogged with soil and roots, but will also prevent the substrate and drainage fragments from falling out of the pot.
The minimum dimensions for holes for water drainage are from 0.5 cm. Holes larger than 1 cm must be covered with a mesh. But choosing the quantity is more difficult: for tall containers you need 5 evenly distributed holes, which will allow the soil to dry out evenly in the lower part, and for wide and low pots one large hole is enough. For orchids and other epiphytes, “leaky” pots are chosen, with numerous holes in the bottom and walls.
Make holes in the bottom of the pot to allow water to drain. © purple sprout Lay out the required drainage layer. © purple sprout Fill the remaining volume of the pot with soil. © purple sprout
What kind of drainage is there for indoor plants?
As drainage you can use:
- Natural and semi-natural stone materials (pieces of ceramics, fine crushed stone, crushed brick, gravel and pebbles). They can be found everywhere.
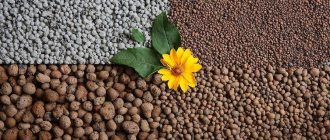
- Artificial stone materials created specifically for the construction of a drainage system (expanded clay, perlite and vermiculite). They are sold in stores specializing in the sale of goods for the home, garden and vegetable garden.
- Porous materials of various origins (cork, coal, foam, moss).
It doesn’t matter what you make the drainage from, the main thing is that it meets certain requirements. So, it should not enter into chemical reactions, rot, collapse or become compacted. It should allow water and air to pass through well. It is acceptable for the material to absorb moisture. It will be transmitted to the roots of the plant if you forget to water the flower on time.
Errors in the manufacture of drainage
Florists often make mistakes when creating a drainage layer:
- Do not use fine sand, which will clog the drainage holes over time.
- Do not use large fractions, which do not retain moisture at all and immediately flow into the tray.
- Do not use natural materials that are prone to rotting, such as sawdust or tree bark. The rotting process often causes plant diseases.
- Marble chips should not be used. This material reacts with water and changes the acidity of the soil.
- Do not use materials with sharp edges: they may damage plant roots.
What can it be made from?
Let's list a list of materials suitable for creating a drainage system and find out which one is better and how to prepare them correctly. Florists usually use the following as drainage materials:
- Ceramics . Old ceramic pots can be used to build drainage. It is enough to split them into small shards and disinfect them. The fragments are placed at the bottom of the pot with the convex part up. They shouldn't be too large. The downside is the presence of sharp edges.
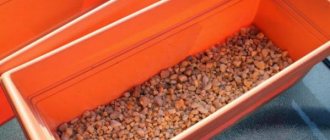
- Expanded clay . This is one of the best and inexpensive drainage materials. It easily removes moisture and also absorbs it, giving it to the plant as needed. Expanded clay drainage does not have sharp corners, and therefore it is safe for the root system. However, it needs to be disinfected before use. No cons noted.
- Moss . Sphagnum moss can be collected from a swamp or bought at a flower shop. This is not only a drainage material, but also a good disinfectant and moisture-retaining agent. Before laying on the bottom, it must be soaked for 30 minutes in warm water. The downside is the fragility. But given that plants require frequent replanting, this is not a problem. Another drawback is that the roots grow through the moss. Therefore, it will be almost impossible to separate them from each other in the future.
- Charcoal . This is not only drainage, but also fertilizing, as well as a moisture-retaining agent and material that absorbs salts and disinfects the soil. Coal is placed on the bottom of the pot in large pieces. There are no cons. But there is a nuance - it alkalizes the soil. And this is harmful if the plant prefers a slightly acidic or acidic soil reaction.
- Vermiculite . It absorbs water along with nutrients. Therefore, the plant will be fed every time the material begins to release moisture. There are no cons.
- Perlite . This is another one of the best materials for creating drainage. But it's expensive. Perhaps this is its only drawback.
Important! The drainage system includes two layers. The first is directly drainage material, and the second is a layer of sand. If it gets into the space between the stones, it’s not a big deal. After all, sand is permeable. If it were soil, then after compaction the outflow of water would be disrupted.
How to replace drainage for flowers
Special drainage for home flowers can be replaced with something that has similar properties. In this case, you don’t need to buy it, just go out into the yard or rummage through the pantry. Examples of a drainage system made from scrap materials:
- Brick . Before use, it is split into small pieces and calcined in a frying pan or in the oven. Sand-lime brick is more suitable for drainage construction, as it is able to absorb water, which it subsequently releases to the plant when the soil dries. The downside is the presence of sharp edges that can harm the roots.
- Gravel and crushed stone . Due to their large size, the use of these materials is advisable for creating a drainage layer in the garden. Only fine stones are suitable for indoor flowers. Before placing them in a pot, they are also calcined to destroy harmful microorganisms. The downside is that the stones are very massive, so they significantly weigh down the flower pot.
- Styrofoam . This is a cheap, porous material that can be used instead of moss. Before use, it must be torn into small pieces and disinfected with a dark solution of potassium permanganate. It doesn't have any special advantages. The downside is that roots grow through the foam.
- Cork . If you didn't throw away wine corks, you can cut them into bars and use them as drainage. Their properties resemble polystyrene foam, but it is more difficult for roots to break through the cork.
The available substitutes for drainage materials do a good job of their functions. Although they have more negative sides than special ones. But this does not prevent flower growers from using them for various plants.
Is it possible to do without a drainage layer?
There are situations when you can do without a drainage layer. But it should be borne in mind that the plant still needs to provide the required level of aeration and moisture removal. For these purposes you can use:
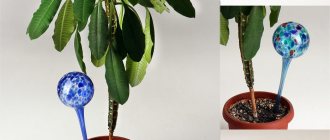
- A pot with automatic watering, where the irrigation process will be carried out automatically , and the drainage system has already been thought out.
- You can also use a pot with a drainage system.
Additional tips, recommendations
House flowers, like the gardener himself, do not always care what kind of drainage you use. Therefore, when choosing it, you need to be guided by both your preferences and the needs of the plants. In this regard, you should heed the following recommendations:
- If accessibility is the main thing for you, then give preference to foam, cork, ceramic shards or brick (whatever comes to hand). You can even use old aquarium rocks or walnut shells.
- If drainage qualities, safety and accessibility are equally important, then it is better to choose expanded clay, crushed stone or gravel.
- If the flower is prone to root rot (or you often overwater the soil), then choose charcoal or sphagnum.
- If you don’t like unnecessary steps (crushing material, disinfecting), buy perlite or vermiculite.
- If the above-ground part of the plant is very massive and the root system is shallow, then heavy drainage will help give stability to the pot. In this case, crushed stone or gravel will do.
Whatever material you choose to construct the drainage layer, it should be quite large. The diameter of individual pebbles should be about 2 cm. Larger sizes are acceptable if for some reason you planted the flower in a pot without drainage holes. In any case, you must make sure that all stones are free of sharp corners and edges. Otherwise, they need to be sharpened to prevent damage to the roots.
Some tips for using drainage materials
The drainage layer must be changed every time the plant is planted and replanted.
- Will winter shelter save plants and do all plants need to be covered?
If you want to use used material for drainage, wash it, sterilize and dry it, but remember that the service life of any material is from 4 to 6 years. The height of the drainage layer depends on the plant you plant in the pot. Usually a layer of 1 to 3 cm thick is sufficient, although some crops require a thicker layer of 4-5 cm.
Each time you replant, change the type of drainage material, and during its service life, do not forget to regularly clean the drainage holes of the pot.
If there is only one drain hole in the pot, then the drainage layer should be at least 3 cm, and if there are many holes in the bottom, then a lower layer can be laid. If there are many large holes, a drainage layer 1 cm high is sufficient. You can buy a flowerpot without drainage holes and make them yourself, based on the requirements of the crop being planted:
Place drainage in the pot immediately upon replanting: pour dry material into the pot, shaking the container, and place a layer of soil on top so that the plant roots do not come into contact with the drainage particles.