Plants play an important role in human life. We get many benefits from living next to plants - fresh air, a pleasant atmosphere and, of course, healthy nutrition.
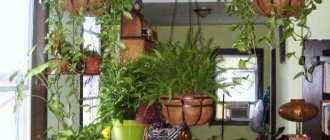
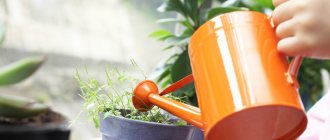
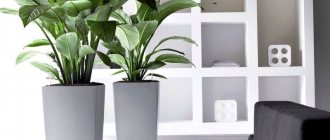
Many people try to surround themselves with plants both in their apartments and on their plots. And it doesn’t matter whether they are indoor plants or plantings in a summer cottage, plants require attention and care. Yet sometimes, due to our busy lifestyle, we simply forget to water them on time. This negatively affects the condition of the plants. To get rid of this problem, automatic watering systems were invented.
Many of the ready-made systems do not suit us in design or price. And many radio amateurs are more interested in assembling their own device than buying a ready-made one.
This article describes in detail how to make automatic watering for indoor and outdoor plants using Arduino with your own hands.
Our automatic watering system on Arduino waters the plant only during the day, when the soil dries out. The system uses a soil moisture sensor and a photoresistor.
The main purpose of this system is to track time of day and humidity. If the ground dries out during the day, the microcontroller turns on the water pump. When the ground is sufficiently moistened, the pump turns off.
Design and principle of operation of the system
There are many types of automatic watering. Systems can be simple or complex: with electronic control, timer and pumping station.
Such a system consists of the following elements:
Main block . It consists of electronic filling and a timer. Due to the preliminary settings, the controller automatically opens the shut-off valve and shuts off the water supply.- Water container . Contains the necessary supply of water for long-term use.
- A system of droppers or tubes . Through them, water flows from the main unit to the pots with plants.
- Pump . The system does not have to be equipped with a pump. But if it exists, then its task is to pump water into the pipeline or dropper system.
- Emitter-regulators . They help regulate water flow.
Automatic watering works as follows:
- The owner pours water into the container and sets the settings for the start and end of water supply. Its temperature is also set.
- The controller opens the shut-off valve at a predetermined time and begins watering the plants. Depending on the model, the system can turn on the pump and supply a large volume of water (relevant for a large number of pots).
- After a specified period of time, the controller shuts off the water supply.
- At a time specified by the user, the process is repeated until the container is completely drained.
The owner of the system just needs to set the irrigation time and water temperature to implement it. It is also necessary to monitor the quality and quantity of water.
This video will tell you about watering systems for indoor plants during vacation:
How drip irrigation works for indoor flowers in pots
Automatic watering for indoor plants - do it yourself
Drip irrigation for indoor plants is used when it is not possible to water the plants daily.
Previously, it was used as an additional type of hydration. For best results, the system should be checked over a long period of time. Only then use this type of watering as the main one.
Automatic drip irrigation is the soaking of the soil in small portions (drops). The idea is to draw out the liquid with the roots. The root system consumes as much liquid as it needs.
People call this system an automatic potty. It has 2 vessels that are separated from each other by a barrier. One contains water, the other contains plant. The liquid, as necessary, seeps into the soil and is evenly distributed in it. Flowers in such pots are not subject to drying out.
Several types of soil moisture are known:
- Overhead is the standard type of top-down irrigation.
- Intrasoil - using droppers, flasks, funnels, etc.
- Root—fluid flow occurs from bottom to top.
Do-it-yourself auto watering system from scrap materials
Pros and cons of this installation
Advantages of automatic watering:
- correctly adjusted water supply of the required volume;
- reduction of labor intensity;
- reduction in consumption - the system supplies a given amount of water, maintaining an optimal balance of soil moisture;
- the ability to carry out irrigation in the long-term absence of the owner.
Flaws:
- purchased systems with software are more expensive;
- the electronic system depends on the household electrical network;
- cheap analogues are not durable.
The most important advantage of simple automatic irrigation is the ability to create such irrigation with your own hands, without the use of complex electronics.
The need to use a watering system for indoor plants
Watering is the most important procedure for the nutrition and growth of all plants on earth. Water carries all the substances and minerals necessary for life. Photosynthesis and metabolism directly depend on it.
DIY drainage for indoor plants
Excessive amounts of moisture in the soil can lead to rotting of the root system, disease and death. All plants have different needs. It depends on the climatic conditions and the homeland of green pets. Using an automatic watering system for indoor plants, you don’t have to worry about the wrong dosage. The plant itself will tell you how much liquid it needs.
Minerals and fertilizers can be poured into the root zone along with water. They are carefully dissolved so as not to cause clogging of the irrigation system. Fertilizers are introduced according to instructions for the required number of days.
Attention! The most common fertilizers when using automatic watering systems are urea and potassium. Phosphorus can be used only under conditions of maximum dissolution.
Houseplants require constant care. Timely watering comes first in importance.
What ready-made options are there on the market?
Gardening stores have a wide range of systems for automatically watering indoor plants. The following is a description of the most popular devices.
GARDENA 1265/1266
Fully automated system from German manufacturers. Equipped with a timer, pump, filter and hose system with a total length of 30 meters. Allows an even supply of water to up to 36 individual pots.
Characteristics:
- Capacity with a capacity of 9 liters.
- 12 outputs from 3 distributors.
- Pegs with water supply regulator.
- Supply hose length 9 m.
- The length of distribution lines is 30 m.
- Minimum irrigation time 1 min.
- Flow from 15 to 60 l/min.
- Possibility of regulating flow for each type of plant.
The system is suitable for owners of a large number of plants. The approximate cost of the model starts from 3,400 rubles. Read about Garden drip irrigation in this article.
DEWDROP
Model from Russian manufacturers . It does not have an electronic component, therefore it is completely independent of the electrical voltage in the network. Consists of main lines and emitters with a water supply regulator.
The system can be connected to a water line or tank. One set is suitable for irrigating a greenhouse or indoor plants in quantities of up to 50 pcs. The cost of the set is from 350 to 500 rubles. Read more about drip irrigation Rosinka here.
Characteristics:
- hose length 20 m;
- number of droppers 50 pcs.;
- water consumption up to 2 l/h;
- working pressure up to 1 bar.
“Rosinka” is completely independent of the container when operating. The main thing is to regulate the water flow and monitor its volume.
Argus
This model is a ceramic cone. Irrigation is carried out through the controlled flow of water from a container (plastic bottle) or using a hose from a container located at a distance.
Characteristics:
- Number of cones 2 pcs.
- Hose length 1 m.
- Water consumption up to 0.5 l/h.
- The ability to connect the cone to the neck of a plastic bottle with a standard diameter.
Ceramic cones are great for irrigation throughout the day. The approximate cost of the model starts from 350 rubles.
Automatic drip watering for indoor plants
This system greatly simplifies the care and cultivation of house plants. By adjusting the drip water supply, you can water more than 15 flowers at the same time. All nutrients penetrate the soil in the required proportions.
Automatic drip irrigation process
Pros:
- simultaneous irrigation of several plants;
- no need to connect to water supply;
- regulation of the amount of liquid to each plant;
- economic water consumption;
- targeted irrigation of specific areas and pots;
- autonomous watering according to schedule;
- Only the roots are moistened (not the leaves).
Before installation, you need to prepare the plant:
- stop feeding with fertilizers in 3 weeks;
- clear the trunk of buds and flowers;
- reduce exposure to direct sunlight.
Attention! You can use the automatic watering system not only for the period of departure. Nobody bothers you to organize such watering on an ongoing basis - the advantages of this approach are obvious to many flower lovers.
How to organize it yourself?
Let's look at several options for making a homemade system.
Drip
Drip irrigation at home can be organized using medical droppers . It is enough to fill the dropper with water, place the hose in the pot with the plant and adjust the water flow.
Instead of a dropper container, you can use a plastic bottle suspended above the flower. This design will allow you to irrigate several pots at once. Read about drip watering of indoor flowers in this article.
Hydrogel
A completely new and efficient automatic watering system. They are helium balls that first absorb and then release moisture into the soil. 2 g of such gel can absorb up to 0.5 liters of water.
Before use, you need to know what root system each house plant has. If it is superficial, then the balls should be placed directly on the surface of the soil and watered abundantly. If the system is deeply buried, helium balls need to be buried to a depth of 3-4 cm.
Before use and the owner's absence for a long time, the balls must be soaked in water for 5-7 hours, and only then placed in pots.
Using a wick
The automatic watering system using a wick is quite simple. It will require:
- water container - it is selected taking into account the number of pots;
- a narrow piece of fabric or fabric cord - it is better to take a synthetic one, as it does not rot.
Next you need:
- Fill the container with water and place the wick.
- Place the container on a slight elevation. Pre-moisten the prepared wick.
- Place one end of the wick in a vessel with water, and the other in a pot with a plant.
For better moisture, it is better to twist the end of the wick around the trunk of the plant.
Using flasks
The flask for automatic watering is a hollow glass ball with a long tip for fixation in the soil . To water one plant during the day, you will need 1 flask with a capacity of 200 ml.
The flask must be filled with water and inserted with the neck into the soil. Irrigation occurs due to drying of the soil. As soon as the soil dries out, water from the flask moistens it again.
Instead of flasks, you can use a regular plastic bottle with a dispenser peg. The system requires:
- plastic bottle with a capacity of up to 1.5 l;
- plastic dispenser peg.
Next you need:
- Fill the bottle with water.
- Screw the peg onto the neck of the bottle.
- Insert the dispenser peg into the ground.
The bottle will moisten the soil in the same way as a factory flask. The dispenser can be adjusted to the desired flow rate.
Capillary mats
Capillary mats are a piece of felt placed in a tray with sides and covered with plastic film with holes. The mat is filled with water, and after impregnation, a pot with a plant is placed on it. You can make such a mat yourself.
For this you will need:
- pallet - you can use a deep bowl for one pot, a construction pallet for paint, a wooden box;
- thick terry towel;
- plastic film or dark colored bag.
Next you need:
- Place a towel on the bottom of the tray. If a wooden box is used, its bottom must be lined with plastic film.
- Punch many small holes in a dark plastic bag. You can roll the film several times and make a hole with an awl.
- Fill the tray with water until the towel is completely saturated.
- Cover the towel with film with holes.
- Place pots of plants on top of the mat.
This system will allow you to moisten the soil as it dries out. The main thing is to periodically remove the towel, rinse it and put it back. If you do not monitor the condition of the system, the towel may become moldy.
The video will tell you about capillary mats for watering indoor flowers:
Self-irrigating pots
A self-irrigating pot consists of 2 containers inserted into each other. A plant grows in one pot, and the outer one is filled with water. To make it yourself you will need: a container with a diameter 1-2 cm larger than the diameter of the planting pot.
Next you need:
- make several holes in the pot with soil, the holes are made near the bottom or on it;
- Pour water into the external tank; it is enough to fill it 3-5 cm;
- cover the bottom of the pot with felt fabric - the fabric is placed on the bottom with a margin of 3-5 cm on the walls of the vessel;
- insert the pot with soil into a container of water.
Irrigation is carried out due to uniform drying of the soil. Water consumption depends on the size of the holes in the container with soil and the speed of its drying. To ensure temperature balance, the water tank must be wrapped in a towel or cloth.
Ceramic cones
This product is a cone with a container for water. The container is filled with water, and the sharp part of the cone itself is inserted into the ground. To ensure an uninterrupted supply of water, the cone is equipped with a hose that draws water from an additional source at an elevation.
To make such a system yourself, you will need an empty tube of construction silicone:
- Remove the cap from the tube.
- Clean and rinse the tube to remove remaining silicone.
- Insert the sharp part into the ground.
- Pour water into the tube.
To ensure that the system is always filled with water, you need to connect the hose from the dropper to the tube. One end of the hose is lowered into the tube, and the other end into an additional water container. For example, a plastic bottle suspended over a pot.
From plastic bottles
This type of watering involves supplying water from a bottle inserted directly into the pot. The system will require:
- plastic bottle;
- dispenser tip.
Next you need:
- Fill the bottle with water.
- Screw the dispenser onto the neck.
- Insert the dispenser with the narrow end into the ground.
- Make a small hole in the bottom of the bottle.
A similar system can be assembled without a dispenser. You just need to make holes in the bottle cap and bury the bottle neck down. Watering will be carried out as the soil dries.
The video will show you how to make a drip watering system for indoor flowers from a plastic bottle:
With microcontroller
This system is more complex and will require knowledge in the field of radio engineering. To create automatic watering you will need:
- Microcontroller "Attiny13A". Can be purchased at a radio equipment store. Approximate cost 150 rubles.
- Soil moisture sensor. Cost 350 rubles.
- Bread board. Cost from 100 rubles.
- Relay. A relay is needed for the pump.
- Copper wires, cross section 1.5-2.5 mm.
- Pump.
- 12 volt power supply.
- Irrigation hoses.
- Several adapters for connecting hoses.
- Water container.
power unit
Connects as follows:
- power supply from a 220 volt household network is connected through the “L” and “N” terminals;
- 12 volt output via terminals “V+” and “CON”.
It is necessary to mark the + wire or use a red wire. Connect the wires from the power supply outputs to the mounting terminal block and output 2 from each terminal.
Controller
Connection process:
On the controller connector, connect the red wire to the “5 Volt” terminal.- Gray wire with terminal “A1”.
- Connect the + blue wire from the power supply to the “GND” connector on the controller.
- Connect another + wire from the power supply to the “VIN” connector
- Connect the red wire of the controller to the “5V” terminal on the board itself.
Humidity sensor module
Connection is carried out in the following order:
- connect the red wire from terminal + on the controller to one output of the humidity sensor module;
- connect the second contact of the sensor module to the “GND” terminal on the controller;
- connect the sensor to the module using the terminal block.
Relay
Connects as follows:
- + from the power supply connect to the “NC” contact.
- A negative wire from the power supply with a “no” contact.
- Connect the relay contacts to the controller through its own connector: “VCC” with the red wire, “GND” with the yellow wire, “INN” with the brown wire.
The entire circuit must be assembled on a printed circuit board without using a soldering iron. Next you need to connect the pump.
This is done as follows:
- the brown wire from the relay connects to any contact on the pump;
- Connect the negative wire from the power supply to the second wire of the pump.
Next, you need to connect the water constipation and water supply tubes to the pump.
The system works as follows:
- The inlet from the pump is placed in a container of water.
- The system is connected to a 220 Volt household network.
- The moisture sensor is inserted into the soil.
- The outlet tube from the pump is placed in the plant pot.
- When the humidity level reaches less than 70%, the relay will turn on the controller, which in turn will turn on the pump.
- Watering will take place.
The duration of watering is set by the controller settings. They are set only through the programmer. You can order the controller firmware immediately upon purchase.
Program code
#define WATERPUMP 13 // the pump is connected to pin 13 #define SENSOR 8 // the digital contact of the humidity sensor is connected to pin 8 #define LDR A0 // the photoresistor is connected to A0 #define PORTNUMBER 9600 // open the serial port, set the baud rate to 9600 bit void setup() { Serial.begin(PORTNUMBER); pinMode(WATERPUMP,OUTPUT); // Define pin 13 as pinMode(SENSOR,INPUT); // Define pin 8 as input to receive data from the soil moisture sensor. pinMode(LDR,INPUT); // Define A0 as input digitalWrite(WATERPUMP,LOW); // Pump is turned off } void loop() { int val = digitalRead(SENSOR); // stores the value received from the soil moisture sensor in the variable val int LDRValue=analogRead(LDR); // stores the value received from the photoresistor in the variable LDRValue if(LDRValue<= 400) // Compare the photoresistor data with the threshold value { // if the inequality is true, then it is night, watering is turned off Serial.print("Night, no watering required"); Serial.println(LDRValue);//Output the value of the photoresistor digitalWrite(WATERPUMP, LOW);//The pump is turned off return;// Return to the beginning of the code } //If the inequality does not hold, then it is day, you need to check the humidity if( val == HIGH) // If the humidity is low { Serial.print("Day, humidity is low, watering is necessary"); Serial.println(LDRValue);// Output the value of the photoresistor Serial.println(val);// Output the humidity value digitalWrite(WATERPUMP,LOW); //Pump is on } else { Serial.print("Day, high humidity, no watering required"); Serial.println(LDRValue);//Output the value of the photoresistor digitalWrite(WATERPUMP,HIGH);//The pump is turned off } delay(400); }
What to do if the system is clogged?
Any water, especially running water, contains a variety of minerals. Over time, minerals begin to settle on all components of automatic watering systems. This leads to clogging of these very systems and their non-viability.
Another cause of blockages is microalgae. They love warm water and reproduce especially actively in it. In order to clean the cone, it is recommended to soak it in a solution of acetic acid. After this, deposits of minerals or small algae can be removed mechanically.
An effective prevention of blockages is the use of a 3% peroxide solution. The solution is not dangerous to plants, but it does help deal with minerals. For 10 liters of water, 40 ml of peroxide is used.
Healthy! The most effective method of combating algae growth is to use filtered water.
The best watering cans with unusual designs
Eschert design
A brand from Holland produces and sells exclusive items, including for flower growers. The company's products reflect fine lines and unusual combinations, which makes them the best gift option for passionate amateur flower growers. The company offers systems made of different materials, but cast metal products are in greatest demand. Their latest creation is a sleek watering can with a thin spout, TG44 from the Waterinthe Garden range. This design stands out for its elegance and carefully designed handle, which guarantees maximum comfort for use.
Eschert design TG44 watering can
Advantages:
- Multifunctional;
- suitable for spot watering and fertilizing;
- allows water to be easily delivered as close to the stem as possible without touching the leaves;
- pleasant shiny surface;
- compact;
- light;
- comfortable handle.
Flaws:
- Easy to damage during transportation.
| type | indoor |
| shade | silver or platinum |
| capacity | liter |
| base for manufacturing | metal |
| weight | 0.35 kg |
| Common parameters | 36 x 13 x 18 cm |
| what is the price | 2000 ₽ |
SBOX
A fashionable and practical offer from a popular manufacturer of plastic systems. The main feature of this product is its unobtrusive texture, which creates a visual effect of weightlessness. In addition, there is unhindered control over the liquid level, which makes caring for the plant more thorough.
SBOX watering can
Advantages:
- Spacious;
- can be used both for watering indoor flowers and for a small greenhouse on the balcony;
- comfortable spout;
- ergonomic shape;
- stylish design;
- Beautiful;
- nice to hold in your hand.
Flaws:
- No.
| type | for home |
| shade | blue, gray, green |
| capacity | 1.5 liters |
| base for manufacturing | polystyrene |
| weight | 0.32 |
| Common parameters | 315 x 115 x 183 mm |
| what is the price | 399 ₽ |
Eva Solo
The Globe model was created specifically for the convenience of indoor flowers and mini-trees. The design from a well-known brand stands out for its original style and noble white shade. This allows it to be a relevant element of the decor of any city apartment or country house. The convenient location of the inlet on one side of the handle makes it possible to quickly fill the vessel even under the tap. And the slightly sharp tip of the spout ensures that the water flows at an even speed and does not splash out chaotically.
Eva Solo Globe watering can
Advantages:
- Stylish;
- beautiful;
- nice shade;
- very comfortable shape;
- light;
- does not require special care, just wipe with a damp cloth.
Flaws:
- Not found.
| type | universal |
| shade | White gray |
| capacity | 2.5 liters |
| base for manufacturing | plastic |
| weight | 180 g |
| Common parameters | 34 x 24.5 x 17.7 cm |
| what is the price | 3850 ₽ |
AquaStar
The new product from the famous brand Eva Solo has a non-standard appearance, with an elegant conical spout, which allows you to accurately dose watering without interrupting the flow of water. The unusual shape of the vessel makes it not only a useful gadget, but also an original interior detail that can fit into any design.
AquaStar watering can
Advantages:
- Stylish;
- light;
- quality of material;
- ease of operation;
- saturated color;
- unusual shape.
Flaws:
- To fill, you need to remove the spout each time;
- limited palette;
- The seams stand out a little.
| type | cone-shaped |
| shade | gray - white |
| capacity | 2 liters |
| base for manufacturing | plastic |
| weight | 0.32 |
| Common parameters | 17.1x17.1x41.5 cm |
| what is the price | 3850 ₽ |
InGreen 747647
A popular brand in the domestic market, it has been actively working with plastic equipment for a long time. Their latest idea is a beautiful and elegant tool for caring for indoor plants. The design of the watering can guarantees uniform distribution of moisture along the very base of the flower, preventing the liquid from splashing and getting on the foliage. The vessel is equipped with a comfortable handle, which makes holding it much more convenient.
InGreen 747647
Advantages:
- High quality;
- diverse palette;
- rich shades;
- original performance;
- comfortable hand position;
- quite large volume;
- light.
Flaws:
- Not found.
| type | without attachments |
| shade | green/pink |
| capacity | 170 ml |
| base for manufacturing | plastic |
| weight | 0.165 kg |
| Common parameters | 320x135x260 mm |
| what is the price | 400 ₽ |
We make automatic watering from an ordinary dripper
An ordinary dripper will allow you to do automatic watering yourself. You will need a regulator and a hose from the device, as well as any convenient container. To ensure that the liquid supply does not stop, we observe the following conditions:
- The tube should be straight, without bends.
- The tube should enter the ground at an angle; the excess length should be cut off.
- The container in which the settled water will be located must be secured above the plant.
To prevent the tube from moving, it must be tied lightly to a peg.
Lechuza Pots
Many people do not want to spend time creating automatic watering and buy a ready-made device for irrigating plants. The most common of the devices is the Lechuza smart pot. It has a built-in liquid level indicator and a shaft for pumping water, thanks to which the soil is moistened as naturally as possible. The shapes and sizes of pots are different, for every taste and color.
Lechuza-Pon substrate is offered as a gift for the device. Fans of indoor plants can use it to create excellent drainage.
Capillary irrigation on fabric
This method is simple and straightforward.
You will need to place a thick soft towel or a specialized capillary mat at the bottom of the tray. Subsequently, flower pots will be installed on top. We replace the bottle with a glass jar. You will also need a nylon cover. A small hole is made in it using a nail. The settled water is poured into the jar. After this, the jar needs to be turned upside down and placed on top of a towel.
When the fabric has absorbed a sufficiently large amount of moisture, water will stop flowing out of the jar. Well, if the towel begins to dry out, moisture from the jar will begin to flow onto it again.
Before leaving, capillary irrigation needs to be tested. You will need to complete several steps:
- Place the jar and flower pots on the pallet.
- Wait until the water from the jar thoroughly wets the towel bed.
- Take out a towel and wring it out.
- Re-lay the litter and install the jar. See if it gets wet again.
Important! In the case when you are not using a towel, but a capillary type of mat, then you must lay a layer of perforated film on top. This will prevent moisture from evaporating too quickly.
Automatic watering with rope
For the automatic design you will need rope, twine or knitting threads. If you don’t have anything on hand, you can cut thin strips from an old T-shirt. The main thing is that the rope or fabric is well saturated with water. It is believed that synthetic fabrics are more durable than natural fibers. In only 14 days, natural threads will not have time to rot.
Operating principle:
- One side of the twine is lowered into a container with liquid, and the other is placed in a flower pot.
- The twine or fabric rope is placed in different ways: on top - and the free part lies on the soil. Or from below, when we insert it into the hole for drainage of liquid. When the rope is at the bottom, more moisture will be retained in the soil, because the liquid will evaporate less. There is a minus: the twine or harness will be pinched by the pan, and water will not flow.
When the container is wide (for example, a saucepan or basin), the water will evaporate more actively and thereby maintain the necessary humidity in the room. And the plants will feel much more comfortable.
From a wide container, strings are brought to different flower pots. Or, when a plant needs a lot of water, they put two or three water sources with ropes on different sides. To prevent the twine or tourniquet from slipping, they are fixed.
Use at least one of the automatic watering options for your indoor plants and you can safely go on vacation. Dear readers, what method do you use to water flowers when you are away from home for a long time?
We recommend studying: morning glory varieties with photos and descriptions - choose the best!