Every spring, the main word for all gardeners is “seedlings.” And with the same regularity, questions related to it arise again and again - where to buy seedlings, what soil to plant in, what to feed, how to water, how much to add light, when and how to plant...
In this material we tried to collect answers to basic questions about seedlings, so to speak, general points and rules for growing high-quality and healthy seedlings at home.
So, a reminder for growing seedlings at home.
Rule 1
Buy seeds only from a trusted manufacturer, official specialty stores or garden centers. If you do not follow this rule and purchase seed material from a Chinese online store (at a kiosk among Snickers, from a random grandmother from a stall on the street, etc.), at best you will get non-germinating seeds or a grown plant of the wrong variety (species). , color, size). At worst, you risk re-infecting all neighboring seedlings, because it is not clear where the purchased seeds came from, how they were processed and how they were stored before getting to you.
- How sellers deceive us, or Plants that do not exist in nature
Rainbow rose, blue strawberry and lily tree - still dreaming of buying? Then our information is for you!
At a minimum, for preventive purposes, soak the suspicious seed in a strong solution of potassium permanganate, and then rinse with running water.
Seed selection
The seed must be of high quality, from a trusted manufacturer . Purchased seeds of a dubious brand may not sprout at all, or the seedlings will grow stunted and weak, so the desire to save money may negate all the work.
You should not buy seeds by weight, which can often be seen in markets. This material is inexpensive, but lack of proper packaging can cause serious damage. Seeds absorb moisture and harmful substances from the air well, so it is better to give preference to labeled products packaged in bags.
Good seeds are not cheap, but this is a guarantee of a good harvest
Rule 2
Most diseases of vegetable and flower crops are transmitted with planting material. Therefore, even reliably high-quality seeds, do not be too lazy to sort, pickle, soak and/or harden before planting in order to get rid of possible pathogens, enrich the seeds with microelements, improve their germination, and ensure smooth germination. The method and duration of treatment depend on the crop and age of the seeds.
Only pelleted and encrusted seed does not need processing.
- Preparing seeds for sowing: what do you need to remember?
Prepare seeds for sowing correctly!
Rule 3
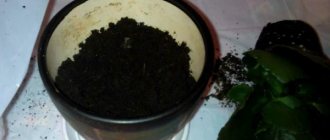
Take care in advance to properly prepare nutrient soil for sowing seeds. No, ordinary soil from a garden bed or soil mixture left over from replanting flowers will not work. Not only do seedlings require a completely different soil composition than an adult plant, but each crop also has its own preferences that will have to be taken into account.
Soil for seedlings can be purchased at the store if you trust the manufacturer (see rule 1), or you can prepare it yourself at home, it’s not difficult.
- Soil for seedlings - how to prepare the right mixture for young plants
Seedlings of tomatoes, peppers, eggplants, cucumbers and cabbage will be strong and healthy if grown in the correct substrate.
In any case, the prepared soil will have to be sifted and then disinfected thermally or chemically before sowing the seeds - you need healthy plants!
We plant seedlings in open ground
Young seedlings are vulnerable to the scorching sun, suffer from gusty winds and can “lie down” on the ground in heavy rain. Therefore, at first it is recommended to protect the plantings with covering material from the vagaries of nature. The cover can be removed only after the plants have completely rooted.
To get healthy seedlings and then a rich harvest, you should follow simple growing rules. After all, young plants are like little children. They also need an “eye and an eye.” Therefore, constant observation and care will help to obtain good seedlings of vegetable crops.
Rule 4
The rule of absolute cleanliness in growing seedlings applies not only to the soil - if possible, everything should be disinfected.
Namely:
- containers for growing seedlings from any material (pots, boxes, cassettes, cups, etc.);
- tools that are used for loosening, watering, picking and other manipulations with seedlings;
- “place of residence” of seedlings and nearby surfaces (table, window sill, wall, window).
The last point is especially relevant for premises where houseplants are grown, which can easily become a source of infection of young and immature seedlings.
For disinfection, you can use the simplest means, for example, a weak solution of potassium permanganate.
Rule 5
Follow the timing of planting seeds for seedlings so that the seedlings develop well, do not stretch, do not overgrow, and are in the best shape by the time of planting. This postulate is especially relevant for plants intended for planting in open ground.
It would seem logical - the sooner you sow the seeds, the sooner the long-awaited harvest will ripen. However, do not forget how capricious the weather is in our latitudes - by the time of the planned landing, the ground may simply not warm up enough for the landing to be possible at all (if, in principle, there is no snow). Follow the long-term weather forecast, study the climatic conditions of past years in your region.
When calculating the sowing time, take into account the characteristics of the plant and the specific variety, the characteristics of the garden plot, the conditions for further growing the plants and your capabilities. For example, if the seeds are sown too early, the seedlings will have to be illuminated for the first time - are you technically ready for this?
It is also important not to overcook the seedlings. The older your plants are, the worse they will tolerate transplantation and the longer they will take root in their new location.
- When to sow seeds for seedlings - calculate the optimal timing
The timing of sowing seeds for seedlings - how to determine for different crops? Let's figure it out together.
Rule 6
The health of future seedlings depends not only on a properly selected substrate and well-prepared seeds, but also on a well-chosen container for sowing. Currently, the range of containers is large, you can choose the right one for each crop - pots made of plastic or pressed rice flour, boxes, cups, cassettes, peat tablets and cubes...
Find out in advance whether the crop you are growing needs picking, how the seedlings of a particular plant will tolerate transplantation, what size the seeds are and how the root system of the seedlings will develop in the future.
The type, size and volume of containers you plan to use for future seedlings depend on all of the above factors.
- What to grow seedlings in - choosing the right container
Let’s take all the containers apart “piece by piece” and tell you why plants don’t “like” peat pots and what dangers seedling cassettes pose.
Rule 7
Sowing seeds also needs to be done correctly - keep in mind that seeds of different crops, due to differences in size or developmental characteristics, may require different methods, density and depth of sowing.
Usually, especially small seeds are simply laid out on the surface of the substrate and sprinkled with water from a spray bottle. In addition, for ease of sowing, they are often mixed with fine dry sand. Medium-sized seeds are planted in small grooves, the size of which is determined by this same size (the thickness of the top layer should be no more than twice the size of the seed), and lightly sprinkled with soil. Large seeds can therefore be planted deeper.
It is also important to observe the seed planting density determined by agricultural technology for each specific crop, because in an overly thickened planting, seedlings will interfere with each other and compete for food, moisture and light.
Growing tangerine, orange, lemon at home
As a child, many of us tried to plant orange or tangerine seeds in some pot with a home flower! Few people were waiting for Rostkov. But the idea is wonderful - the citrus tree exudes an incredible aroma and looks delicious!
The most affordable and easiest way is to grow citrus crops from seeds.
Only the largest seeds are used for cultivation.
First, they are cleared of pulp and washed carefully under running water. Then the bones are wrapped in damp cotton cloth for three days.
Before planting seeds in the soil mixture, they are treated with a natural growth stimulator (willow water, aloe juice or honey solution).
Containers for planting citrus seeds should have drainage holes. Tangerines, lemons and oranges grow best in a soil mixture made from two parts forest soil, one part sand and two parts humus. As an option, buy ready-made substrate for citrus fruits in gardening stores.
The seeds are placed in the soil to a depth of 3 cm. The greenhouse effect is important for the germination of citrus fruits. Therefore, the container is covered with plastic film, which is periodically opened to allow oxygen to enter the soil. A month after planting, the first shoots should appear on the soil surface.
The emerging sprouts of any of the citrus trees begin to be fed. For this purpose, solutions specially designed for citrus crops are used. They are applied strictly according to the instructions in the instructions indicated on the packaging.
To protect seedlings from pests - for example, from whiteflies and spider mites - the leaves are washed with Actellik (use the solution according to the instructions).
When the tree begins to bloom, it is important to maintain the temperature regime. Tangerines and oranges require a room temperature of 22-25°C for good flowering. Lemon is not picky about temperature and can bloom profusely even at +16-18°C.
The temperature regime for plants also depends on the season - in the summer months the temperature is increased, and in the winter it is decreased. This increases the chances of getting fruit.
Citrus trees require plenty of watering. In summer, water lemons, oranges, tangerines every day, and with the arrival of winter - twice a week.
It is recommended to replant the plants every 3 years. For replanting, a fresh substrate is prepared, consisting of turf, leaf soil and humus (proportions 2:1:1). The mixture is mixed with one part of river sand.
Rule 8
Do not forget about the temperature regime for growing seedlings, which lays the foundation for the resistance of grown crops to diseases and adverse weather conditions.
Although it is clear that excessively high and excessively low temperatures are equally harmful to seedlings, the same temperature regime is not always suitable for seedlings of different crops for comfortable development.
Some plants (tomatoes, eggplants, peppers) are heat-loving and require a daytime temperature in the range of 22-25°C, and a night temperature of at least 18°C. Others (potatoes, celery, lettuce) are moderately demanding of heat; 14-18°C during the day and 12-14°C at night are enough for them. Still others are generally cold-resistant (all types of cabbage) and tolerate night temperatures even within 6°C, and during the day they need 13-16°C.
- What should be the temperature for growing seedlings?
Why can’t cabbage and peppers be kept in the same room? Find out everything about the temperature for growing seedlings of your favorite plants.
Rule 9
Provide your seedlings with optimal daylight hours (lighting) to bring growth conditions closer to natural. After all, by sowing seeds in February, we, strictly speaking, are trying to circumvent the laws of nature.
If the sowing time is quite late, the seedlings can get by with natural sunlight - you just need to provide them with a place on a bright windowsill. In case of early sowing of seeds, you will have to purchase special phytolamps and add additional illumination to the seedlings. In general, in our not very sunny climate, it is useful to have at least one such lamp “just in case” for every gardener who wants to produce strong seedlings.
Remember that even with the purchase of a phytolamp, you will have to understand the nuances - after all, at different stages of development, seedlings require lighting regimes of different durations and intensity. So study the manufacturers’ instructions and agrotechnical “machinery parts”.
- Lighting for seedlings at home
Do seedlings grown on a windowsill need additional lighting? What are phytolamps, how to choose them and use them correctly?
Growing a coffee tree at home
They also grow coffee trees at home.
But one nuance must be taken into account: those coffee beans that are poured into a coffee machine will not be suitable. And you will have to ask (or buy) a few unripe brown-red coffee fruits from those who already have such a tree growing.
You can get to the unripe grain by peeling the fruit and removing the pulp. Use both halves for planting. The grains are washed with water, then kept in a weak manganese solution for half an hour.
Then the seeds can be planted in a pot with drainage holes, filled with loose substrate to a depth of 1 cm.
Important! The coffee tree is a finicky crop and grows best in acidic soil. Therefore, the following soil mixture is prepared for a coffee tree: acidic peat is mixed in equal proportions with ash, humus and sand. Sphagnum moss is sometimes used to increase humidity and add acidity to the soil. Before adding it to the substrate, it is crushed.
The container with the seeds is placed where there is good sunlight, which will provide future sprouts with a temperature of at least 20°C. When placing pots on a windowsill on the sunny side, they must be covered with a jar on top to create a greenhouse effect. If it gets too hot, move the containers to a cool place. During germination, you need to ventilate the soil by removing the jar for a while.
Important! When growing a coffee tree, take into account that in a small pot the plant will continue to develop, but will not bloom.
The coffee bonsai has a capricious character. It will be necessary to change the soil mixture to a new one every year. But after reaching the age of five, you can replant once every three years.
Before laying the substrate in the pot, add fertilizer to it - 20 grams of horn shavings or bone meal per 1 kg of soil mixture.
Rule 10
Do not overdry or overwater the seedlings; make sure the soil is always slightly moist. In the first stages of growth, excessive watering and stagnation of water are especially harmful to seedlings, and later problems can be caused by insufficient, superficial watering of plants.
Seedlings of any crop are watered when the top layer of soil dries out. Before emergence, the soil is moistened with a spray bottle and covered with glass or film to create a special microclimate. In the first days after the emergence of seedlings, the shelter is removed, and the seedlings are watered by spraying water from a fine spray bottle or using a pipette under the root - so as not to damage the still immature plants. After 2-3 true leaves appear, the seedlings’ need for water increases, so you need to ensure that the liquid reaches the lowest layer of soil. At this stage, you can practice watering from below (into the pan) to stimulate the formation of the root system.
Pay attention to the water you water the seedlings with. It must be settled or filtered and must be warm (about 20°C).
- How to properly water seedlings on a windowsill, in a greenhouse and in the ground
Everything you wanted to know about watering vegetable seedlings.
Vegetable garden on the windowsill
Many vegetables, fruits and berries can be successfully grown indoors in the same way as flower or ornamental crops. They will not only add additional vitamins to your table, but will also decorate your interior. Bright red tomato fruits, multi-colored lettuce leaves, bright green or light leaves of bulbous and spicy-flavoring plants create a unique color in the house. You will enjoy their splendor throughout the year.
You can use more than just windows to grow vegetables in your apartment. Depending on the light requirements, a number of plants can be kept and removed for a certain time in semi-dark rooms, basements, corridors or dark closets. During spring, especially in the second half, and autumn, we recommend using glazed balconies, loggias, verandas to obtain vegetables, as well as using additional film covers and, if necessary, artificial lighting.
It is possible to grow various types of vegetables in the rooms. It is possible to reap a good harvest from the windowsill only if the gardener knows which crops are best grown at home, as well as the requirements of these plants for environmental conditions, the optimal timing of sowing, planting and caring for them, and competently selects and purchases plants.
All indoor plants, including vegetables, should be purchased in early spring or early summer. At this time, healthy, well-rooted specimens most often arrive in stores. Before buying plants, you should consider where they will be placed in the apartment. In this case, it is necessary to take into account their size and their growth rate.
When growing any plants in apartments, there is a rule: the larger, higher and brighter the rooms, the easier the plants can withstand all the hardships of enclosed spaces, especially in winter. For example, in bright, cool rooms, in a corridor, a slightly heated loggia or in a winter garden, where the temperature does not rise above 10–15 °C, subtropical plants grow best - all types of citrus fruits, tea, olives, Japanese medlar and others. Some vegetable crops, especially green ones, can also grow here. If your room has northern windows and in winter the temperature in it does not exceed 10–12 °C, then the most suitable for it would be bay laurel, pomegranate, which sheds its leaves in the winter; among vegetable crops, sorrel, celery, parsley and onions on greens. Very little light is required to force endive and grow cauliflower.
All plants should be purchased only in specialized stores, as well as in farms that produce planting material, or in greenhouses. Only here they will help you choose the necessary plants and give you qualified advice on how to grow them, and often instructions on how to care for them. In specialized stores and farms, as a rule, completely healthy plants with washed leaves go on sale.
We do not recommend buying plants if the roots are pushing through the drainage holes, the pots have green growth or mold, the plant is poorly formed, there are few shoots and leaves, or if the size of the pots does not match the size of the plants. In addition, we do not recommend purchasing newly planted plants. They can be identified by drooping leaves. In this case, you will have to create special transitional conditions for them to adapt to the apartment.
Another tip: when purchasing plants, try to choose young specimens, as they adapt better and faster to indoor conditions. When purchasing, it is advisable to check the degree of rooting. To do this, you need to remove the plant with a lump of earth from the pot. If the roots begin to entwine a lump, you can buy such a plant.
Attention! When purchasing, you should carefully inspect the plants to prevent the introduction of pests and diseases into the apartment. Aphids often live on the tops of the shoots of many plants, and scale insects and their larvae often live on the undersides of the leaves. Sometimes it is not the pests themselves that are visible on plants, but the damage caused by them (sticky leaves with a blackish coating are a sign of the presence of scale insects and sooty fungus, speckled or spotted leaves are a sign of viral spotting).
Annual vegetable crops can be bought at the market. Here you can find good varieties of tomatoes suitable for growing in windows, cucumbers, peppers (sweet and bitter), multi-germ onions for forcing, and cauliflower. When purchasing vegetable crops at the market, you should also adhere to the rules outlined above - carefully inspect the plants and discard sick and underdeveloped ones. It is recommended to buy plants only in peat humus or plastic pots, best in the morning.
Most vegetables and some subtropical fruit crops (tea, laurel, coffee, cherry laurel) are propagated by seeds. Purchased seeds must be clean, free from debris and plant residues. The best time to purchase seeds is in the fall (September-October). If possible, you need to check them for germination.
We recommend that you carefully package purchased plants. This is especially important in winter and early spring, since if the packaging is poor, the plants may freeze or dry out. Within 2-3 weeks they must go through an adaptation period in the apartment. At this time, they should be protected from drafts, low temperatures and direct sunlight. We recommend that you keep newly acquired plants at a moderate temperature for the first time, do not water them excessively, and only after 1–2 weeks can they be placed in a permanent place.
Rule 11
Do not forget that seedlings require regular feeding - even the richest soil in composition is not able to provide it with nutrients throughout the entire growth period.
When choosing fertilizer for seedlings (and today there are many of them, both complex and simple - to suit any needs), pay attention to the appropriate markings on the packaging, because The concentration of the active substance in fertilizers for adult and young plants can differ significantly.
The first application of fertilizers is carried out after the plant has taken root; the optimal time to start fertilizing is after picking. Regardless of the type of fertilizer, the interval for fertilizing seedlings should be at least a week. In order for the plant to develop harmoniously, alternate feeding with mineral and organic substances with the application of fertilizers for seedling growth.
Fertilize in the morning during cloudy or cloudy weather. Apply the fertilizer solution at the root, making sure that it does not get on the tender leaves and stems of the seedlings, otherwise it will lead to burns.
- Fertilizers for seedlings - which ones to choose and how to feed the plants
From nitrogen to phosphorus or, Everything you need to know about feeding seedlings.
General rules of care
Many indoor plant lovers give the following recommendations for caring for home plantings. Let's look at them in detail.
- Moderation in watering and fertilizing. With a large amount of moisture, the root system rots.
- In winter, you should avoid applying fertilizers. Otherwise, indoor crops will not rest and will bloom poorly.
- Maintaining appearance. Dried flowers and leaves should be removed promptly. This will keep the culture attractive.
- The plant should be inspected regularly for pests and signs of disease. It should be immediately treated with special preparations if they are detected. Otherwise, this will lead to the death of indoor plants.
Rule 12
Decide on picking seedlings - some crops need it vitally, others can easily do without it and, moreover, this procedure is extremely painful. Recently, the theory that all mechanical manipulations with seedlings should be minimized in order to avoid unnecessary injury has become increasingly widespread among gardeners.
If you are still planning to pick, remember that transplanting seedlings from a common container into separate containers is usually carried out at the stage of 1-2 true leaves (the older the plant, the worse it tolerates picking). All weak, crooked, pale plants are removed, leaving the strongest and most beautiful ones.
For the first 5-6 days after picking, the seedlings are not watered so that the plant takes root better (the roots will stretch and grow in search of moisture).
- Picking seedlings - what is it and why is it needed?
To dive or not, what crops to dive, what is better - picking or transshipment... And these questions haunt you?
Features of growing seedlings from seeds (step by step)
- Thickening of crops . It is important to consider sowing agricultural technology individually for each crop. There is no need to thicken the seedlings too much, because each plant should receive the sun, water and nutrients equally. Saving space can lead to weak, elongated and diseased seedlings, with roots intertwined, which makes picking difficult. Such seedlings will definitely not provide the gardener with a good harvest.
- Watering . After sowing, it is better not to water the seeds so that they do not sink deeper into the soil than necessary. The soil is well moistened before sowing, and if there is a need for watering after, then it is better to use a spray bottle.
- Feeding . To stimulate healthy seedling growth, do not forget about special fertilizing. This is especially necessary for seedlings grown in small containers. Seedlings are fertilized with ammonium nitrate, potassium sulfate or superphosphate. Before applying fertilizer, it is important to protect the weak root system of young plants by irrigating them with plain water from a spray bottle. The volume and frequency of fertilizing can be found in the description of the plant variety on the packaging.
- Diseases . With improper care or poor pre-sowing treatment, seedlings can be affected by various diseases. Often young plants suffer from blackleg and root rot. In this case, it is better to prevent the disease from occurring than to treat it. For additional protection, seedlings are treated with special means.
General recommendations that will help you get high-quality seedlings
To obtain high-quality seedlings, it is important to strictly observe certain conditions. Seeds need a lot of sun energy, heat and moisture in order for them to germinate well.
Lighting
For stable growth and development of plants, daylight hours should last at least 12-14 hours a day. Early seedlings will have to be additionally illuminated with a special lamp. To ensure that the crops receive more light, the dishes are moved to the windowsill on the south side of the house.
Humidity level
Seeds need a constant level of moisture in order for them to germinate. Therefore, after sowing, the dishes are covered with film and mini-greenhouse conditions are created to maintain the necessary humidity and prevent the substrate from drying out. The film needs to be removed briefly every day to air it out. After all the shoots appear, the shelter is removed for good.
Of course, each plant has its own requirements for humidity and watering, but in order not to ruin young seedlings, it is recommended to moisten the soil as the top layer of the substrate dries.
It is better to irrigate the soil from a sprayer from above and pour water into the pan from below. It is important that the contents of the pot always remain moist, but you should avoid excess moisture, as this can lead to rotting of the roots. Water the seedlings with soft, settled water no colder than 20-24 degrees.
Temperature
Low temperatures will slow down germination and growth of seedlings. If a container or tray with crops is on a cold windowsill, then it is better to place a stand under the dishes. If possible, you can use an electric heating pad, which is also placed under the dishes. The soil temperature should be approximately 21 degrees.
Important! When the seedlings just begin to appear, it is necessary to maintain 25-27 degrees of heat in the room, and when all the seeds have sprouted, the temperature can be lowered to 20 degrees.
For beginners, growing seeds at home (planting, calculating the favorable time and many other nuances) may seem like a complicated science, but this is absolutely not the case. It is important to approach the process with ease and enjoy working with plants.
Author of the article: Skorobogataya Tamara Dmitrievna
Tags: seedlings, seeds
- Related Posts
- What flowers should be sown for seedlings in March - planting dates (calendar)
- Secrets of growing cucumbers: planting, feeding, care
- Beautiful geranium - growing and care at home (photo)
« Previous entry
Rule 13
Do not allow the seedlings to be pulled out. An elongated, and therefore weak and fragile plant may die or not produce a good harvest in the future.
Such a sad outcome can be caused by sowing seeds too early, lack of lighting, incorrect temperature conditions, and even excess moisture or fertilizer - which is why it is so important to follow all the rules described above for caring for seedlings.
If trouble has already happened, try to minimize the consequences - adjust the watering and fertilizing schedule, move the seedlings to a cooler and more lit place, transplant the plants into larger containers.
Another solution may be the use of special retardant drugs that suppress excessive growth of roots and shoots by regulating the synthesis of phytohormone growth. They suppress the elongation of stem cells during their growth, but enhance their division in the transverse direction without compromising other basic physiological processes.
- What to do if the seedlings are overgrown?
We will tell you how to avoid stretching plants and what to do if the seedlings are already overgrown.
What can you grow at home?
1. Of course, greens and herbs . They are relatively easy to grow; you can start your gardening experience with the least demanding specimens. And how pleasant it will be in winter to eat fresh herbs, inhale spicy aromas, brew fresh herbs into tea, and take aromatic baths. Greenery will please our eyes, provide us with vitamins and bring a little bit of spring and summer into the house.
The most popular herbs and spices for growing at home are:
- Green onions
- Parsley
- Dill
- Basil
- Cilantro
- Thyme
- Mint
- Melissa
- Spinach
- Sorrel
You can also grow lavender, rosemary, tarragon and other plants
2. A more difficult task would be to grow vegetables in an apartment , but there is nothing impossible about it. The network is replete with photographs shared by proud amateur gardeners who were able to grow and, importantly, harvest tomatoes, cucumbers and peppers right in their apartment. So, if you don’t have a summer cottage, but the spirit of gardening is in your blood, feel free to start planting your own home garden.
What kind of vegetables do people grow at home:
- tomatoes (most often cherry tomatoes, but sometimes other varieties of tomatoes)
- cucumbers
- bell pepper
- potatoes (can you imagine??!)
- sweet potato
- mushrooms
- onion
- garlic
3. Exotic lovers will also be able to apply their strengths in a direction that interests them. And in this matter nothing is impossible. Our resourceful people grow lemons, kiwis, pineapples, tangerines, palm trees and other plants unusual for our area at home.
Of course, when getting such pets, you need to be prepared that they can grow to significant sizes and keeping them in an apartment can be problematic. So, before you decide to grow some exotic, you need to carefully study what can grow from it :)
Rule 14
Do not forget about hardening off the seedlings before “relocating” them to the ground. This procedure helps young plants adapt to new living conditions (differences in day and night temperatures, wind, bright sun, etc.).
To reduce the stress of such a future move, seedlings need to be hardened off in advance. One or two weeks before the upcoming planting of seedlings in the ground, they begin to open the window vents on which the seedlings are placed every day for a couple of hours. Gradually, this time is increased to 6-8 hours, and three to five days before the transfer, they begin to take containers with seedlings outside (preferably in calm, windless weather) so that the seedlings get used to the open air.
It is important to remember that for cold-resistant and heat-loving plants, the recommended temperature and hardening time may differ significantly.
Of course, there are nuances - each crop requires an individualized approach and special growing conditions. Therefore, our recommendations are not exhaustive; if you want to get a really good result, you need to study the issue deeper. However, we hope that you have received a general idea of \u200b\u200bgrowing seedlings at home, and this knowledge will certainly be useful to you.
How to place a lot of seedlings
If the size of your window sill is not enough for all the seedlings, increase the usable area with the help of simple devices. For example, place a piece of plywood 40-50 cm wide on it. This will increase the usable area of the window sill by 1.5-2 times and protect the seedlings from the dry and hot air of the radiator.
At a height equal to the middle of the window, you can make an additional shelf from boards, plywood or any other available material that can withstand a load of at least 10 kg. If the window is large, you can make a rack in several tiers.
Some particularly enterprising gardeners hang containers with seedlings in the air.
To do this, they take a strong thread or rope, fix one end of it to a cornice or a specially attached strip above the window, and tie the other end to a pot with a plant. It turns out something like hanging flower pots.