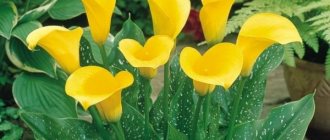
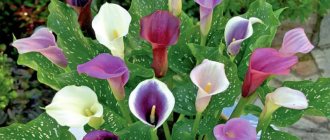
Calla or Zantedeschia is a very popular plant that first appeared in South Africa, and nowadays can be found among many summer residents on their property. This plant is popular not only as an open ground flower, but also as a houseplant. Externally, the plant resembles a wide clearing, since wide and large leaves fill a fairly large area, where up to 10 flower stalks grow, which are fragrant with magnificent flowers similar to water lilies. The color palette of flowers is varied, since you can find buds not only in classic white, but also in yellow, pink and dark purple shades, because it all depends on the plant variety, especially since the variety is huge. How to care for calla lilies, plant and propagate this plant correctly, so that owners and guests can enjoy the magnificent flowering for a long time. We will consider all the secrets, nuances and features step by step below.
Seed preparation
Seeds lose their viability during storage, so they are purchased fresh from the store for sowing. Before planting, old ones are soaked in a growth stimulator to improve germination.
Order by mail to grow calla lilies from seeds from China. But whether the plant you ordered will grow is unknown. And long delivery has a negative impact on the germination of the crop.
Seeds are also prepared at home. For cultivation, calla lily seeds are prepared as follows:
- After flowering, the seeds are left to ripen.
- When ripe, cut and dried.
- Separate and clean the seeds.
The peduncle is left only when they plan to prepare planting material, because this weakens the underground part. Dried planting material is used immediately.
Flowers of Death
You can often hear that callas are the flowers of death. The sources of this opinion are unknown. According to one version of its origin, calla lilies are often brought to funerals in some countries. Therefore, they began to be called the flowers of death.
But in real life they have nothing to do with death. In many countries, these flowers are a symbol of love. They are often used when making wedding bouquets in European countries.
Preparing the container and soil for planting
Before planting calla lilies with seeds, select a suitable container. The best would be a clay pot with drainage holes at the bottom, 15-17 cm in diameter and 12-15 cm in depth. Such a container will create conditions for the development of roots and prevent them from rotting.
The plant loves fertile, acidic or slightly acidic, well-drained soil. Therefore, to propagate calla lilies by seeds or other means, mix leaf soil, turf, sand and peat in equal quantities. This is a universal composition suitable for all types of calla lilies. Depending on the type of crop, it can be changed:
- for tuberous varieties, leaf soil and humus take 1 part, turf - 2, and coarse sand - 0.5;
- for growing rhizomatous plants, humus, soil and turf in the same quantities, 2 times more sand and 0.25 parts of clay.
For 3 liters of mixture add 1 tbsp. superphosphate. You can buy special soil in the store.
Watering and spraying
Calla has fairly wide leaves that require regular care. They must be especially carefully removed from dust using a damp, soft piece of cloth. In addition, they need to be sprayed regularly.
An important condition for good growth and development of calla lilies at home is watering. It was already mentioned above that these flowers love moisture. Therefore, they must be watered regularly and often. If the soil dries out in their pot, various diseases can develop, which often lead to the death of the plant. Particular attention should be paid to watering during the hot summer months.
It is especially important to maintain soil moisture in the container at the desired level during the growing season of the plant. After the flowers ripen, watering can be reduced. They should be carried out only after the top layer of soil has dried.
Sowing
How to plant calla lily seeds at home:
- To germinate seeds: soak for 5-7 hours in water, possibly with the addition of a growth stimulant (potassium humate), put in a shallow container, cover with gauze and put in a warm place for a week (20-23°C). Moisten the gauze periodically to prevent it from drying out. For germination, take moistened cotton swabs, placing seeds between them.
- Make holes (3 cm) in the soil and water.
- Place the sprouted seeds and sprinkle with soil. It is advisable to plant 3-5 seeds in one pot to ensure the appearance of sprouts.
Another option is how to plant calla lilies with seeds from China or a store: the seeds are not placed in holes, but laid out on the surface, lightly pressed, moistened and covered with polyethylene. The container is transferred to a bright place, protected from the sun, with an air temperature no higher than 20°C.
Propagation using seeds
If you want to use the seed method of propagating calla lilies, then you need to know that it is painstaking:
- Before planting the seeds of this plant, they are soaked. For this purpose, cotton pads or paper napkins are most often used, between which the seeds of an indoor flower are placed.
- Next, the material is wetted with ordinary water. The seeds in this form must be placed in a warm place for three days.
- After the seeds are pierced, they need to be planted in a container. In this case, they must be sprinkled with a thin layer of soil.
- After the emergence of seedlings, the strongest of them are left in the pot, and the rest are pulled out in the simplest way.
- A month after the sprouts appear, they are picked and planted in separate bowls.
- If the planting is dense, they can be grown until the end of spring without thinning.
In May, callas are planted in a permanent place. In this case, it is necessary to plant one plant per pot. If it is too long, then a distance of 40 centimeters is maintained between individual indoor flowers. Caring for the seedlings of this plant is carried out in exactly the same way as with any other method of propagation.
Propagation of this plant by seeds is a fairly lengthy, but not difficult, process.
If you like to care for house plants and have the patience, then you can easily use this method, especially since feces have a high percentage of similarity.
Planting care
Before the sprouts appear, the soil is watered and the greenhouse is ventilated. It is important during this period to prevent waterlogging and rotting of the soil - this will lead to rotting of the seeds, which, with good care, can sprout after a month. To prevent such consequences, water through the bottom, and if the surface of the soil is moistened with a sprayer as needed.
If the seeds have sprouted well, they are picked. Healthy sprouts are removed, the roots are carefully washed to prevent possible microorganisms from entering the fresh soil, and replanted in prepared soil.
- Fill the bottom of the container with soil.
- Place the sprout.
- Carefully cover the roots with soil.
- Water.
When transplanting, the rhizomes are lightly sprinkled with soil, since the plant requires shallow planting.
It is important at this stage to choose the right container for the flower. In a small pot, calla lilies will not bloom, devoting energy to the development of the green part. Even applying fertilizers won't help.
Propagation of flowers from bulbs
Most often, this plant is grown using bulbs. For this:
- It is necessary to choose only high-quality sprouts that are characterized by the presence of the strongest possible root system.
- They must initially be placed in a pot and covered with a small amount of soil.
- The soil layer should not exceed 5 centimeters.
- If the plant is planted in winter, then it must be provided with a temperature of 8-14 degrees.
- When transplanting calla lilies in the summer, ensure the temperature indoors or outdoors is 22-25 degrees.
In order to provide the plant with early flowering and the richness of the shade of the blanket that encircles the plant, it must be placed on a windowsill characterized by a large amount of light. At the same time, at night the temperature should be +16 degrees. If this plant is planted in winter, then it is necessary to provide it with additional lighting to extend daylight hours to 10-11 hours.
After planting an indoor flower, it needs to be provided with appropriate care:
- Calla needs to be provided with moderate and frequent watering. In this case, they are guided by the moisture level of the earthen coma. It should always be moderately moist.
- This plant needs to be fed twice a month. For this purpose, liquid fertilizers in the form of water-soluble fertilizers for indoor flowers are most often used.
When growing calla lilies from bulbs, they are transplanted in the summer. To do this, the indoor flower is dug out of the pot, old shoots and leaves are removed from it. Next, you need to transplant this plant into a new pot.
To perform propagation, it is necessary to separate its offspring as carefully as possible before transplanting an indoor flower. It is planted in a separate pot. Transplantation of this plant and its propagation is carried out in winter. When calla lilies are propagated by offspring or mother bushes, they are separated from the bush in the spring.
Propagating this plant in a variety of ways is a fairly simple procedure. To do this, it is necessary to correctly select the pot and material for replanting.
Conditions for plant development
For better development of crops, a microclimate close to natural is organized. When growing calla lilies from seeds at home, you need to take into account the components of successful flower development: light, temperature, moisture and soil fertility.
Illumination
Calla is a light-loving crop, but does not like direct rays. The daylight hours of a flowering plant should be 10-12 hours, and after flowering - 8-10 hours. In autumn and winter additional lighting is necessary. Lack of light leads to elongation of leaf petioles and absence of flowers. The situation can be corrected by placing the pot on the western and eastern window sills in the hot summer, and on the southern windowsills in the winter.
Humidity
Requirements for indoor calla lilies
In order to ensure full growth and development of plants, it is necessary to grow it in the most favorable conditions.
Kala needs optimal:
- Lighting
- Temperature
- Humidity
- Polivé
Growing this plant in a pot is quite simple. But this plant is grown in a warm climate, so it needs to ensure optimal room temperature. If the air temperature in the room does not exceed +8 degrees, this may negatively affect its development. When growing calla lilies in winter, they are transferred to a room that is characterized by the presence of appropriate heating devices. It is best to grow this plant at temperatures from +20 to +25 degrees.
Kala is a fairly light-demanding plant.
is a fairly heat-loving indoor flower. If you choose the right place to grow calla lilies, this will be the key to success. If there is diffused sunlight or partial shade, you can provide fairly favorable conditions for growing calla lilies. This plant is characterized by the correct formation of flower stalks only if the daylight hours last for 12 hours. This is a very important condition for growing an indoor flower. After the indoor plant has finished blooming, it will need to be provided with 8 hours of daylight.
Kala is a moisture-loving plant. That is why it is necessary to regularly water the indoor flower. If the kala blooms, then it needs to be provided with abundant watering. During the calla lily's dormant period, it is provided with moderate watering. When growing this plant, it is necessary to ensure that the room has a high level of humidity.
Aftercare of plants
Every year, flowers are replanted to increase space (the emerging bulbs will begin to fight for survival) and to renew the soil (soil depletion and the gradual accumulation of pathogens lead to the death of sprouts). Instead of annual replanting, you can replace the top layer of soil with fertile one. When doing this, you need to be careful not to damage the roots.
By making every effort to grow calla lilies from seeds at home, you can get a living barometer for your home. Before precipitation occurs, water droplets appear on the large bract (which is often confused with the flower itself) and the tips of the leaves.
Problems
Sometimes it takes a long time for a plant to bloom. There may be several reasons for this. The most common is the absence of a rest period. It should be remembered that before flowering begins, the plant must rest for at least 2 months.
Calla may not bloom due to lack of feeding . On the contrary, heavy fertilizing with nitrogen fertilizers leads to blackening of the edges of the leaf blades.
Another common reason for the lack of flowers is low lighting. A plant that begins to bloom may stop blooming if the air humidity is very low.
But even with high humidity, if the air temperature is above 27ºC, the leaves and flower stalks of the plant may begin to dry out and wither.
Calla - a beautiful tropicana in the garden
Bright callas
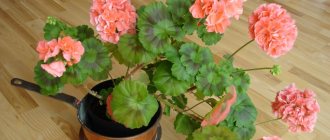
The second name for callas is Zantedeschia. In nature, the beautiful Tropicana lives on the banks of rivers and lakes, in heavy silty soils, so its “cultivated” sisters of the Aronnikov family love slightly shaded places and moist, well-fertilized soils.
Callas are grown both indoors and in open ground. Calla is able to spread a “carpet” across a clearing, and all because from its thick rhizomes young shoots appear annually, wrapped in numerous leaves, among which elegant arrow-peduncles “shoot” into the sky. Similar clearings in gardens and flower beds resemble ornamental Arabic paintings.
Lush calla bush
Callas prefer open areas, where they grow unusually luxuriantly if they “live” on fertile soils. But (!) they also need some shading. And there is no contradiction here. In shaded areas they bloom most luxuriantly, and in sunny areas their foliage is more developed, but they produce fewer flower stalks. Plant height varies from 30 cm to 1.5 m, depending on the variety. Garden callas delight us with their blooms all summer long.
Favorable location
For successful flowering and excellent reproduction, any plant must be planted exactly on that piece of land where it feels most comfortable. Garden callas are no exception. This is a plant that grows well, so it needs space, but at the same time, the best option would be a slightly shaded area where the sun appears periodically, and shade is not uncommon. The problem is that if calla flowers grow exclusively in a sunny area, this increases the green mass of the plant, but the number of flower stalks decreases significantly. But the presence of not constant, but long-term shade leads to the formation of more flower stalks, so the flowering turns out to be lush and very beautiful.
Growing calla lilies
Callas prefer acidic soils. The best soil composition for them is: 2 parts turf soil, 1 part leaf soil, 1 part peat and 1 part sand. And if you are using tubers from an existing plant, they must be thoroughly cleaned and kept in any disinfectant solution for several hours. Can be done in a weak solution of potassium permanganate.
Calla blossoms
Depending on the type, calla lilies have a root in the form of a group of tubers or in the form of a powerful, branched rhizome. In the first case, the plant is propagated by new young tubers, in the second - by dividing the bush, and both species can be propagated by seeds (which is used in rare cases).
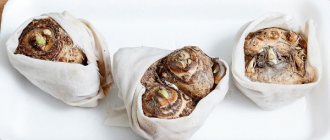
Reproduction of callas by tubers
Calla lily tubers usually go on sale at the end of February. Healthy nodules should be dense (like young potatoes), only in this case the calla will produce arrow-shaped flower stalks already in the year of planting. If the nodule looks wrinkled and flaccid, it is better to refuse the purchase.
Planting material is laid out on a tray and placed in a cool, dry place (+5. +7°C). Some zealous housewives have adapted to storing them in a regular refrigerator, regularly turning them over and airing them.
In April, the tubers are planted in pots, sprinkled with 2-3 cm of soil and the room temperature is increased to +20. +22°C. Please note that there is a tubercle on the nodule - this is the top. The tuber needs space, so place it in a pot with a capacity of 3-3.5 liters. There is no need to water immediately, water after a week and make sure that the soil in the pots does not dry out.
How to care for calla lilies
In order to provide callas with the necessary care, you should control the degree of lighting, temperature, humidity level and the quality of the soil in which the plant is planted.
- The soil. Of course, fertile and fertilized soil is the best option for any plant, and the presence of a large number of earthworms promotes natural loosening and oxygen circulation even at a decent depth.
- Watering. Callas are considered a moisture-loving plant, but, like most other flowers, they do not tolerate stagnation or excess water. Therefore, adhere to the rule: it is better to have little and often than a rare abundance of moisture. Control the quality of watering, as the soil should be moist, but not wet.
- Feeding. Garden callas should be fertilized twice a month. The best fertilizer option would be complex preparations for corms, as they are as balanced as possible. During the flowering period, an extraordinary fertilizing with potassium should be applied, as 20 grams of this substance will improve and prolong flowering. Remember that a high nitrogen content in fertilizers harms the plant, since the effect is aimed at leaf formation, and not at flowering, so excess nitrogen can destroy flowering.
The final stage of caring for calla lilies will be the removal of peduncles after flowering, as well as digging up tubers or rhizomes for propagation and new planting next year.
Types and varieties of calla lilies
All types and varieties of calla lilies are divided into two groups. One includes hybrids and varieties of tuberous calla lilies: ' Eliota' and ' Remani' . The other includes hybrids and varieties of Ethiopian calla lilies , which have powerful tree-like rhizomes.
Ethiopian calla
I present to you two of the most beautiful varieties of Ethiopian calla lilies: 'Amethyst' and 'Vermeer'. Calla 'Amethyst' 'Amethyst' is distinguished by its violet tenderness and delicate aroma, reminiscent of the freshness of a sea breeze. Height varies between 60-120 cm depending on growing conditions. The peduncle is tall and stately. 'Amethyst' flowers were considered most suitable for decorating the boudoirs of queens and noble ladies.
Calla 'Amethyst'. Photo from procvetok.com
Calla 'Vermeer' 'Vermeer' shimmers with a satiny splendor of contrasts. A white edging along a purple blanket of slightly wavy petals covers a bright lemon cob. The leaves are decorative, with white specks. Does not grow higher than 60-70 cm.
Calla 'Vermeer'. Photo from procvetok.com
Calla Elliott and Calla Rehmann
The figured flowers of this group of callas are distinguished by a rich shade of colors: red, yellow, purple, white. They are all distinguished by a colored border around the edge.
Calla Remanna
Calla Remani
Calla Elliott
Temperature
This is a plant with a pronounced dormant period, which lasts 2 months a year and begins after the end of flowering. From the beginning of the growing season, a stable temperature with small average daily differences is needed.
It is best to keep the flower in a room at a temperature of 18-22ºС . This plant does not like heat; at temperatures above 27ºС, its leaves begin to dry out, despite the air being humidified. Cold is also detrimental to it, although Ethiopian calla can tolerate a short-term drop in temperature of up to 5ºC.
During the dormant period, the temperature of the plant should be within 10-15ºC.
Growing calla lilies from seeds at home
Calla is a delicate and beautiful flower that leaves few people indifferent. It comes from Africa and can be found in the wild there, as well as in South America. This plant requires care and careful maintenance, which, however, does not stop connoisseurs. This article will discuss how to grow calla lilies at home.
Trimming / Support / Garter
During the growth and flowering of the plant, you can sometimes remove yellowed and drying leaves. At the beginning of the dormant period, when all the leaves of the plant have dried, they should be trimmed.
As such, pruning is not applied to calla lilies. Only dried leaves are cut off. The procedure is carried out during the dormant period, when the plant does not bloom.
In most cases, the plant does not need support or garter . However, if the calla lily has reached an impressive size or has become very elongated, you can carefully tie it to a support. This will prevent the pot from tipping over and injuring the flower.
Description and varieties
Calla lilies are often confused with calla lily, but these are completely different plants. If you want to grow this flower at home, the choice of varieties is not too wide. For this purpose, flower growers use Ethiopian calla lilies, “Elliota” and “Remani”. They differ in appearance.
Ethiopian calla is represented by such varieties as “Green Goddess” and “Childsiana”. They boast long leaves of rich emerald green that shoot upward. The flowers themselves are very large and white.
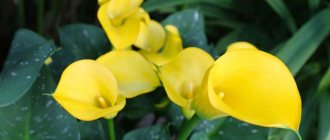
“Elliot” also does not leave connoisseurs indifferent. Its highlight is its very large, up to 15 centimeters, orange-yellow flowers. The leaves are bright, with small specks.
Most often, flower growers purchase calla lilies "Remani" . It has much smaller flowers of various shades. Pink ones are very common among them. There are also red, purple and even black flowers.
Choosing a pot and soil
The pot plays a fairly important role in growing indoor flowers. If you are growing Ethiopian calla lilies, then you need to select a container that is large in size. If you use a small pot, in this case the calla lilies will not bloom. If you apply fertilizer in a small container, you will only achieve growth of the green part of the plant.
To plant one flower, select a container with a diameter of more than 20 centimeters.
When choosing soil for growing indoor plants, you should give preference to porous structures. This allows you to most effectively remove excess moisture from the pot and ensure normal breathing for the plant. In order for the plant to constantly grow, it is necessary to select the correct soil mixture. For this purpose, a special mixture is most often used, which includes garden soil, rotted manure, and sand. In this case, it is necessary to ensure the acidity of the soil.
With the correct selection of container and soil for calla lilies, its full flowering is ensured. This process also greatly facilitates the work of the gardener in the process of growing calla lilies.
Seed preparation
During long-term storage, seeds may lose their viability. The best way out would be to buy fresh seed from a specialty store. For more active development, seeds can be placed in a growth stimulator.
If you wish, you can prepare seeds at home. To do this, you will need to leave the seeds on the calla after the flowering period so that they ripen, then they must be carefully cut and dried, and then the seeds must be removed.
It must be borne in mind that the peduncle is left only if the seeds of the plant are needed. Otherwise, this will lead to a weakening of the root system. Planting material must be sown immediately after drying.
Reproduction
There are 2 options for propagating this plant.
- You can use seeds, as well as dividing tubers. The first option is quite complicated, we talked about it earlier. In this case, the planting material is soaked for several hours in sodium humate, after which it is placed in a damp towel and put away in a warm place with a constant microclimate for a week. When the seeds germinate, they can be planted in the soil.
- Reproduction by dividing tubers is simpler. The rhizome bulb grows annually. If, when replanting, you divide it into several pieces and plant it in different containers, the plant will feel great. However, it must be taken into account that for germination to occur, at least a single bud must be present on the selected bulb.
To learn how to properly grow calla lilies, watch the following video.
Preparing the container
After the seeds are ready, you need to select a container to work with them. A clay pot equipped with holes for drainage is ideal. Its diameter should be about 15 centimeters, the depth the same or slightly less. Such a container will allow the root system to develop in comfortable conditions.
It is recommended to choose fertile soil for planting. Acidic or slightly acidic soil is perfect, the main thing is to ensure proper drainage. To prepare the soil yourself, you will need leaf soil, peat, sand and turf. All ingredients must be mixed in equal proportions. This soil is suitable for calla lilies of any type.
In order to saturate the soil with useful substances, you can add a little superphosphate. Optimal ratio: 1 tablespoon per 3 liters. You can also purchase special soil at retail outlets for gardeners.
Sowing
Before sowing calla lilies, you need to germinate the seeds. To do this, they are placed in warm water for 6 hours. Adding a growth stimulator will not be superfluous. After this, the planting material is placed in a damp towel or gauze, covered with it and sent into a warm place for about a week. When the towel begins to dry out, you will need to re-moisten it.
Seeds are planted as follows. Small holes are made in the previously prepared soil, about 3 centimeters deep. The soil is watered, seeds are placed in it and carefully sprinkled on top. If clay pots are used, the number of seeds in each should be from 3 to 5, this will guarantee the emergence of seedlings.
You can also put the seeds on top, without digging them into the ground, lightly press them into the soil. Then moisten, cover with polyethylene and put in a room where the temperature does not exceed 20 degrees.
Features of transplantation
If the flower is damaged or too weak, it is not replanted. To ensure the most comfortable adaptation of this plant to a new place, soil is used, which in its composition is very similar to natural soil.
Before transplanting this plant, its roots are washed.
To avoid damage to the flower, the procedure is carried out as carefully as possible, otherwise incorrect behavior with calla lilies will lead to its infection with various diseases.
A small amount of soil is poured into the new pot, on which the flower is placed. But this does not mean the end of the transplant. The roots of this plant are sprinkled with the substrate as carefully as possible. After this, the calla lilies are watered. This plant is quite demanding of abundant watering. It is also necessary to apply this procedure to sprouts. These measures should be applied without overdoing it.
Planting care
Before the first shoots appear, it is necessary to promptly moisten the soil and provide access to oxygen. Shoots appear in about a month, the main thing is to prevent the seeds from rotting.
If the seedlings look healthy and there are quite a lot of them, picking should be done. To do this, the sprout is removed from the container, its roots are washed and it is placed in fresh soil. The rhizome will need to be lightly sprinkled with soil; it should not be placed deep.
Another important point is the selection of containers for transplantation. If it turns out to be too small, the calla will actively develop greenery and no flowers will appear on it.