Violets have been popular among gardeners for many years. They are grown not only as a houseplant, but also to create alpine slides and rockeries in the summer. The plant invariably arouses great interest among breeders due to its variety of shapes and colors, so the number of Saintpaulia varieties increases every year. To successfully grow a flower, it needs to create suitable conditions. Then it will delight you with its lush flowering for a long time.
For propagation by seeds, breeders use different varieties. This method can be used to grow indoor Usambara violets and all varieties of garden viola. Among the variety of Saintpaulia varieties, they are distinguished by the following characteristics:
- Based on the diameter of the rosette, violets are divided into micromini, mini, midi, standard and large.
- The inflorescences have a classic shape, bell-shaped, in the form of a star, wasp or spider. Flower petals are simple, semi-double or double. The color of flowers can be monochromatic, two-tone or multi-colored.
- Leaves are divided according to shape and color. The edges of the leaflets can be either solid or jagged or wavy.
For growing in an apartment, the following varieties are most often used:
- Caprice - with white double flowers with a greenish fringe and wavy leaves of variegated colors.
- Macho - has purple double flowers with a white border and simple green leaves.
- Your Majesty - distinguished by pink double flowers with wavy edges and bright green leaves.
- Sea Wolf - has large blue flowers with a mesh pattern, the foliage of this variety is dark in color.
- Jabot - with dark blue flowers with a greenish wavy border and wavy leaves.
To grow violets from seeds at home, you must first take care of suitable soil for it. The soil can be purchased at a specialty store or made independently. Soil containing a lot of clay is not suitable for violets. In such soil, the plant is very likely to get sick or even die. If you decide to use ready-made soil, then it is preferable to use one that contains disintegrants. Typically, this is performed by perlite or vermiculite, which retain moisture well and provide air access to the root system. Since violets feel better in acidic soil, peat must be present in it. When preparing the soil yourself, it is mixed from equal parts of perlite and crushed peat.
It is convenient to use phyto-cassettes with lids for sowing seeds. A drainage layer of broken shards is poured onto their bottom. Then you need to pour a layer of coarse river sand and lay a layer of sphagnum moss. Lastly, the soil is poured. Before filling containers, all materials must be sterilized. The shards and sand are kept for some time in a hot oven, and heating with water steam is used to sterilize the soil and moss.
Uzambara violet has very small seeds, so it is recommended to pan them before planting. This will allow for more economical and uniform use of planting material. The procedure is carried out in two stages:
- 1. The seeds are sprayed with water and the same amount of crushed charcoal is added. The mixture is placed in a jar and shaken for a while, after closing the lid. As a result, coal dust envelops the seeds and disinfects them.
- 2. Add the same amount of sand and shake vigorously again.
The prepared seeds are scattered in a thin layer on moist soil and covered with a lid. Containers with seeds are placed in a warm place so that direct sunlight does not fall on them. Now you need to control temperature conditions and constantly moisten the soil until the first shoots appear.
At the stage of seed germination, the temperature should not fall below +20 degrees. Then the first shoots will appear on the 20th day after sowing. If you increase the temperature to +25 degrees, the violets will germinate in two weeks.
After the first shoots appear, the lid is removed. Watering the seedlings should be done by spraying the soil with a spray bottle. When the first leaves appear and the seedlings grow to 0.5 cm, they need to be picked. The plants are dug up using a toothpick and transplanted into fertile soil with the addition of charcoal. Keep a distance of 2 cm between plants.
When the little violets grow up and feel crowded, make a second pick. They are placed one at a time in disposable cups. When the root system gets stronger, Saintpaulias are transplanted into pots. The containers for this purpose are small and shallow. The diameter of the pot should be three times smaller than the diameter of the rosette, then Saintpaulia will bloom well. From this moment on, violets need to be provided with warmth and constant soil moisture.
It must be remembered that direct sunlight is detrimental to violets; they cannot tolerate low temperatures or drafts. In general, homemade Saintpaulias do not require careful care, only some varieties have special requirements.
What do indoor violet seeds look like?
First of all, it is worth buying high-quality seed material. Many beginners, and sometimes even advanced gardeners, do not pay proper attention to this stage and ultimately remain dissatisfied with the result. First you need to purchase a seed pod, but not at the market, but in a specialized store or at a flower exhibition.
The Saintpaulia pestle should be cleaned. Then use a needle to open the box. Ideally, there should be a lot of seeds, but sometimes unscrupulous suppliers do not provide the plant with proper care, as a result of which movra is born in small quantities. Very often sellers use different tricks, so you should be careful when choosing and purchasing, especially on the Internet.
A normal moura will look like this:
- tiny, resembles grains of sand, but don’t worry, because this is the norm;
- has a limited range of colors, from black to brown;
- oblong, looks like small coffee granules with pointed ends.
Do violets have fruits?
There is a huge selection of Saintpaulia varieties, but the most popular varieties remain in purple, blue and pink shades. After pollination, beautiful flowers form a fruit - a seed capsule, in which, as the name suggests, the seeds ripen.
Seed ripening is a long process. If the fruit sets in the spring (successful pollination has occurred), then it will ripen in about 5-6 months. If pollination took place in the fall, then the capsule will ripen for 7-9 months. The shape of the fruit can be either ovoid, spindle-shaped or awl-shaped. The capsule flaps are destroyed by moisture and also crack during ripening, allowing the seeds to fall into the soil.
Sowing seeds
The grains of violets are very small, so before sowing, panning should be carried out to provide a protective film for the seeds. Due to this procedure, they are covered with a ballast layer, as a result of which they increase in size and become more convenient to use.
The soil
Soil is an important element in growing Saintpaulia. Many stores have a special substrate intended for this type of flower, but it is important to consider the following: often such soil does not absorb water, the liquid simply flows down the walls of the pot. There is only one way out - to prepare the soil for sowing with your own hands. To do this you need:
- Carefully sift the garden soil.
- Add some sand. With the presence of this component, the violet root system will develop perfectly and painlessly.
- Heat the soil in the oven. At this stage, all pests that could interfere with the normal functioning of Saintpaulia are destroyed.
- Place a layer of expanded clay at the bottom of the container.
Pots
It is better to purchase special phyto-cassettes with a lid, but a regular pot will also work well. It is important that it be small, since the root system of these lovely flowers is small, so excessive size will not allow the plant to develop normally.
Landing
Growing Saintpaulia is a rather labor-intensive, but generally uncomplicated procedure. In this matter, it is important to listen to the advice of experts on how to grow violets from seeds at home, as well as to carry them out step by step and in a concentrated manner. Seeding is carried out as follows:
- First, the top layer of soil is sifted using a sieve and the prepared vessels are filled.
- Immediately before sowing, it is necessary to water the soil with a fungicidal avicide.
- Wait until the soil dries. Then make grooves into which the grains will be sown.
- We sow our furrows with grains and pour a thin layer of soil on top.
- Immediately after planting, you need to water the soil.
Correct soil and pot
Growing violets from seeds will be truly effective if you approach each of the preparatory stages with all seriousness. Pay special attention to the process of selecting the soil mixture, as well as the flowerpot. As a rule, the most favorable conditions for the growth of Saintpaulia can be created if it grows on light sandy loam soils.
Many people prefer to buy ready-made substrate in flower shops, and this is a good choice, since such soil is already saturated with all the necessary vitamins and minerals. However, if you wish or lack financial resources, you can prepare the soil mixture at home. To do this you will need leaf soil, peat, and sand. It is recommended to immediately feed the resulting composition. Use humus, perlite or chopped sphagnum. You can safely plant violet seeds in such a substrate.
Growing indoor violets is not a particularly labor-intensive process. But some requirements should still be fulfilled if you want to get a 100% result. For example, it is very important to choose a comfortable potty. Do not buy large flowerpots. The root system of Saintpaulia is miniature. If you plant this flower in a spacious pot, it will not be able to develop.
For those who plan to start germinating plants from seeds, it is generally recommended that at first they use small plastic cups, containers, or even medicine bottles rather than pots. Choose the optimal container for planting indoor violet seeds, and after some time you will be able to evaluate the result.
Reproduction
Having grown a violet from seeds, every amateur gardener experiences pleasure and genuine joy. After all, in this way you can get completely different types and colors: from ordinary to elite terry. This is because plants have unstable DNA, as a result of which almost 100% of new flowers differ from the mother flowers. It’s safe to say that propagating violets by seeds is an interesting and rewarding endeavor.
Is it possible to breed a new variety of violet at home?
First of all, you need to be persistent, because breeding a new variety is a labor-intensive and time-consuming procedure. Sometimes more than ten pollination attempts are made before the desired shoot is established. For example, it took at least five years to develop the “Vernost” variety.
How to breed a new variety of violet at home
The process of violet selection at home is a painstaking task. When pollinating a flower, follow a certain algorithm:
- Carefully open the anthers of the plant with a needle.
- Apply the resulting pollen to the pistil of the flower, thus pollinating the violet. The pollen will ripen 5 days after opening, and its capacity for gynogenesis is not lost for 3 months.
- After the formation of the pistil, the flower with the fruit will turn into a box (in which the tiny seeds are born). If drops of a viscous, sticky solution appear on the stigma, the pestle is ripe.
- After 5, and sometimes 6-7 months, the stem dries out and the seeds ripen. At this time, you need to remove the boxes, dry them a little and open them.
- Pour the grains into a paper bag and place in a warm, dry place. They should be removed 2-3 weeks after ripening.
How new varieties of violets are developed
It is extremely difficult to convey the qualities inherent in parents to violet children. The fact is that they have a dominant dark color (when crossing purple and white, blue and pink, we get a predominance of purple and blue) and ordinary varieties (when crossing double with simple, we get all simple with a few semi-double). Flowers that have been grown from seed do not have the opportunity to reproduce all the characteristics of the variety. New selection of violets at home is possible, but requires repeated crossings of various species. This will take years of hard work. You need to be patient.
Rules of care
Growing violets at home is difficult, since you need to ensure that all conditions are met. These plants love light, but not direct sunlight. It is better to place them on the windowsill on the north-west, north-east or north side. A flower must receive at least 13 hours of light per day. In winter, it is recommended to provide additional lighting using a phytolamp or a regular fluorescent lamp.
Saintpaulias stop developing when the temperature drops below +150 C. The optimal indicator is +18...+240 C. Drafts and sudden hypothermia should not be allowed. An important parameter is air humidity. The level should be increased, but moisture should not fall on the foliage and inflorescences. It is better to place a container filled with water next to the pot.
Watering should be done using the bottom method. It is necessary to add settled warm water into a deep and wide bowl once every 1-1.5 weeks, and then immerse the pot of Saintpaulia there. The water should almost reach the edges of the container with soil, but not overflow. When the top layers of soil get wet, you need to take out the pot and wait until excess water drains from it. This method is considered optimal. But you should not resort to overhead watering often, as this leads to rotting of the root system. Carry out the procedure only when the soil dries out (usually because of this the leaves begin to droop).
Caring for Saintpaulia also involves the use of fertilizers. You need to start fertilizing during the growing season. It is necessary to apply fertilizers every 1-1.5 weeks until the plant begins its dormant period. It is better to use liquid complex formulations. They need to be added to water for irrigation. You can also replace the substrate every year; you can use the same pot.
An important procedure is pruning, as this will help form a beautiful rosette. The bush should have three levels of leaves. All the others, which are located lower on the stem, can simply be torn off, especially if they look pale and lifeless. Gradually, the lower part of the stem becomes longer, which is why the violet loses its decorative effect.
In this case, two methods will help:
- 1Replant the violet by burying its stem in the ground.
- 2Cut the rosette, leaving only 2 cm of stem at the bottom. Then put it in a container with water and wait for new roots to form. This is a kind of rejuvenation of the plant.
Despite the fact that you should not allow water to get on the petals and leaves, there are still exceptions to this rule. A shower will be needed when a lot of dust collects on the leaves.
How and when are violet seeds collected?
After successful pollination, the ovary begins to grow and a seed capsule (fruit) is formed. If pollination was carried out in the spring, its maturation can last 5-6 months, if in the fall - 7-9.
The fruit can be ovoid, spindle-shaped or awl-shaped. Its valves may collapse from excessive moisture or open when fully ripe, then the seeds will spill into the pot.
It is difficult to catch the moment of full ripening, therefore, in order not to take risks, you should remove the dried peduncle from the socket a little before the plant spontaneously gets rid of the seeds, focusing on the formal signs - drying of the peduncle and a change in the color of the fruit to brown.
If you remove the seed pod from a mother violet too early, it may not contain any viable seeds. If this is done 3-4 weeks before its natural opening, the seeds will have a germination rate of up to 80%.
Having separated the box, it is dried for 1-3 weeks in a warm, dry place. They open it by running the point of a needle along it, and pour the seeds onto white paper - this way they are better visible and easier to pour.
Proper storage
It is best to store seeds in a seed box, placing it in a paper bag or bottle. If it is opened, the seeds can be planted immediately or within 2 years. Store them in a linen or paper bag or matchbox. Storage conditions:
The bottom shelf of the refrigerator or the cellar meets these requirements.
You can store seeds at a temperature of +15...+20°, but not more than 1 year.
Habitat
When you are planning to have an indoor violet, strive to create conditions for it that are close to natural. First of all, the comfort of Saintpaulia depends on its habitat, or rather, the soil in which it will grow.
The soil for violets should be sufficiently nutritious and have a loose structure. Great importance is attached here to the proportional ratio of the components included in the substrate. Take leaf soil (chernozem) as a basis - it should consist of 5 parts. 3 parts of the substrate is peat and 1 part is sand. Additional components include sphagnum moss and charcoal.
Drainage also plays an important role here, so do not forget to place expanded clay balls or river pebbles on the bottom of the flower pot. This will prevent water from stagnating in the soil. Otherwise, excess liquid will cause root rot.
When choosing a flower pot, you should take into account the characteristics of the plant itself. Violet roots do not grow deep, but “spread” to the sides, located in the top layer of soil. So you should choose a container that is not deep, but rather spacious in width. The optimal dimensions for growing domestic violets are considered to be the following flower pot sizes: depth within 6 – 9 cm, width – at least 4 cm.
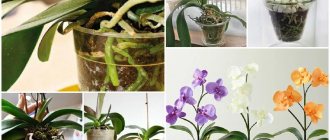
Appearance and general description
Saintpaulia grows quickly and blooms all year round. Modern indoor violets are hybrids in which breeders can specify the frequency of flowering, the number of peduncles and buds, and shades of the flower. The number of varieties amounts to thousands and increases every year.
Externally, the plants differ as follows:
- according to the size of the outlet - from small (8 cm in diameter) to standard (20-40 cm);
- by type of flower - simple, scalloped, double, semi-double, with corrugated or wavy petals;
- according to the shape of the flower - pansy, star, cup, bell, wasp;
- by flower size – small (2 cm), large (4-6 cm) and especially large (more than 6 cm);
- in color - plain (from white, blue and pink to red-violet), variegated (with spots, strokes, stripes, dots, veins or a mesh pattern).
5-7 Saintpaulia flowers are collected in a loose cluster, the leaves are fleshy, dark, pubescent above, green or grayish below. Variegated varieties have elegant, brightly colored foliage with many shades and contrasting spots.
The ampelous ones are characterized by a stem up to 50 cm long with several growth points, small flowers and variegated leaves.
Despite the fact that violets are indoor plants, landscape designers suggest using them to create compositions in a landscape style.
Flower pots are taken out onto balconies, into garden gazebos, planted in large boxes, in flower beds. In the fall they take it into the house. Saintpaulias are afraid of temperature changes and drafts.
Popular varieties of violets
- Flamenco. The flowers are semi-double, lilac-pink in color with a greenish fringe and a bright yellow core. The green “ruffle” is a distinctive feature of the species.
- Fire moths. The flowers are red or burgundy, with simple petals with slight fringe. Less common with a light border.
- Mars. With large buds of a crimson hue, distinguished by the presence of a wide frill. The edges may be decorated with a white border.
- Rococo Viol. These homemade violets are double varieties. Their flowers are deep blue in color. The shape resembles curly balls that go perfectly with the light green foliage.
- Rosemary. Plants with double star-shaped flowers. The main color is pink, with ink splashes and a lightish border.
- Rococo Rose. They look like small roses, delicate pinkish color. They belong to terry varieties.
Propagation by seeds
Reproduction of violets by seeds occurs with splitting of characteristics, and seedlings do not inherit the characteristics of their parents.
Breeders discard up to 95% of the resulting plants, leaving for further work specimens with a beautiful rosette, strong peduncles, interesting color and flower shape. If these characteristics are tested in three generations during vegetative propagation, the plant is considered varietal.
The advantages of growing violets from seeds at home are as follows:
- obtaining a large number of plants of the same age with different colors and shapes of flowers and leaves;
- seedlings are stronger and more resistant to various diseases than those obtained by cuttings.
Disadvantage: flowering will occur later than when propagated by cuttings.
Diseases and pests
Violet may suffer from diseases:
- 1Powdery mildew. A whitish coating appears on the leaves. The cause is a fungus that is activated due to high humidity, excess nitrogen, and low temperatures. The plant must be treated with Fundazol. After 10 days, repeat the procedure.
- 2Late blight. Also associated with fungal activity. The root system begins to rot, and brown spots appear on the leaves. The disease develops due to improper care. The diseased flower must be destroyed and the pot sterilized. As a preventative measure, it is recommended to use superphosphate.
- 3Botrytis or gray mold. This disease is characterized by the appearance of a grayish-brown coating on the ground part of the violet. Gray mold develops quickly. All damaged areas must be cut off and destroyed. Then treat the plant with a fungicidal solution.
- 4Fusarium. The petioles begin to turn brown, the leaves wither, the roots darken. Gradually the entire plant rots. If the disease has just begun to develop, then the damaged areas need to be cut off and the plant treated with a fungicide. If the violet is completely affected by fusarium, then it must be destroyed.
- 5Rust. Orange and then brown tubercles appear on the leaves. It is recommended to use Bordeaux mixture.
As for pests, the most dangerous for violets are mites, thrips, scale insects, nematodes, scale insects, aphids, flies, woodlice, whiteflies and duras. It is recommended to use an insecticide, and in the case of ticks, acaricides.
Beginning flower growers will find it interesting to propagate violets by seeds. This procedure is lengthy and quite complicated, but very exciting, as you can watch how beautiful bushes emerge from small seeds. Every breeder always carries out such procedures to obtain new varieties.
Time and methods of planting seeds
The most suitable time for sowing Saintpaulia seeds is spring and early summer. In winter, if the air temperature is insufficient and the humidity is high, the seeds may rot. They are planted in the following ways:
- Pour the seeds onto a white sheet of paper and, shaking it, scatter it evenly over the surface of the prepared soil.
- Planted in peat tablets, which are previously kept in warm water until swelling. Place 2 seeds on each tablet and place them in plastic cups or boxes.
- Mix the seeds with sand (1:1) and pour into the grooves.
The seeds of the Uzambara violet are so small that they are compared to dust. If you carry out pelleting, they will be convenient to pick up and evenly distributed over the soil surface, and their quantity required for sowing will be reduced by 1.5-3 times.
Seeds are coated on their own as follows:
- Moisten and mix with an equal amount of crushed and sifted charcoal, place in a glass bottle and shake. Coal dust should cover each seed.
- Add fine sand (the same amount as coal dust).
Dried seeds have a shorter shelf life.
What varieties can you grow?
From seeds at home you can grow many varieties of indoor Uzambara violets. Garden varieties of viola are also easy to grow. The types of this plant can be distinguished by their main external characteristics.
- socket diameter: micro, mini, standard, large;
- inflorescence shape: classic, star-shaped, bell-shaped, arachnid, wasp-shaped;
- petals: double, semi-double, simple;
- flower color: single-color, two-color, multi-color;
- leaf shape: round, oval, pointed, elongated, heart-shaped;
- leaf color: plain, interspersed;
- edges of leaves: wave, with teeth, smooth.
The following varieties are usually grown at home:
- “Caprice”: white, double inflorescences with a light green fringe, wavy, variegated leaves;
- “Macho” : purple, double inflorescences, simple green leaves;
- “Your Majesty” : pink inflorescences, double with wavy edges, bright green leaves;
- “Sea Wolf”: blue inflorescences, with a mesh pattern, large, dark green leaves;
- "Jabot" : dark blue inflorescences with a green wavy border, wavy leaves.
Sowing and caring for seedlings
You can buy a special slightly acidic substrate for growing Uzambara violets at a flower shop or prepare it yourself:
- sift the peat through a metal sieve with mesh size up to 1 mm;
- mix peat with fine agroperlite in a 1:1 ratio.
Before planting the seeds, the soil must be steamed to avoid the appearance of fungus. Then it is poured into prepared microgreenhouses - transparent plastic containers 3-5 cm high with tight-fitting lids. It is better to take not just one wide container, but several small ones - in case of infection, some of the crops will be preserved.
The soil in the box is evenly moistened with a spray bottle so that it is not saturated with water to the ground, or the required number of peat tablets is prepared and the seeds are planted using any of the above methods.
After this, the container is closed with a transparent lid, film or glass and placed in a warm place (+23...+25°C) under fluorescent lamps.
Further care is as follows:
- Once a day, open the container for 1 minute for ventilation;
- do not allow the temperature to drop below +20°C;
- moisten the soil with a spray bottle if it is dry.
Excessive moisture harms crops and can destroy them by getting on the leaves and root collar. Therefore, if drops of water fall from the lid into the container, it is worth replacing it with a non-woven covering material to improve air exchange.
The first shoots appear after 15-20 days. They are dived 2 times:
- When 2-4 true leaves appear. Before doing this, you need to moisten the soil so that water does not get on them. If there are drainage holes, the containers are placed in water, and the soil is saturated with water from the bottom up. To avoid damaging the roots of the violets, dig up the plants with a small fork or a toothpick. The seedlings are transplanted at a distance of 2 cm from each other into the prepared substrate, adding a little charcoal to it.
- When the leaves of neighboring seedlings close together, they are transplanted into small plastic cups (100 ml). Plants can be supported by the leaves, but not by the base.
Seedlings grown in peat tablets are replanted along with the tablet. When the young plant has mastered the new container, it can be planted in a pot. Conditions for the normal development of Saintpaulia:
- temperature +16…+25°;
- illumination with fluorescent lamps for at least 12-15 hours a day, the distance from the tops of the seedlings to the lamp is 7-10 cm;
- if the central leaves have lightened, the plant must be fed with fertilizer with a high nitrogen content.
Landing
When propagation by seeds is used, after receiving the seed, you can proceed directly to the main part of the work. Planting takes place from January to March. The seeds themselves are very small, so they do not need to be sprinkled with soil.
It is important to choose the right soil. This should be a special mixture of vermiculite, peat and perlite. You need to pour the seeds on top of the ground, spray with water and cover the container with glass or plastic wrap. Next, place the container in a warm and bright place, protected from direct sunlight. There should be no drafts either.
As the soil dries, it is recommended to water it with boiled, cooled water. Distilled is also suitable. It should be 2-30 C warmer than the room temperature. The soil should not be allowed to dry out.
The first shoots will appear in 2-3 weeks. Sometimes they appear already on the tenth day. Replanting is required when the seedlings grow and the first pair of true leaves appear on them. Then a picking is carried out, thanks to which they will grow without interfering with each other. The root system of the sprouts is still quite fragile, so they need to be removed from the substrate after watering.
It is important to choose the right flower pot. It should be small, so that the roots will not take up much space. Abundant flowering occurs only after the root system has completely occupied the entire space in the container. For young crops, a pot with a diameter of 5 cm is sufficient, and for older crops a pot with a diameter of 10 cm is required. Only for the largest specimens you need to choose those containers that are 15 cm in diameter. Calculating the size of the dishes is very simple. Its diameter should be 3 times smaller than the diameter of the outlet itself. It is better to choose plastic containers for Saintpaulia.
As for the soil, viola (this is another name) prefers a certain composition. It can be purchased at a flower shop. But this composition is not always suitable for violets - it depends on the varieties. You can choose the universal soil “Terra-Vita”. A home-made substrate is also perfect: you will need to mix one part each of humus and sand, add two parts leaf soil and half a part turf soil. You can add a spoonful of superphosphate and half a cup of bone meal to a bucket of this composition. Mix everything thoroughly. The substrate should be loose and quickly absorb moisture.
Be sure to place drainage at the bottom of the pot. This can be expanded clay, broken brick, gravel, pebbles, etc. The layer should be 2 cm thick. You can put a small piece of charcoal on top of the drainage.
The nuances of growing violets from seeds
To grow violets from seeds, you need to consider the following:
- Saintpaulia germinates better in the light, so the seeds are not sprinkled with soil when sowing;
- the soil in the pot should always be slightly moist, but if it dries out, it should not be filled with water - this is detrimental to both seedlings and adult plants;
- Saintpaulias love sunlight, but not direct, but diffused;
- water the seedlings with water at room temperature (or slightly higher), standing for 2-3 days in an open container to ventilate the chlorine;
- when watering, use a watering can with a narrow long spout or a syringe; the water should not erode the soil;
- You cannot feed plants earlier than 3-4 weeks after picking or transplanting.
The roots of violets are located close to the surface, weakly developing deeper. Therefore, in a large pot, the soil, not covered by roots, turns sour, dense foliage may form, but flowering will be poor or not at all.
Young plants are planted in pots measuring 5x5 cm; for an adult, it is selected so that it is 3 times smaller than the diameter of the crown.
Necessary conditions for growing seedlings
So that the violet seeds can germinate soon, after sowing, it is advisable to cover the container with a lid or paper and then place it in a shaded place. Do not leave a pot of planted seeds on a windowsill or any other place that receives too much direct sunlight.
You should not forget about Saintpaulia: control the temperature, as well as the level of humidity in the soil. Under no circumstances should the soil dry out and the temperature should not drop below 20 degrees. Create an optimal microclimate for the seedlings, and seedlings will appear pretty soon.
Growing violets for seeds
The main condition under which Saintpaulia can reproduce is that the mother plant must be healthy. It must be inspected for the presence of pests (aphids, mealybugs) and diseases (powdery mildew, gray rot, rust). You need to choose a violet for pollination, focusing not only on beautiful flowers, but also on important inherited traits:
- strong socket;
- a large number of flowers;
- clearly defined symmetry of the bush;
- blue, white and purple colors dominate.
Young Saintpaulias pollinate and bear fruit better, so it is advisable to select plants of the same age. If the selected parents bloom at different times, their flowering dates can be changed by the following methods:
- to speed things up - raise the temperature to +21°C, place the plant under red fluorescent lamps, and feed it with phosphorus fertilizers;
- for detention - placed in a cool room, placed under a fluorescent lamp of daylight or blue color.
In order for the plant to be healthy and strong, for its growth it is necessary to maintain a comfortable temperature, regularly water it and fertilize it for flowering once every 2 weeks with phosphorus-potassium fertilizers.
If there is not enough light in winter, there is no possibility of illumination, it is better not to fertilize the violet, but to give it a rest.
Optimal timing
Vitrock violet is sown from seeds to seedlings in early summer . Seeds should be sown between the last week of February and the end of the second week of March.
When deciding when to sow seeds, keep in mind that the plant blooms at 3 months of age, so late planting will mean late flowering.
For planting before winter, the seeds are sown in open ground before frost and covered. Seedlings are expected in early May and are planted or thinned out by summer.
Backlight
The best germination of violets is observed in the dark, a week, maximum two, after sowing.
require warmth and darkness to germinate
When the first leaves appear, March seedlings require additional lighting . Daylight hours for seedlings should be at least 14 hours.
During the day, the seedlings should not be exposed to sunlight . They cause overheating, as a result of which young plants die.