Decorative camellia is considered a good gift for any occasion. Its beautiful, large flowers can not only lift your spirits on winter days, but will also become a unique addition to your home interior. Knowing the secrets of caring for and growing camellia at home, you can achieve its good growth and annual flowering.
Also, this wonderful plant, due to its decorative foliage and beautiful flowering, can be grown on a personal plot in regions with a warm climate. Camellia flower. The photo of the plant is striking in its beauty. Experts from the Agronom.guru portal will share with you the secrets of plant care and tell you how to cope with growing difficulties and diseases that are typical for the flower.
Camellia - tea flower for home decoration
What is camellia - a brief botanical information
The evergreen beautifully flowering camellia belongs to the Tea family. The plant is native to the tropics of the East and subtropics of Southeast Asia. In nature, the flower is a shrub or small tree with a loose crown growing up to several meters. They named it in honor of Camellus, who first discovered this plant and brought it to Europe from the Philippines.
The dark green leaves are round in shape and arranged singly or in pairs. The flowers are large and, depending on the variety, colored red, pink, snow-white or variegated. Flowering occurs in winter and lasts until mid-spring.
Camellia can bloom even in the winter season
Transfer
The best time for a planned camellia transplant is considered to be the moment when flowering has already completed and the buds of new leaves have not yet formed. It usually occurs in the spring.
The first transplant is done 2-3 weeks after purchase. This indoor plant can also be replanted during the flowering period.
The main thing is that after the transplant, return it to exactly the same conditions as before the procedure. The angle of incidence of light is especially important.
Botanist's opinion
The best way to transplant camellias is to transfer an earthen clod. It is allowed to destroy it only if there is a suspicion of root rot.
The root collar should not be deepened too much. It should be flush with the ground surface.
A young plant requires changing the pot every year. Grown-up specimens - once every 3 years.
An adult, heavily grown tree living in a tub should not be replanted. It is enough for him to change the top layer of soil (5-7 cm) annually.
Pot
To plant camellias, you need to use pots with large drainage holes.
The material of manufacture is not important. But for young bushes, ceramic containers are preferred, for adults - wooden tubs.
Each time a new pot is taken 2-3 cm larger than the previous one.
When choosing a pot for planting camellias, take into account how the plant was obtained.
If the flower is the result of rooting cuttings or layering, then a low container is suitable for it. Bushes grown from seeds have longer root systems and need tall, conical pots.
Priming
From store-bought formulations, you can purchase soil mixtures intended for azaleas or Japanese akadama.
The soil for camellia should be:
- slightly acidic (pH – 5.5);
- loose;
- heavy and nutritious.
The soil for camellias is prepared independently from peat, leaf and coniferous soil taken in equal proportions. Sand is added to them. It is taken 2 times less than other components.
Some gardeners mulch the soil after replanting the plant. Rotted linden leaves, sawdust, and bark are suitable for this.
What indoor and garden colors look like in the photo
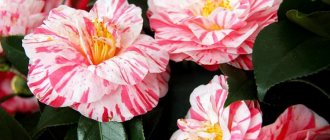
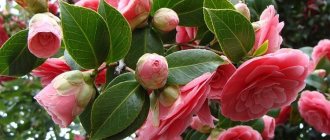
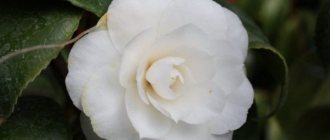
Camellia flowers are large, single, single or double. Their color can be varied: snow-white, scarlet, soft pink or variegated. The petals may have stains, spots or specks that smoothly transition from one color to another. In shape they resemble roses, peonies, anemones or carnations.
This flower in the interior is impossible not to notice
Catalog of indoor flowers with photos and their names. In a special publication on our portal we will talk in detail about indoor flowers. You will learn the types of indoor flowers, about fruit indoor flowers and get acquainted with the photo gallery.
Garden plant option
Determine the name of a garden flower from a photo. In a special publication on our portal we will talk in detail about garden flowers. You will learn about the types of garden flowers, perennials that winter in open ground and look at the photo gallery.
Features of varieties: mountain, Japanese, Chinese and Middlebury pink
Breeders have developed a large number of varieties and hybrids that are popular for growing at home and in the garden. The most common of them are presented below.
Camellia montana , or flower of the winter sun. This variety came from Okunawa Island. In nature it is a shrub reaching up to 5 m in height. Thin flexible branches are covered with red fibers. The leaf blade is wide and long, oval-shaped and dark green in color. The flowers are large, reaching up to 7 cm in diameter, have a white, red or pink color with an unforgettable aroma. Their color and shape depend on the type of mountain camellia.
Blooms in gardens and indoors in cool climates from November to March.
Japanese camellia . This species grows in Korean and Japanese forests as a shrub growing up to 13 m in height. Flowers can be single, double or semi-double depending on the species. Color of inflorescences: from white to all shades of scarlet and pink. The flowers are similar in shape to a rose, peony or anemone, but without a distinct aroma. They bloom from the axils of the leaves, forming a chic, beautifully flowering crown. Flowering occurs in late autumn and lasts until mid-spring. Each flower stays on the plant for up to 30 days. At home, Japanese camellia, with good care, grows up to 1 m. This variety has many types. The most common:
Alba Simplex
Pink perfection
Camellia Japonica Easter Morn
Debbie
Callifornia
Dream Girl
Chinese camellia , or bohea. This variety is known as the tea tree, the leaves of which are used to make black or green tea. In natural habitats it grows on mountain slopes, gorges and forests of China. The plant can reach several tens of meters in height. The leaves are large, ovoid, and when young they have a white waxy coating with a silver fluff. Long tea varieties are made from young leaves, and the flowers are used as an aromatic additive.
This variety is grown very rarely as a houseplant, as it requires proper care.
Camellia middlebury rosea . The rarest variety with soft pink flowers that bloom in mid-autumn. The inflorescences are large, double, odorless. The petals are neatly arranged in the form of tiles. Flowers fade gradually, while maintaining rich color. Thanks to this, the plant always looks neat and well-groomed.
Flowering begins in mid-November and continues until mid-March
Possible difficulties during cultivation
Due to improper care of camellia at home, the flower may lose its decorative effect. The consequences of the most common gardener mistakes are shown in the table.
| Problem | Probable Cause |
| Leaves turn brown or turn brown | Overflow |
| Leaves fall | Insufficient watering |
| Dry spots on leaves | Sunburn |
| The buds fell off | Changes in light or temperature Overflow and acidification of the soil |
| The leaves have withered | Lack of feeding |
How to care at home
Camellia is a very capricious plant, and if you do not know all the rules of care, the flower can quickly wither and die.
Air temperature and humidity
In order for the plant to delight with its flowering, it must be protected from drafts and sudden changes in temperature. In winter, the air temperature should be kept within +12°C. Therefore, it can be placed on an insulated loggia or balcony. In the spring-summer period, when the plant enters the active growth phase, the air temperature should be about +25°C. At the end of summer, when flower buds begin to form, it is reduced to +18°C.
Air humidity also plays an important role in plant care. Camellia prefers moist air, so install a humidifier next to the plant or pour wet moss or expanded clay into a tray. Also, the flower must be periodically sprayed with warm, settled water.
When spraying, water should not get on the buds, as this will lead to the dropping of buds and flowers.
High air temperature during the formation of buds will lead to their discarding
Location and lighting
For good camellia growth, bright, indirect light is needed. To do this, it is placed on the western or eastern side. In the open sun, the flower will suffer from excess light and begin to shed foliage and buds. And on the north side it will need additional lighting.
Mountain camellia can grow in full sun, while Japanese camellia prefers partial shade.
How to feed and water
This flower needs a lot of water, only after the top layer of soil has completely dried. Watering should be carried out with settled warm water strictly at the root. The best option for watering would be rain or melt water, since it contains those microelements that are so necessary for indoor plants. In winter, watering is reduced to avoid soil acidification. The first sign of souring is that the leaves turn brown and the buds fall off.
Before flowering, the soil in the pot should be slightly dry
In the spring, when intensive growth of young shoots begins, camellia needs feeding. For this purpose, complex fertilizers are suitable, which are specially designed for flowering indoor plants.
You need to dilute the concentrate twice as much as indicated in the instructions.
At the end of summer, when the plant begins to prepare for flowering, fertilizing is completely eliminated.
Camellia needs to be fertilized once every 10 days.
Which soil to choose
Camellia prefers acidic, well-drained and nutritious soil. Peat soil can be purchased at the store. And to make the soil more loose, you can add pine needles, perlite or crushed tree bark to it. You can increase acidity using citric or oxalic acid.
Camellia prefers light, permeable soil.
How to replant: step-by-step instructions with photos
A young tree must be replanted once a year. Adults – once every 4 years. In order not to damage the delicate root system, the plant is replanted using the transshipment method.
| Photo | Action |
| For annual flowering, an adult camellia needs to be replanted every 3-4 years. | |
| To make the plant feel comfortable, you need to take a larger pot. | |
| Place a 2-3 cm layer of drainage on the bottom of the pot. | |
| To avoid damaging the root system, remove the plant from the pot along with a lump of earth. | |
| Place the flower in the center of the prepared pot and fill the voids with nutritious soil. | |
| The soil can be purchased at the store; it should be nutritious, well-drained and permeable. | |
| After transplanting, compact the soil and place the pot in a warm, bright place. |
Replanting must be done carefully so as not to damage the root system.
Requirements for soil and planting site
In its natural habitat, the plant grows in light, sunlit forests. The same conditions must be provided to her in the garden. Camellias have the same requirements as rhododendrons, so they need humus and acidic soil and a shaded position.
The best place for garden camellia will be partial shade under trees. Shrubs should be carefully protected from gusty winds and direct sun - slightly shaded places, protected, for example, by a high hedge (thuja, cypress trees), are better suited. You can plant shrubs near the wall - eastern, western or southern. Without protection, gusty spring winds can tear off the plant's heavy buds.
For camellias, you need to choose areas where sunlight will not fall on the bush in the spring morning - this is due to the freezing of the buds at night and their rapid thawing when sunlight hits them in the morning; temperature changes are harmful to the buds.
Japanese camellias require soil with the following characteristics:
- slightly acidic (5.5-6.5 pH);
- humus, fertile;
- loosened;
- the soil should not be waterlogged, but it should not dry out either - you need to maintain a constant, moderate level of humidity.
You can prepare the soil by mixing compost, garden soil, clay soil, and sand in equal parts.
Unfortunately, camellias are very capricious and even sudden changes in temperature can harm them, so growing them in the garden is always fraught with considerable risks. Indoor plants can be taken outside in the warm season, but take care of gradual hardening and possible shelter under the roof in inclement weather.
Caring for a flower in the open ground
Nowadays, breeders have developed many varieties of garden camellia that grow well in open ground even in regions with harsh climates. But in order to achieve success in growing and see flowers on a garden plant, you need to put in a lot of effort and patience.
Soil preparation and planting
Growing camellias in the garden should begin with preparing the soil. Since garden soil is dense and does not allow water and air to pass through well, it needs to be slightly improved. To do this, make good drainage, acidify the soil and add peat, sand and compost. It is better to plant a flowering camellia in a permanent place, since at this time it is in a dormant period and, with the accumulation of strength, will tolerate transplantation much better.
How to properly transplant camellia into open ground:
- The purchased plant is carefully removed from the container, trying to preserve the earthen lump.
- When installing a plant in a hole, you need to make sure that the root collar is not too deep into the ground. But you shouldn’t leave it close to the surface of the earth, as there is a possibility that the plant will not survive the winter.
- After transplantation, the soil is compacted, watered and mulched.
- If several plants are planted, the distance between the holes should be at least 2 m.
Camellia is planted in a pre-diluted hole
Caring for garden camellia
Caring for camellia planted on a personal plot consists of timely watering, fertilizing and pruning.
Watering and fertilizing
Garden camellia is very demanding on water quality. You cannot water the shrub with tap water, as it contains a high lime content. In hot summers, the plant is watered 2-3 times a month. The first sign of a lack of moisture is the leaves drying out and falling off. In rainy summers, no watering is required.
Tree camellia is an ideal solution for landscape decoration
In the spring, during the period of active growth of young shoots, garden camellia needs to be fed twice a month. Feeding must be of high quality. Fertilizers intended for feeding azaleas are suitable for camellias.
The plant should not be overfed, as this will lead to intensive growth during the dormant period.
In the autumn, feeding is stopped, and the bushes begin to be prepared for wintering.
In regions with harsh climates, the plant is dug up and stored indoors
How to prune to form a crown
They begin to form the crown in the spring by pinching the shoots. This is necessary for better branching of the bush. In autumn, shoots are pruned to stimulate the growth of axillary buds.
With annual pruning, camellia turns into a beautiful flowering shrub.
Pruning is carried out with a sterile sharp instrument
Preparing for winter
If camellia grows in a region with harsh winters, it must be dug up and wintered in a room where the air temperature will not drop below +2°C. In regions with a mild climate, the plant is covered with breathable material.
Subtleties of care
Camellia is one of the plants that requires certain conditions to be successfully grown. Therefore, let's talk about how to grow camellia in city apartments and make it bloom. When you see a flowering plant on sale, you feel the desire to purchase a luxurious flower. But often such a purchase ends in the death of the plant after flowering ends.
Creating a comfortable temperature regime
The most important thing is to ensure temperature conditions, because for normal development a flower needs conditions close to natural. For flowering in winter, camellia is recommended to be kept at a temperature of 10-15 degrees. It can withstand slight sub-zero temperatures. It is impossible to maintain coolness in an apartment with central heating. But if you have a glazed, insulated loggia, balcony or cool veranda in a private house, then you can admire the flowering plant all winter. In summer, camellia prefers moderate temperatures in the range of 20-25 degrees.
Camellia is demanding on lighting, so with short daylight hours it is necessary to provide it with additional lighting. As a result, daylight hours should reach twelve to fourteen hours. When placing a flower on a window facing south, you need to take care to protect it from direct sunlight and moisturize it. The most suitable would be an eastern or western window, where the camellia is not threatened by the hot midday sun. On a window facing north, the plant shreds and stretches out.
This may be interesting: Diseases and pests of indoor Gerbera
Watering, moistening and fertilizing
Camellia is one of the flowers that begins to grow shoots in the spring. At the beginning of autumn, buds are laid and flowering occurs in winter. Therefore, watering and the application of mineral fertilizers must be organized taking into account the annual growth cycle. Camellia needs bottom watering through a tray, draining the remaining water after an hour and a half.
In the spring, when new shoots begin to grow, and in the summer, camellias need to be watered frequently and abundantly. But the soil should not be allowed to become waterlogged, because this will lead to rotting of the roots. In winter, watering is reduced to once a week. Camellias are harmed by an increase in calcium salts in the soil, so the water must be settled. You can use melted or boiled water. Sometimes it is recommended to add a small amount of vinegar or citric acid to the water to increase the acidity of the soil.
Camellia needs air humidification, especially if the pot with the plant remains in the apartment for the winter. Hot radiators dry out the air greatly, which can lead to buds and leaves falling off. Therefore, the foliage is periodically sprayed without moistening the soil. You can place the pot in a tray with damp expanded clay or moss. If possible, we recommend installing a humidifier, which will create a comfortable microclimate not only for the flower, but also for people.
In the spring, when young shoots begin to grow, you can start feeding camellias. To do this, use fertilizers for azaleas. The amount indicated on the package is halved. Fertilize no more than 1-2 times a month. In July, fertilization is stopped until next spring. When choosing fertilizers, you should pay attention to ensure that they do not contain calcium and magnesium. Excess calcium in the soil causes buds to fall off.
Crown formation
In order to give a compact shape and remove weak shoots, camellias are pruned. This procedure is performed at the end of flowering. After pruning, the plant produces new shoots more actively. Flower growers who have been growing camellia for many years already know how many shoots need to be left so as not to weaken the bush with abundant flowering.
By cutting shoots, you can form a bush or tree. After pruning, the cut of large woody branches is treated with garden varnish. It is permissible to trim shoots to half their length.
Important! During the formation of buds, we do not recommend rearranging or turning the pot, otherwise the plant may drop the buds.
How does it reproduce
Camellia can be propagated in two ways: cuttings and seeds.
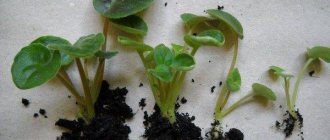
Propagation of camellia by cuttings: step-by-step instructions with photos
| Photo | Action |
| Camellia is best propagated by lignified cuttings, which are cut in mid-summer. The cutting must be at least 8 cm long and have 5 leaves. Before rooting, planting material must be treated with a root formation stimulator. | |
| The seedling is placed in prepared soil consisting of moistened sand and peat in a 1:1 ratio. Before it is buried in the soil, it must be treated with a phytohormone. This is necessary for better soil heating. | |
| For rapid rooting, the air temperature must be more than +25°C. To maintain a favorable microclimate, place a plastic bag or glass dome on the pot with the seedling. Under such conditions, the cuttings will germinate in 60 days. |
Sowing seeds
The seed propagation method is simple, effective, but time consuming. Seeds are sown in a moist substrate consisting of sand and peat, the container is covered with polyethylene and put in a warm, bright place for germination. The duration of this process depends on the conditions, and it can last from several months to a year.
As soon as the first shoots appear, the film is removed, the seedlings are watered and planted. Each plant is planted in separate pots with a volume of at least 7 cm. Camellia grown from seeds is more adapted to sudden temperature changes and grows much faster.
A plant grown from seeds begins to bloom in the 5th year.
The ripe seed pod is dark brown in color.
Reproduction
Camellia propagation is carried out in several ways:
- seeds;
- cuttings;
- layering;
- vaccination.
Growing from seeds
Camellia seeds
Seeds appear on a faded bush in the fall. If you want to start growing from seeds, they must be planted soon after collection, before they lose their viability. Unfortunately, in apartment conditions, camellia practically does not produce seeds. They are obtained either in natural conditions or in greenhouses. Therefore, you can buy seeds in flower shops, but there is no guarantee that they will sprout. Additionally, if the plant is grown from the seeds of a hybrid plant, it may not inherit all the traits and the flowers will look different from the parent. And the representative of the species, Camellia sinensis, transmits its characteristics when propagated by seeds.
Let's look at the steps for planting seeds:
- Ripe seeds should be dark brown, almost black. The main thing is that the purchased seeds do not dry out, so before planting they can be put in a bag and placed in the refrigerator. Before planting, the seeds are dipped in water. If they surface, it is not recommended to sow them.
- Before planting, it is enough to soak fresh seeds in water overnight. We recommend scarifying dry seeds to speed up germination. This can be done in two ways. The first is to cut or pierce the shell of each seed, being careful not to damage the core. The second method is to alternately immerse it several times for a few seconds, first in boiling water, then in cold water.
- A planting mixture is prepared from equal parts of peat and sand. You can take soil for azaleas and camellias. The seeds are placed in the soil, slightly pressing. Place each seed with the “eye” from which the root will appear, down or to the side. You can sprinkle a thin layer of sand or vermiculite on top.
- Propagation by seeds requires careful adherence to temperature conditions. The pot is placed in a place with a temperature of 23 degrees. It is also covered with glass and cellophane to maintain humidity. It is also necessary to provide slight shading from sunlight.
- It will take several months for the seeds to germinate. After the second leaves appear on the sprouts, they are planted in separate pots, picking. Camellia grown from seeds is characterized by good adaptability to new conditions. Flowering of a young plant occurs after approximately five to eight years.
Planting seeds
Growing from cuttings
It is easier to grow a flowering plant using cuttings, which are taken in late May - early summer. At this time, the shoots turn brown and are ready for cuttings.
You cannot take green shoots, as they will not take root. It is worth paying attention to ensure that the growth bud is well developed. The soil is taken the same as for camellia seeds - a mixture of peat and sand in equal proportions.
Rooted cuttings
Before planting, it is recommended that the end of the shoot, which goes deep into the ground, be dipped wet in a rooting powder, for example, Kornevin. There are other rooting agents on the market, so don’t stop at Kornevin only. The soil should be moist, and it is recommended to cover the planted cuttings with film or a jar to maintain the humidity level. Four months are enough for cuttings to root. During the rooting period, it is necessary to maintain a constant temperature of 23 degrees. At higher temperatures, leaf growth may begin, and the root system will be delayed in development, and the sprout may die. Flowering occurs after two years.
This may be interesting: Caring for Clivia at home
Reproduction by offspring
Root shoots that appear in an adult plant and have reached a sufficient size, when transplanted, are separated from the parent bush and planted in a separate pot. This is one of the simplest methods of reproduction, but you have to wait a long time for the offspring to appear and develop.
Reproduction by grafting
Camellia grafting is performed using two methods:
- butt;
- splitting
The butt drive makes it possible to achieve propagation for camellia species that do not root well from cuttings. The root system of the scion is preserved until its complete survival.
Reproduction by grafting
Camellia is also grafted using a new method specially developed for it. A cutting is taken for rooting and a shoot grown from seeds. The shoot must be at least five centimeters. Its root is split and cut off at the level of the cotyledons. The cut is split and the tip of the cutting is inserted into it. Rooting of cuttings is carried out in pots in soil consisting of peat and sand (1:1 ratio). The pot is covered with cellophane and a jar.
Diseases and pests
When growing camellia, gardeners often encounter some problems. The most important of them are diseases and pests.
Yellow spot . The leaf blade is covered with yellow spots of irregular shape. At the initial stage of the disease, damaged leaves are removed and the plant is quarantined.
Phyllostictyosis. Brown spots of various shapes appear on the leaves. This disease can appear with high air humidity. For the plant to recover, it is necessary to regulate the humidity, remove all affected leaves, and before the onset of cold weather, the plant is treated with copper sulfate.
Weevil-mower. This insect can be recognized by its leaves. The edges of the leaf plate are gnawed, and the plate itself loses color over time, dries out and falls off. The insect lays larvae in the ground. Adults are the most dangerous, as they very quickly damage the root system, which leads to the death of the plant. Treatment consists of treating the flower with a solution of “Fly-eater” or “Medvedka”.
Shield. Damages young shoots, forming golden-brown tubercles on them. You can fight the pest by wiping the leaves with kerosene.
Mite. The insect appears when growing shrubs in a room with high temperature and low air humidity. When infected by this insect, the leaf blade becomes covered with yellow spots, which quickly grow without treatment. You can get rid of ticks using insecticides.
How to get rid of midges in indoor flowers using simple methods. In a special publication on our portal, we will talk in detail about how to get rid of pests in indoor plants. You will learn the reasons for their appearance, the types of midges and their signs and measures to prevent the appearance of midges.
Tips and reviews
The most serious problem of a plant is most often represented by root rot , which is formed as a result of the negative effects of too low a temperature or waterlogging of the soil in a flower pot. To cure Japanese camellia, an urgent transplantation into a high-quality, breathable soil substrate will be required, after which it is imperative to reduce irrigation activities.
The appearance of brown spots on the foliage may be a sign of phyllosticosis. The disease is a consequence of increased levels of air humidity, and for treatment, the foliage is treated with a solution based on copper sulfate. Affected foliage should be completely removed, and the humidity in the room should be reduced to comfortable levels.
Mistakes of novice gardeners
- Camellia sheds its leaves - very dry soil. Watering time is determined by the condition of the soil; if the soil has dried out by 5 cm, then the plant needs moisture.
- The leaf blade becomes brown, and unopened buds fall off - the shrub is overflowing. In this case, the plant is transplanted into a new substrate.
- The leaves turn brown due to sunburn. The flower grows best on the east or west side.
A capricious plant - camellia
Camellia is an ornamental plant with a long flowering period. It will perfectly complement both your home interior and will be indispensable in landscape decor. In order for a shrub to delight with its flowering, it is necessary to surround it with care and love.
Planting camellias in the garden
The shrub has a reputation for being a finicky plant, so successfully growing camellia japonica in climates with cold winters largely depends on the choice of location.
The shrub does not tolerate midday sun well, preferring semi-shaded growing conditions.
Autumn-blooming variety “Snowfall”
Northeast and northwest exposures, sheltered from the wind by a wall, fence or tall trees, are ideal for planting camellias, as cold winter winds increase the risk of shoots freezing and drying out leaves when the ground is frozen and unable to replenish moisture to the roots.
Spring planting of trees and shrubs
Research has shown that camellias are more susceptible to winter damage when their dormancy is disturbed by fluctuating winter temperatures.
This can happen not only with open southern exposure, but also with eastern exposure, when the morning sun suddenly warms up the plant after a cold night.
"Korean Fire"
Camellias also tolerate winter weather better when they are planted at higher elevations rather than in a low-lying “frost pocket” where cold air settles in the winter.
Spring planting of camellias is considered a better time than autumn, as it gives young seedlings more time to gain strength before the stress of the first cold weather. However, seedlings with a closed root system can be planted throughout the season.
It is not recommended to plant where tall trees with shallow root systems will compete with camellias for nutrients and water.
The shrub loves rich, well-drained, slightly acidic and moderately moist soil. Stagnant water does not tolerate well.
Planting a camellia seedling
Before planting, it is recommended to mix the soil from the planting hole with compost, leaf soil and two parts of peat. Some peat moss, rotted leaves and shredded bark will improve drainage and soil fertility.
A drainage layer of broken brick or large expanded clay, which is laid at the bottom of the pit, is required.
A 10 cm layer of earth is poured on top. The root ball is placed in the hole, covered with soil, compacted and watered abundantly. The root collar is left at ground level.
Watering after planting
When growing dwarf varieties in pots, add about 50% organic matter mixed with 50% potting soil and make sure the pot has good drainage holes.
