The image is finally adjusted and the background is created. Drawing from life is almost finished. If the flower is on the windowsill, but the artist is not satisfied with this, then you can draw a table on which the shadow of the object will lie. This will enhance the effect. There will be a white background on both sides of the plant, but you should not paint it over with rough black lines, as beginners do - this will spoil the perception of the drawing.
GCD for drawing on the topic “Our indoor plants”
Yulia Titova
GCD for drawing on the topic “Our indoor plants”
GCD “Artistic and aesthetic development (Drawing)” on the topic “
Our indoor plants
"(drawing from life)
Program content : - Teach children to convey in a drawing the characteristic features of a plant group (structure and direction of the stem, leaves, shape of a flower pot;
- develop the ability to see tonal relationships (light and dark places) and convey them in the drawing by increasing or decreasing the pressure on the pencil;
- develop small hand movements (when depicting small parts of a plant);
- to develop the ability to regulate the drawing movement of force, to successfully place it on the sheet.
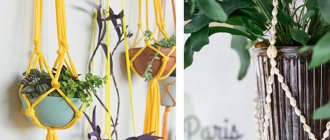
Materials : indoor plant (Geranium - Pelargonium, Peperomia, Crassula (crassula or Money tree, Chlorophytum, Papyrus indoors (Swampweed), wax crayons, felt-tip pens, colored pencils, albums, pencil, eraser, samples of drawings on the board.
Methodology: Examine indoor plants, clarify their names, method of care (watering, sun); compare plants with each other, note the structure and color characteristics of each plant.
GCD move
V. -Good afternoon, guys. (Children say hello). Today we will draw our indoor plants. You often watch them, look after them and know their names. Yes, flowers also have names - these are their names.
V.: Guys, why do we need plants? (if children answer incompletely or incorrectly, the teacher tells them)
V .: Plants absorb harmful substances, create comfort in the home and in the group, and the green color also has a pleasant effect on the eyes, because looking at the green color the eyes relax. Another plant is a “Home Doctor”, they can be used for treatment, for example, Aloe, Colonchoe (for the runny nose, and aloe also treats wounds)
Today we will draw them.
(the teacher puts flowers in front of the children)
V .: Guys, please note that all the flowers in our group are different.
There are flowers that look like palm trees - this is Papyrus indoors
, this plant has a long stem and on the top of the head, like a “palm”, long, thin leaves open in the form of a “star”, and there is a plant whose leaves are plump and round - this is Crassula or
Crassula,
this flower is also popularly called “
Money tree”
“As the flower grows, the stem eventually becomes covered with a crust like a tree and the leaves look like coins.
Here is another interesting plant - Peperomia
, this plant has round-shaped leaves, smooth and look at the color, they are the darkest - Dark green. Pay attention to this when you draw it. We have Geranium in our group.
V.: Guys, what’s special about this flower? (yes, that’s right, it has curly leaves, they are rough to the touch and when you touch the plant it smells. Geranium is scientifically called Pelargonium
.
V.: Guys, choose any of the plants and draw it. Draw on the entire sheet. (Children do their own drawing of their choice)
Our works
V.: We got very beautiful plants.
Literature : Komarova T. S. Visual activities in kindergarten: Preparatory group for school. - M.: MOSAIC-SYNTHESIS, 2016. - 112 p. (pp. 43-43)
Photo report “Indoor plants” Photo report “Indoor plants” Educator: Vladimova Elena Stanislavovna Indoor plants for children are the first experience of caring for something.
Games on the lexical topic “Indoor plants” PALMA Goal. Tighten and relax alternately the arm muscles in the hands, elbows and shoulders. Progress of the game. “A big, big palm tree has grown”: right.
Summary of an open lesson in a secondary physiological group on the topic “Indoor Plants” Goal: To form a comprehensive understanding of indoor plants, their benefits and structure. Objectives: Learn to distinguish indoor plants by...
Lapbook “Indoor Plants” Children grow up, begin to ask questions, and become interested in the life of plants. There was a need to replenish the RPPS with something new and interesting. NOD for cognitive development “Indoor plants” senior group NOD for cognitive development “Indoor plants” senior group Educator: Elena Stanislavovna Vladimova Goal: to educate children.
Project “Indoor Plants” Environmental project in the middle group “Indoor Plants” Group “Snail” Educator: Kulikova N, R. Theme: Houseplants are ours.
Project “Indoor Plants” Introduction Project theme: “Indoor Plants” Relevance The use of indoor plants for the formation of environmental concepts is advisable.
Lesson summary “Indoor plants are our friends” Topic: “Indoor plants are our friends” Purpose. To consolidate children's ideas about indoor plants (impatiens, Chinese roses) and them.
Drawing lesson “Indoor plants” PLANTS NEAR US. DRAWING FROM LIFE “HOUSEPLANT” Integration of educational areas: “Cognition”, “Communication”, “Health”.
Drawing a diagram of a home flower
Let's start with a small flower pot.
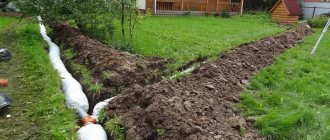
Then take a tree branch, the size of which is 3-5 times higher than the pot (Fig. 1). It is better if this branch is thick, old and easily broken. Such a branch can be selected from dead wood or old dead tree branches. Break off all the small branches and leave only one core of a branch approximately the same as in Fig. 1. Fill a pot with earth or sand and stick a branch into it. Place the pot with the branch on the windowsill or on the table. If the pot is on the table, then you need to make a light background (paper or sheet) so that the pot and branch stand out well against the light background. This will be our nature. Figure 1 — Branch for constructing a drawing diagram
Next, you need to choose a place for the chair on which you will sit and work. It is best to position yourself 3 m from the object you took. Sit in a position that is comfortable for you and that the paper you are going to draw on is well lit. How to place a folder, hold a pencil or charcoal has already been discussed enough in the article about.
Take a closer look at the so-called “flower in a pot” and estimate by eye how you can arrange the future drawing on paper. The entire pattern of the pot and branch should occupy at least 4/5 of the height of the leaf. The drawing should be in the middle, and there should be some space (margins) at the top, bottom and sides.
To find a suitable place for your future drawing, draw a light vertical line on which, by eye, mark where the bottom of the pot and the top of the branch will be (take the pot and branch as a single whole). Of course, this may not be possible right away, but you will make the necessary corrections, and thus the line with the top and bottom marks will determine for you the location of the future drawing.
Now estimate by eye: what part of this line the pot occupies (the height of the pot). Beginners usually greatly exaggerate the size of the pot because it is massive, heavy and has a very different character from the branch. But we have the opportunity to check the size of the pot and branch by measuring with a pencil. After measuring the height of the pot and comparing it with the height of the branch, we make corrections by eye (Fig. 2.1). The check, especially at first, needs to be done more than once. This first operation, like the first exercise with the circuit, is the most difficult, but at the same time the most decisive. If this first task is solved correctly, then it will be easier to work further. If a mistake was made, it will inevitably lead to a number of further mistakes.
Figure 2 - Stages of drawing an indoor flower in a pot
The next task is to build a diagram of the pot and branch
.
You determine by eye the width of the pot at the top using the height of the pot. First you need to determine which is greater: the height of the pot or the width, and then how much greater, and mark the width of the pot in your drawing. Having noted, measure with a pencil and make corrections. Use the same exact method to find the width of the base of the pot. As a result, you get a diagram like in Figure 2.2. Having checked the diagram of the pot, we move on to building a branch
.
A branch has a main trunk and branches. The trunk is not straight, but you will determine its shape a little later. In this case, again, by eye, try to find the place where the main branch comes from, and roughly (simplified) outline it. Check first by eye, and then by measuring with a pencil the dimensions of the trunk to the branch, then the dimensions of the trunk from the branch to the top of the trunk and, finally, the dimensions of the depicted branch. All this is by comparison. You do the same with the second and the remaining largest branches (Fig. 2.3).
Having outlined the diagram of the pot and the branch, once again check the ratio of the height of the pot to the height of the branch, as well as the width of the pot to the side branches, checking that you outline the main bends of the trunk and the largest branches. If the diagram is correct, then 90% of the work has already been done. Moreover, the most difficult and most important thing has been done (Fig. 2.4). Next, if you find it necessary, outline the most necessary details.
The work, as you can see, is difficult and painstaking, requiring great perseverance. You will get tired of this work more than once. Having finished the diagram, you need to put the drawing aside, not look at it for a while, and then, putting it in place, look at it with rested eyes.
This exercise is more convenient and easier to perform not with a pencil, but with charcoal.
I'm finishing up the foliage
First of all, I’ll make it spherical, for this I select the foliage with the “ Rectangular Selection ” tool (M)
and transform it (Ctrl+T), compressing it vertically. Deselect (Ctrl+D). The foliage is rounder, but now I don't like the bald spots on the edges. I cut out several leaves from the part where the crown is clearly visible, and transforming them freely, I close the holes.
3. I don't like that the tree grows off-center. the Straight Line Lasso Tool (L)
(or “Feather”, whichever is more convenient) select the crown and trunk and copy the selected area to a new layer (Ctrl+J). For convenience, I rename the layer that appears to “Crown”, and the layer below it to “Pot”.
I move the “Crown” to the “Rectangular Selection” tool and delete the crown. Next, I will edit the pot and foliage layers separately. Using the Stamp (S), I erase the trunk on the layer with the pot.
How to draw a hibiscus flower with a pencil, master class step by step for beginners with photos
Hibiscus is one of the most beautiful flowers that is not at all difficult to draw with a pencil. It is a symbol of happiness and peace, and therefore makes a great decoration for a greeting card, poster or holiday design. Learn more about how to draw a hibiscus flower with a pencil in a step-by-step master class with photos for beginners.
Necessary materials for drawing a hibiscus flower with a pencil for beginners
- paper
- simple pencil
- colour pencils
- eraser
Instructions on how to draw a hibiscus flower step by step with a pencil for beginners
- The circle marks the basis for the bud of our flower. We also make a sketch for the trunk and stamen, as shown in the photo below.
- Now inside the large circle we make a light sketch of a smaller circle. Then we draw 5 petals with wavy edges. We erase the inner circle with an eraser and draw the stamen in more detail.
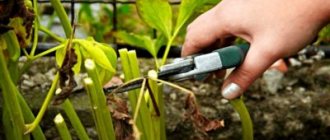
- Let's move on to drawing the leaves. We also sketch a small bud just below the main flower.
- At the next stage, we draw the stem and leaves in more detail. Hibiscus leaves are shaped like an oblong triangle with jagged edges. The leaves also have pronounced veins.
- Now, using colored pencils, we draw all the details of the flower. Using green color we decorate the stem, leaves and small bud. And with a light lilac pencil we draw the details of the large bud.
- Let's move on to coloring: first we decorate the bud with a light lilac color, and draw the stamen with a yellow pencil.
- Then paint the bud dark pink over the lilac, which will allow you to get a shade closer to the natural shade of the flower. Using dark blue we add depth to the bud.
- All that remains is to color the stem and leaves of the flower with a light green pencil and our hibiscus is ready!
Putting the potty in order
1. First, I erase and correct the bottom : I create an elliptical selection at the bottom of the pot.
Brush tool (B) with 100% opacity and hard edges, with the “ Brush ” tool active, use an eyedropper (or click while holding Alt on a sample of the desired color) to select a color from the pot, and paint over the hole at the bottom of the pot. In principle, at this stage the color is not important, it can even be black, I just find it more convenient when the colors are closer to the main range. I invert the selection (Shift+Ctrl+I) and use a hard eraser (E) to erase the edges of the pot that extend beyond the selection area. I remove the selection area (Ctrl+D).
2. the top of the pot in the same way : I create an elliptical selection, along the contour as close as possible to the top edge of the pot, fill in where there is not enough fill and erase the excess. I invert the selection again (Shift+Ctrl+I) and copy the selected area to a new layer (Ctrl+J). I name the new layer “Top edge of the pot” and duplicate it again. For the “Top edge of the pot” layer, using an elliptical selection, I cut out the center so that only the horizontal border remains, and rename the duplicate to “Earth”, drag it in the layers panel under the “Top edge” layer and erase the pot with an eraser, leaving only the soil.
3. I select the side of the top edge and copy it to a new layer, placing it under the “Top Edge of Pot” layer and calling it “Top Edge Side.”
When it is necessary?
There are a sufficient number of reasons that make decorating pots desirable, and often the only correct decision. In some cases, a few spectacular touches are enough to transform the selected containers, while in others, product owners have to work hard.
Practice shows that the solution in question is most relevant for the following situations:
- the appearance of the pots used does not match well with the decorative features of the plants in them;
- containers do not attract due attention or, conversely, are overly bright and do not fit into the more moderate interior of the room;
- the pots are very worn, and therefore their appearance is far from ideal;
- the containers used have noticeable defects (for example, chips or deeply ingrained dirt);
- the plant owner likes exclusive designer pots, but their cost seems too high to him;
- the desire to create a decor that is characterized by maximum originality;
- the desire to bring several stylish and spectacular details into the interior of the room, for which flower pots were chosen.
Editing the color of the pot
One Pixel Horizontal Line Tool
Select the area closer to the top edge of the pot and copy the selection to a new layer (Ctrl+J). Transform (Ctrl+T) the copied layer so that it overlaps the entire pot.
This will be the new color of the pot. But the resulting color has clearly defined vertical stripes, so I blur it using Gaussian (Filter-Blur-Gaussian Blur, choose the blur radius so that the vertical stripes are not visible).
To simulate a slight narrowing, I transform the new layer in perspective, close to the contours of the pot. New layer in Clipping Mask mode, for this, holding Ctrl+Alt in the “Layers” panel, move the mouse cursor between the color layer and the pot layer. If you do everything correctly, the cursor will take the form of a square with a down-click arrow, the top layer is hidden along the contour of the pot, and the color itself has become much nicer.
Decoupage mood
How to plant a cactus so that it takes root quickly
I don’t know who came up with this technique, but he was definitely a genius. Judge for yourself: thanks to simple manipulations with paper and glue, ordinary things turn into non-trivial products.
According to craftswomen who have mastered this technique, decoupage is a chance to give a second life to your favorite things. And indeed it is! Moreover, you can use not only napkins, but also fabric.
Don't be afraid to take the first step. As practice shows, this decoration technique is easy to master. But there is also a “side effect” - after the first successful experience, an irresistible desire arises to transform everything and everyone!
It's hard to resist temptation when so many great ideas have not yet been tried. Perhaps these pots will fit perfectly into the interior of the living room.
When your creation is ready, do not forget to coat it with varnish so that the design is not afraid of water, dirt and sun.
You can also try to create a retro pot. Pots stylized as antiques must have some minor flaws - rust stains, abrasions, scratches, cracks and other traces supposedly left by time. It turns out that such original decor is not difficult to make. Interesting, are you ready to try? Then the theory will come in handy: the crackle technique is described in detail in the material Renewing old furniture. The charm of cracks.
An interesting trend in decoupage of pots is the use of photographs. You can, of course, frame the pictures and hang them beautifully on the wall. But it’s much more original on a flowerpot!
Restoring pot parts
I turn off the visibility of the “Color” layer and create an elliptical selection at the level of the protrusion at the top. I copy the selected area to a new layer. I call it “shadow”. I select the resulting layer (Ctrl+click on the layer icon), activate the “ Selection ” tool (M) and move the selected area slightly up to the distance I need. I delete the selected area.
I move the selection down about half of the rim and use the Dodge (O) to lighten the top part, invert the selection and darken the bottom part of the rim.
I remove the selection, erase the edges a little with a soft eraser and transform them under the protrusions of the pot. I use a Gaussian blur, reduce the fill to 50% and apply a clipping mask to the layer.
I duplicate the layer and transform it for the bottom protrusion. I reduce the fill to 30% and apply a clipping mask to the layer. We got protrusions on the pot.
I emphasize the details of the barrel
Using the “Hard Edge Brush” tool in black, I draw cracks on the bark, switch it to clipping mask mode, and blur it a little using Gaussian. Change the blending mode to “Linear Burn” and reduce the fill to 15-20%.
I add volume: I create a new layer, switch it to clipping mask mode and use a black brush to paint shadows in the Multiply blending mode with a fill of 35%, create another layer, switch it again to clipping mask mode and use a white brush to paint light highlights in the mode overlay "Overlay" (Overlay) with a fill of 40%.
Materials and tools
Professionals use a simple pencil to create realistic paintings. The advantage of redrawing live plants is that you can carefully view the detail of the object. To draw flowers in a pot, like the masters, you will need the following equipment:
- Pencils of different hardness, ranging from light graphites to dark ones.
- Pen with black paste.
- A nag for erasing unnecessary lines.
- Material for rubbing out hatching.
- Landscape sheet with high density A4 or A5.
- Ruler.
For a beginner to draw flowers, it is better to choose a simple object to redraw.
Adding volume to foliage
1. I add saturation to the crown - I create a new one above the “Crown” layer, switch it to clipping mask mode and fill it with a more saturated green color. I erase the layer in the area of the barrel. Change the blending mode to “Overlay” (Overlay) with a fill of 40%. The foliage became richer, but at the same time the volume was lost.
2. I add volume using the same method as when adding volume to the trunk.
3. I combine the crown and highlights layers and sharpen the crown: Duplicate the crown layer and apply the High Pass filter to it (Filter-Other-Color Contrast). I choose the radius so that the contours of the foliage begin to appear and change the blending mode to “Overlay”.
13. I return to the pot - now, compared to the foliage, the pot is “cluttered” - it looks less contrasting and detailed.
I combine the elements of the pot (except the soil) into one and add highlights using the Lasso tool, create an area of highlights in the required places, fill it with white, switch it to clipping mask mode and erase the unnecessary area with an eraser. Change the blending mode to “Overlay” (Overlay) with a fill of 30%.
I'll add flowers on the tree
I cut out a suitable flower, and I don’t really pay attention to the borders of the flower, if it is on a green background, I place it in a document with a plant and adjust it to the desired size; I use the leaves as a guide; they should be approximately the same size (although this is not necessary). I place flowers in an arbitrary number, but I make sure that the direction of growth of the leaves coincides with the direction of growth of the flowers - then the flowers will seem more natural. Using a black brush in the blending mode “Multiply” with a fill of 35%, I draw a shadow under the flowers and combine the flowers with the crown.
Perfect drawing “Flower in a vase” with watercolors
What is needed to create the perfect image with watercolors “Flower in a Vase”
- watercolor paper
- honey watercolor paints
- simple soft pencil
- eraser
- synthetic brush No. 5 and No. 6
- glass of water
How to correctly draw a picture with watercolors “Flower in a Vase”
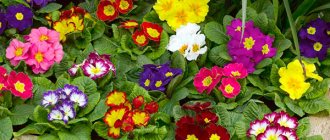
- Place a sheet of watercolor paper vertically and sketch out a sketch of tulips. Don't draw details. Only contours. Make sure to keep the lines thin and light, otherwise they will be difficult to erase.
Use lilac paint to fill in the buds. Highlight the shadows with darker shades.
Using dark green and swamp watercolors, paint the shadow in the tulip foliage. Mix green and black and add flower stems.
Mix lilac with burgundy for the main part of the buds. Draw the bases of unblown buds pink-orange, and the bases of bloomed buds swamp green.
Use pale green, lightly watercolored watercolor to outline the leaves of the plant.
Use a thin brush and brown paint to outline the tips of the leaves.
Return to the flowers. Using clean water, blur the light part of the buds to obtain smooth transitions.
Give foliage contrast and richness. To do this, mix different shades of dark green and brown and draw shadows in the recesses. Use the darkest color to draw the outlines of the leaves.
Outline the buds with dark burgundy. And give pale blue colors more realism.
To make the drawing more saturated, paint the convex parts of the flowers with a blue-lilac tint.
Using thinned blue watercolor, draw a soft horizon line. Start filling the vase with different shades of the previously used flowers. You should not choose colors that have not previously appeared in the drawing.
Give the vase some relief by highlighting the shadow with a rich color and the light with a pale color. Outline the vessel with a black outline.
Fill the background with blue with plenty of clean water.
Draw the gray shadow of the vase on the plane. Let the illustration dry completely. Now the perfect watercolor painting “Flower in a Vase” is completely completed.
Adding chiaroscuro
Judging by the light spot on the crown, the light source is located in front of the flower, slightly above and to the left of the center, which means there should also be light on the upper edge of the pot, and the lower part should be darkened. I display this: on a new layer with a soft white brush I paint a highlight, change the blending mode to “Overlay” with a fill of 50-60% and with an eraser with soft edges I erase everything unnecessary.
I create a new layer, set it to clipping mask mode and use a black brush to paint a shadow on the sides and bottom of the pot. Change the blending mode to “Multiply” and reduce the fill to 35%.
I create another layer, shade the edges, blend mode “Linear Burn”, fill to 10-15%.
Applying highlights to the horizontal edge of the pot
I create a new layer above the “color side top” layer, use the Lasso tool to select the highlight area, fill it with white, deselect it and set the layer to clipping mask mode. I blur it with a Gaussian blur so that the clear edges of the transition are not visible and change the blending mode to “Screen” with a fill of 60-70%.
You also need to add highlights to the edges of the pot, they are the brightest there. On a new layer, I create a selected area based on the top edge (Ctrl+click on the layer icon), fill the selected area with white. I activate the Selection Tool (M) and move the area a little up and to the right. I delete the selected area (Delete) and unselect it, the result is a white rim around the edge of the pot. I erase the edges a little with a soft eraser. I reduce the fill to 60%. I duplicate the layer and add a little Gaussian blur to soften the sharp edges. Change the blending mode to “Overlay” (Overlay), fill 60%.
I duplicate two layers of highlights along the contour and move them to the lower border of the upper edge of the pot, remove the upper rim and, for a layer with a clear border, reduce the fill to 20% so that the highlight is not too sharp.