After all, agave is bred not for beauty, but for home treatment and skin care (women will understand). But if you already have such a green pet, there is no need to purchase new ones. Even a child can cope with aloe propagation!
I’ll tell you in the article how this is done and what methods exist for this.
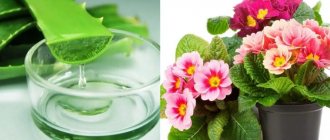
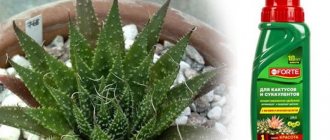
Home doctor - aloe
Mentions of this culture are found in the works of famous healers - Paracelsus, Hippocrates, Avicenna. Cleopatra also recognized the healing power of the humble flower.
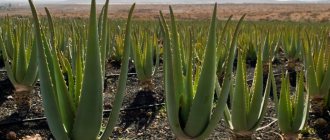
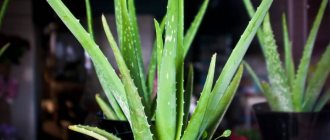
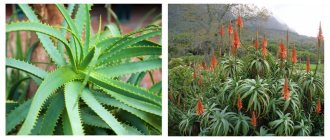
In the natural environment, aloe grows in Africa and the Arabian Peninsula. This representative of the Asphodelaceae family includes more than 550 species, of which aloe vera, arborescent, variegated, spinous and fan have gained wide popularity as indoor plants.
A hot climate and dry air are familiar to tropical trees. In addition, it is well adapted to dry, poor soils of a clay or sandy nature. Therefore, at home, the agave lives happily ever after.
“In the wild,” the succulent captures new areas with the help of self-seeding and root layering (children). Indoor specimens are also propagated by leaves, cuttings and tops. The convenience of one method or another depends on the availability of time, the required number of plants and the type of aloe.
The plant can be propagated all year round, but the optimal time is the end of spring and the first two summer months.
Best time to breed
Each plant, regardless of its type and variety, has periods of active growth and dormancy. Aloe can be replanted at any time, but it is better to do it in the spring and early summer months.
This is explained by increased growth activity, which leads to rapid adaptation to the new soil. As a result, the shoots take root faster than in winter.
It is also noted that it is possible to maintain a suitable temperature in the room in the summer, which is quite problematic to ensure in the winter.
Preparing for aloe propagation
Vermiculite gives the soil looseness and improves its moisture capacity
To grow aloe at home you will need:
- A container with drainage holes, at least 10-15 centimeters in diameter and the same depth. If you plan to separate the children without roots, you should also stock up on a container of water for their germination.
- Soil mixture. The easiest way is to buy soil intended for succulents at a flower shop. But you can also prepare the mixture yourself (I’ll share the recipe a little later).
- Trowel.
- Sharp pruning shears or knife.
- Clean water for irrigation.
- Root formation stimulator - Zircon, Kornevin, Heteroauxin, Etamon, Ribav-Extra or any other analogue.
- Vodka or a strong solution of potassium permanganate to disinfect instruments.
This list is comprehensive—not all items on the list may be needed for a particular method. Therefore, it is important to carefully study the chosen technique in order to prepare only the essentials.
If the planting container is not new, it must be thoroughly disinfected. A ceramic vessel can be calcined in the oven for 10-15 minutes. Plastic containers are simply washed thoroughly with water and laundry soap and then rinsed. And clay pots can be soaked in a two percent solution of superphosphate or copper sulfate. By the way, clay products can also be treated with heat, but only place them in a cold oven, and only then turn on the heat.
The soil for aloe should be crumbly, moderately fertile, neutral or slightly acidic (with a pH of 5.5 to 7). To make such a mixture, take 2 parts of garden or turf soil, one part of sand and one part of compost or humus.
For each liter add 2-3 teaspoons of crushed gravel, 2-3 teaspoons of charcoal powder and 30-50 grams of wood ash. These additions are desirable, but not required.
Advice. To fluff up the soil, you can use perlite or vermiculite instead of gravel and coal.
What does that require
The breeding process can last for several days, so you should thoroughly prepare for this. This will help in the rapid adaptation of the planted shoot and in the further growth of the plant.
Materials and tools
In advance, flower growers prepare the tools and materials that will be required for the work. It all depends on the method of propagation of the plant. Depending on the situation and capabilities, the following tools and materials will be required:
- A new pot for planting sprouts - you may need glass jars with water and other containers in which the babies will be stored.
- Soil - it is better to purchase ready-made soil. You can make it yourself by mixing certain components, which will be listed below.
- A spatula for digging up sprouts and subsequent planting.
- A utility knife used to cut leaves or shoots.
- Various root treatment products are growth stimulants.
How to propagate aloe: 5 proven methods
Leaf
To get a new aloe plant from a leaf, you need to do the following:
- Disinfect a knife or pruning shears with strong alcohol, a lighter or a raspberry solution of potassium permanganate.
- Select leaves that are at least 8 centimeters long, without spots, yellowing or signs of wilting. They are usually located in the lower tier of the plant. At the same time, it is recommended not to take more than 2-3 leaves from the plant at a time, so as not to excessively weaken the bush.
- The leaves are removed as close to the base as possible, the knife is held obliquely.
- Place the separated parts on gauze or a napkin and place in a dark closet for 1-3 days. This is necessary so that a thin transparent film forms on the cut. If she has not appeared during this time, wait another 1-2 days.
- Treat the leaves with an antiseptic: crushed charcoal or activated carbon, ash.
- Plant them with a depth of 3-4 centimeters in containers with a diameter of 10-15 centimeters.
- Place the container in a warm place with indirect sunlight. For example, during the rooting period, you can stick a newspaper on the window. The bowl with seedlings is watered every day, and the leaves are sprayed.
On a note. Some gardeners do not cover the leaves with soil, but simply place them on the ground. Usually they quickly send out roots and go to the desired depth.
After the leaves have taken root, they are planted in separate pots.
Cuttings
The cutting is a developed side shoot 8-10 centimeters long with at least 6 full leaves. To separate it from the mother plant, use disinfected scissors with a long blade or a stationery knife. At the same time, they are cut so as not to leave hemp.
The aloe sprig is placed in a place without access to light, with a humidity of at least 50%. After 5-7 days, when the wound is covered with a film, it is sprinkled with wood ash (crushed coal) and planted in a pot with a loose, moist substrate.
The recommended planting depth is 2-3 centimeters, but you need to ensure that the lower leaves do not come into contact with the ground. A distance of 8-10 centimeters is maintained between cuttings.
The bowl is exposed to diffused light in a room with a temperature of +20...25 degrees. The roots form after 2-4 weeks. Then small aloe plants are placed in separate pots (if they are no longer growing in individual containers).
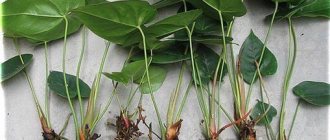
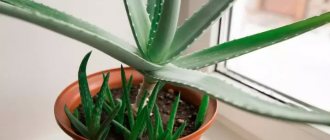
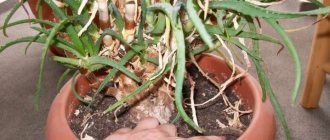
Children
When they talk about propagating aloe by adventitious shoots, dormant buds, root shoots, and children, they mean planting tiny aloe plants that form at the base of the main stem. But they appear only in adult agave. Children grow especially abundantly if the plant is planted in a cramped flowerpot. This puts it in a situation of survival, so that it devotes all its energy not to its own development, but to the production of offspring.
Attention! Appendages greatly weaken an adult bush, so it is important to remove them in a timely manner.
Here's how to plant aloe babies step by step:
- 2-3 hours before starting work, the soil in the container is generously moistened.
- Aloe is carefully pulled out of the pot, trying not to tear off the roots.
- Remove excess soil and separate the shoots manually or with a knife so as to preserve the roots on them. Specimens that are too small and without roots are rejected.
- New plants are placed in separate pots with a moist, porous substrate. Planting depth is 1-1.5 centimeters.
- The mother tree is returned to the old container or transplanted into a larger one.
- Until the babies take root, they are kept warm and in partial shade.
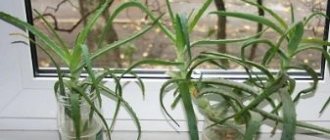
It happens that aloe has produced a lot of shoots, but there is no desire or opportunity to bother with their separation. Then I do this. I just cut them from the bush with a sharp knife. Then I put it in water for a week or two (the water needs to be changed periodically). Usually 80-90% of the children produce good roots - I plant them in small pots in the usual way.
Or you can treat children without roots in the same way as with cuttings. That is, put them in a warm cupboard for 2-3 days to dry, etch the cut with charcoal and plant it in containers.
Top
To propagate aloe with the top, the top of an adult bush with 7-8 full leaves is separated. This injures the plant, but from such a shoot a large agave quickly grows.
On a note. The method is often used to rejuvenate aged succulents.
Here are complete instructions for rooting the apical part of aloe:
- A knife or pruning shears is sterilized in a solution of potassium permanganate or over an open fire.
- The top of the agave is cut off so that 6-8 leaves remain on it.
- The cut is immersed in water with the addition of Heteroauxin, Kornevin or any other root former for 30-40 minutes.
- You can keep the top in a warm and dark place until the wound is covered with film, as some gardeners do. But this item is optional.
- The shoot is soaked in water until roots appear. The water in the container is changed every 2-3 days, and it is also added as it evaporates.
- When the length of the roots is 5-6 centimeters, the shoot is planted in a separate pot. This usually takes 7-10 days.
Seeds
The option of seed propagation of aloe is not suitable for an amateur gardener. At home, aloe blooms reluctantly, and the plant’s seed material cannot be found in a regular store (although you can probably order it online).
The optimal time for this is the end of winter and the first half of March.
To complete the picture, let’s consider the main steps needed to reproduce aloe using this method:
- Seeds are placed in a solution of Zircon or Epin-Extra for 6-8 hours. You can take any other growth activator and process it according to the instructions.
- Flat, low containers are filled with a loose mixture (it is better to take special soil for succulents), not reaching the edge 2-3 centimeters.
- Grooves are made in them at a distance of 3-5 centimeters from one another and 2-3 centimeters deep.
- Wet seeds are placed in spilled grooves every 1.5-2 centimeters. This can be done easily with tweezers or the tip of a pencil.
- The soil mixture is watered again from a spoon with clean water.
- The container is covered with polyethylene or glass and placed in a warm (+20...25 degrees) and shaded place.
- Every day the shelter is opened slightly for ventilation, and the soil is irrigated with a spray bottle.
- The first loops will appear within 7-10 days, and complete germination can take up to three weeks.
After complete germination, the film is removed and the container is moved to a sunny window. When the plants produce 2-4 true leaves, they are planted in individual containers.
On a note. To get a large flower using this technology, it will take at least two years.
Tips for growing succulents
Professional gardeners recommend focusing on the following nuances of growing aloe:
- an adult, strong plant should stand on a windowsill that is lit most of the day;
- In spring and summer, agave is watered more often, in winter - as rarely as possible;
- aloe needs to be fed annually with mineral complexes and humus;
- if it was not possible to get rid of scale insects and mealybugs within 5 days using insecticides, the aloe must be immediately transplanted into new soil;
- Once a season, the agave needs to be sprayed with Fitosporin.
How to cut a leaf correctly?
Cut a leaf from an adult plant at a short distance from the stem . Make the cut with a clean, sharp tool at a slight angle. The cut area must be treated with activated carbon powder and dried. The leaf is stored in a dark, dry place for several days.
It is imperative to wait for the film to form; it serves:
- A protective barrier against the entry of pathogens and infections from soil and water.
- An accumulator of nutrients from the leaf, which it will need for further growth and development.
After the film has formed, the plant can be prepared for planting for further cultivation as a separate flower.
What to do if the plant does not take root?
There may be several reasons:
- There is no drainage at the bottom of the pot, and air flows poorly to the plant. Before filling the pot with soil, place small pebbles, coarse sand or gravel at the bottom.
- Overmoistening of the soil. The cut site begins to rot, preventing the plant from taking root. It is necessary to very carefully remove the leaf from the pot and see if rotting has begun, then it becomes unsuitable for planting.
- The survival rate of the plant also depends on the pot; it is advisable to use clay pots - they allow air to pass through better.
- Leaf infection by pathogenic microbes and pests. The leaf begins to dry out. It is necessary to remove the leaf from the soil and once again treat the soil with high temperatures.
You can also read about other ways to propagate aloe:
- growing aloe from seeds;
- cuttings of aloe.
Is it possible to root a broken aloe?
The trunk of an overgrown aloe often breaks under the weight of leaves and side shoots. But even such significant damage as a broken stem is not critical for the agave. To save the plant you need to take the following measures:
- Renew the broken area with a knife and place the fallen off top in a dry place.
- When the cut dries (after 7–10 days), place the top in water or stick it into a pot of soil.
- Renew the cut on the hemp and sprinkle with activated carbon. In the future, reduce its watering to stimulate bud formation.
- When the stump produces many children, remove it from the pot and distribute the daughter shoots into new pots.
Sources
- https://pocvetam.ru/komnatnye-rasteniya/kak-razmnozit-aloe.html
- https://ufermer.com/komnatnye-rasteniya/aloe/kak-pravilno-razmnozhit.html
- https://1gryadka.ru/komnatnye-rasteniya/sukkulenty/razmnozhenie-aloe/
- https://proklumbu.com/komnatnue/aloje-razmnozhenie.html
- https://delaogorodnie.ru/komnatnyie-rasteniya/kak-posadit-aloe-v-domashnih-usloviyah-iz-lista-otrostka
- https://dacha.expert/domashnie-rasteniya/sukkulenty/aloe/vyrashhivanie-a/razmnozhenie-listom-al.html
- https://greensotka.ru/sukkulenty/kak-razmnozhit-aloe.html
[collapse]
Mistakes when propagating aloe
Aloe grows quickly and requires regular replanting
Sometimes children and cuttings do not produce roots and rot or dry out. This is due to inaccurate adherence to rooting rules.
Use of low quality soil mixture . A prerequisite that any soil for germinating aloe must meet is looseness.
Lack of disinfection of soil, containers, cuttings . Harmful bacteria provoke rotting, as a result of which roots either do not form or die.
Excess or lack of moisture in the soil . The overfilled soil is too dense and air does not penetrate into it. And without oxygen, plants cannot extract nutrients and dry out. If there is a lack of water, roots simply do not form.
How to prepare a flower?
Preliminary preparation significantly increases the chances of a successful transplant. They work with the flower according to the following scheme:
- Water thoroughly 3-4 hours before transplanting.
- Turn the pot over and tap it with your palm on all sides. If the roots have grown too much and the flower does not want to fall out of the pot, the flowerpot will have to be broken. If you forcibly cut aloe from a planting container using a spatula, the root system will suffer irreversible damage and, most likely, the plant will die.
- Separate old adhering drainage from the bottom of the earthen clod.
- Inspect the remaining rhizome. If you find rotten or moldy roots, shake off as much soil as possible, carefully disassemble it with your hands and rinse with running water.
- Trim diseased or damaged roots with scissors. Sprinkle the cuts with charcoal.
Soil selection
The substrate for aloe should be as close as possible to the soil in its growing area. Criteria that the soil must meet:
- Breathability. The soil should be so crumbly that even after watering it is difficult to form a ball.
- Low acidity. The maximum permissible pH level is 8.0. It is desirable that the substrate be neutral.
- High iron content. This element stabilizes photosynthesis processes in succulents.
You can buy soil in the store (for succulents and cacti) or prepare it yourself. To do this, turf and sand are combined in a 1:2 ratio, nutrients and vermicompost are added.
Important! The earth is pre-steamed in the oven at a temperature of +60 °C. This destroys the germs and insects in it.
Suitable pot
The dimensions of the required container are determined by the transplantation tasks:
- 250 ml plastic cups are suitable for sowing. After the first leaves unfold, the seedlings will need to be planted into larger containers.
- To root a cutting or leaf, you will need a shallow container with a diameter of 10–15 cm.
- To transfer adult plants, you need a pot with a diameter of 25 cm.
A permanent flowerpot for agave must be heavy and stable, otherwise it will fall to one side under the weight of the stem. The preferred materials for making are clay or ceramics: such pots have good air exchange and release moisture faster.
Important! The flowerpot must contain the exact number of drainage holes. The succulent does not tolerate stagnation of moisture in the soil.
How to care for aloe after rooting
Young aloe seedlings need moderate lighting. During spring-summer propagation, the plant is protected from aggressive sun by shading nets. Or you can simply place the containers at some distance from the window glass.
Starting next year, with the onset of steady warmth, they gradually begin to “walk” them on the balcony or in the garden. They start with 1-2 hours, and over time the aloe is moved to fresh air for the whole day, and then all night.
By the way. Some gardeners plant their pets in open ground for the summer.
The temperature in the room is maintained around +20 degrees in summer, and not lower than +14 degrees in winter. Regular ventilation is required, but you need to make sure there is no draft.
If you decide to start planting succulents in late autumn or winter, after rooting the babies are illuminated with phytolamps (at least 3 hours a day).
In the warm season, small aloe plants are watered 1-2 times a week, in winter - two to three times a month. The main thing is to wait for the upper level of the soil to dry out, because the crop does not tolerate waterlogging. Water is applied at the root so that drops do not fall into the axils of the leaves. The leaves are regularly wiped with a damp cloth to remove dirt and dust.
When planting in fertile soil, the first fertilizing is done no earlier than six months later. Special complex formulations for succulents are better suited for this. The optimal time is mid-spring, before active growth begins.
Advice. An adult flower is fertilized no more than once or twice a year. At the same time, it is convenient to water and fertilize through a tray to avoid overflow.
The first transfer to a larger vessel is carried out after a year, preferably in spring or summer. In the future, the operation is repeated annually until the plant reaches five years.
Pests of aloe are sometimes bothered by mealybugs and scale insects. For treatment, the plant is removed from the flowerpot, all soil is removed and treated with an insecticide, garlic tincture, vinegar solution or soap solution. Then it is transplanted into clean soil and a disinfected pot. And to find out what ails your family doctor, I suggest reading the article.
Specifics of care
The basis of a strong, healthy plant obtained as a result of propagation is the following:
- Aloe vera is a fast growing plant. When propagating, it should be transplanted into a larger container (shallow, wide, with drainage holes) once every 2 years. You can understand that aloe is grown in too small a container by the following signs: the flower has stopped growing during the propagation process, the leaves are at least 2 times larger than the diameter of the container, and instead of soil there is an intertwined ball of roots. A ceramic container is preferable when propagating aloe, since ceramics remove excess moisture. To propagate a flower in it, the container must first be soaked for 1 hour in superfosate, washed with warm boiled water and soap, and baked in the oven for disinfection. If you decide to propagate a flower in a plastic pot, you just need to wash the pot with hot water and soap.
- The soil. It needs to be updated with each transplant. Aloe vera should be propagated in slightly acidic and moderately fertile soil. It is either bought in a store or prepared independently: a mixture of turf and leaves - 60%, humus - 15%, coarse sand - 15%, charcoal - 10%. Place a 2 cm high drainage layer (gravel, fine-grained granite) at the bottom of the pot to drain excess moisture.
- Feeding. During the breeding season, aloe is fertilized once a year, in the spring. More frequent feeding will only harm the plant's reproduction. Most often, to propagate the flower, fertilizers labeled 10-40-10 are used.
- Pest repellents. The main enemy that prevents the plant from propagating is the scale insect, which drinks its juice. Method of control: wipe the leaves with a soap solution or a weak solution of vinegar. Another pest is the spider mite. Prevention that increases the chance of propagating the plant healthy: use a spray bottle to spray aloe with tobacco infusion.
- Location. Aloe is a light-loving plant, therefore, in order to successfully propagate it, it must be kept in an apartment on the south, south-east side, but not in direct sunlight to avoid burns. During the propagation process, you need to gradually accustom the plant to bright light - place it on a windowsill, balcony, street for a while, then put it away under tulle or gauze. In winter, transfer to a bright, cool room with a temperature of 12-15°C.
During the propagation process in winter, it is a good idea to provide aloe vera with additional artificial lighting. If there is a lack of light, it is more difficult to propagate the plant - it stretches out and turns pale. Over the winter, the flower gets used to bright light, so in the spring you need to repeat the procedure of accustoming it to aggressive lighting.