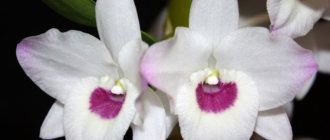
Propagation of orchids by peduncles is the easiest way to obtain a new plant. After prolonged flowering, the orchid flowers dry out and fall off, then small plants - babies - often develop on the flower stalk. They are quite easily separated from the mother orchid and take root. This method can be considered the easiest to obtain a new plant. Next, you will learn how to grow an orchid from a peduncle.
Caring for a plant to produce babies
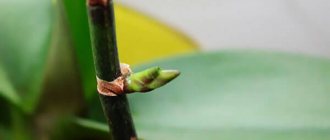
The baby (shoot) of an orchid is a fully formed, miniature plant with leaves, stem and roots.
Phalaenopsis orchid babies.
In order for children to form on the peduncle, after the end of the flowering period, the arrow must be shortened to a height of 1.5-2 cm above the upper dormant bud. As a rule, children develop on their own; for this it is only necessary to create optimal conditions for the plant:
- a large amount of bright diffused light;
- quite high daytime temperature – about +27-30℃. If you want a flower shoot to form from dormant buds, the room temperature should be no more than 24℃;
- Poor watering of the plant is combined with high humidity (60-80%). To do this, the orchid is regularly sprayed and placed on a tray with wet sand or moss.
Having created the necessary conditions, it is quite easy to awaken dormant buds and cause the appearance of children.
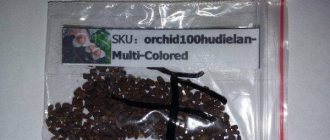
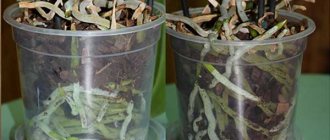
Where to buy flasks?
1. Bring from Thailand or other Asian countries.
2. Order directly from a large orchid breeder. There are special farms for forcing orchids in flasks. Delivery is carried out by mail or courier service.
3. Online stores or special forums for flower growers. Participants form a collective order for the purchase of a certain variety of orchids.
The price of flasks directly depends on the number of seedlings and varieties of orchids in it.
Timing for vegetative propagation
After the end of the flowering phase, the best period for the development of children begins. In this case, the following requirements are imposed on an adult plant:
- the orchid must have a developed root system and at least 2 pairs of large leaves;
- it must be in the final flowering phase;
- The best time of year is spring or early summer.
In low humidity or low light conditions, which is typical for the autumn-winter period at home, babies do not form on the peduncle.
Unpleasant moments
Flask can be fraught with its own troubles:
- The flask may not be sealed.
Because of this, the hydrogel will darken and become covered with bacterial blackness, and possibly mold. Such a flask must be urgently opened and the plants must be disinfected. Plants may also freeze inside and all moisture may evaporate.
- The flask may be broken.
- The flask may contain too many plants and they begin to choke each other.
Stimulation: use of cytokinin paste
A paste based on the phytohormone cytokinin is a preparation that is widely used in floriculture. It actively influences plant cell division, awakening dormant buds, and stimulates growth and flowering.
Its application is as follows:
- on a faded peduncle, choose a dormant bud, the uppermost or lower one, as they give a more predictable result;
- with a sharp object (knife, scalpel, needle), cut the dense scales on the kidney;
- Using tweezers, remove the cut off parts of the scale. A small bright green dot will open under them - a bud with which we will work;
- Apply a little paste onto it with a cotton swab (a ball about 2 mm in diameter). For better penetration of the drug, the kidney can first be slightly scratched with a needle. All manipulations are carried out very accurately;
- The surface of the kidney is completely and evenly lubricated with the paste.
Stimulation of a dormant kidney with cytokinin paste.
Attention! It is not recommended to treat more than two dormant buds on a peduncle with cytokinin.
7-10 days after applying the paste, you can expect the first signs of a growing baby or flowering shoot to appear.
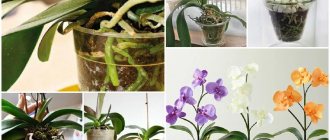
Adaptation of seedlings
Before planned transplantation, it is recommended to adapt the seedlings to the external environment.
The process is possible if the development of plants in the flask is normal . The nutritional gel is exactly at the bottom, and healthy and green shoots quietly grow from it.
Begin gradually accustoming the seedlings to new conditions.
At the beginning, open the lid for a couple of minutes , letting air into the flask, gradually increasing the airing time from five minutes to several hours.
Observe your pets’ reaction to changing circumstances, and if mold appears, remove it.
When can I place my older child?
After six months, the baby forms 2 pairs of leaves and roots.
Attention! Very small roots cannot ensure good survival of the baby after transplantation. It is better to delay its separation from the peduncle until the roots grow.
When the baby forms 3-4 roots about five centimeters long , it is separated from the peduncle and planted in a separate pot.
Do you need to take action?
The florist will make the decision independently. Watch the baby, and if 4 months after the appearance of the layer the beginnings of roots have not appeared on it, then it’s time to think about how to help the young plant.
You should not plant the baby in a separate pot without roots, since 80% of the time it will not survive, so before separating the cuttings, try to make sure that roots appear on it.
But if this option seems impracticable, then you can try to grow roots on a separated plant. At the same time, the process, although labor-intensive, gives very good results. Moreover, there are several ways. Therefore, you need to consider several options and choose the most suitable one.
Growing an orchid from a cut peduncle
Flower growers often wonder whether it is possible to grow orchid babies from a cut peduncle. Can. For this:
- The peduncle is cut off and placed in a container with settled water so that its base is immersed in water by 4-7 cm. Instead of water, you can use a 0.005% solution of complex mineral fertilizer;
- perform all the manipulations to awaken the dormant kidney using cytokinin paste . In this case, the peduncle is taken out of the container, then the cut is renewed, the water in the container is changed ;
- the flower-bearing arrow together with the vessel is covered with a plastic bag .
Growing a baby from a cut peduncle.
The plant is placed in a well-lit place. The further development of the baby proceeds in the same way as on the mother orchid.
Step by step on how to plant at home
On the peduncle of the mother plant
The process of dropping the baby:
- Using a knife, cut off the shoot along with a small part of the peduncle (about 1 cm).
- The cut areas of both plants should be treated with an antiseptic.
- Dry the section for 30-60 minutes.
- Place the plant in a pot on a layer of soil, sprinkle with soil without compacting it.
On already cut
When babies with leaves and roots 4-5 cm long have formed on the cut peduncle in the greenhouse, they can be planted in a manner similar to that described above.
Basal
First of all, before transplanting the root shoot, it is necessary to assess the condition of the roots. To do this, remove the soil and check the length of the roots of the young plant. If at least 4-5 cm, you can start separating.
- Mark a cutting line that leaves the mother plant with two lower leaves, and the division with the remaining and all available aerial roots.
- Carefully separate the sprout.
- Treat the cut areas with an antiseptic and activated carbon.
- The cut baby should be dried for 30 minutes. before planting in the ground.
- Plant the top with roots in a prepared pot with substrate.
On the trunk
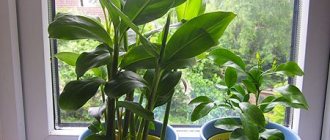
If the baby has formed on the stem, it is not recommended to separate it. This will lead to the death of both the shoot and the mother plant. Both flowers can coexist with each other for a long time if they are well cared for. In this case, the baby can have its own peduncle. Cases of simultaneous flowering of the mother plant and its shoot are described.
Landing in the ground
For planting, you can use a small glass made of transparent plastic, in which holes for drainage have been made in advance. Its volume must correspond to the size of the root system.
You can prepare the substrate yourself from the following ingredients:
- boiled pieces of pine bark no larger than 1 cm in size;
- sphagnum moss;
- charcoal.
Everything is mixed in equal parts.
Ready-made substrate can also be purchased at a garden store ; the size of the bark pieces should be no more than 1 cm.
Main problems
If we grow babies from a peduncle, we may encounter various problems.
Does not produce a peduncle
Regular watering of the plant stimulates leaf growth, so a change in climate is necessary for the formation of a peduncle. First of all, create a period of drought:
- air temperature should not exceed 30℃;
- double the interval between waterings to achieve complete drying of the roots. After this, the orchid should stand without watering for another 4-5 days in a warm room, and up to 7 days in a cool room;
- at this time the plant is not sprayed or fed.
To stimulate the appearance of a peduncle, the orchid is subjected to drought.
The appearance of a flower-bearing arrow means the resumption of care, excluding feeding.
Children are not educated
The formation of children can be considered as an orchid’s response to unfavorable conditions. By creating a regime of poor watering against a background of high temperatures and humidity, you can achieve the development of children. If this does not help, the dormant kidney is treated with cytokinin paste.
The emerging shoot has dried up
Such a baby on the peduncle is removed . If there are other dormant buds on the peduncle, then you can try to awaken them by treating them with cytokinin paste, and then create the conditions necessary for the plant to develop.
The dried baby must be removed.
The roots of a young plant died
To stimulate the re-development of roots, a special technique is used using sphagnum moss, thread and film for food products:
- the moss is soaked in water until it swells;
- form a ball out of it, fastening it with thread;
- the resulting lump is attached with a thread under the base of the baby;
- every day the ball of moss is sprinkled with water, to which it is recommended to add “Kornevin” to stimulate root growth.
Attention! An orchid with moss tied to a peduncle may topple, so it is better to tie it to a support.
Usually, the roots of a child are formed within six months , after which the small plant is ready for replanting.
How to properly build up in different ways?
If roots do not grow on the children, you can use both natural and artificial methods of extension.
Artificial
This method involves separating the baby from the mother, and only then growing roots. There are several options for this method; let’s look at the most effective ones, which are used by experienced gardeners at home.
In polystyrene foam
The young plant is supposed to float on water in a piece of foam. The first step is to separate the baby from the mother orchid. It is worth remembering that cutting must be done with a sterile instrument and with a part of the peduncle, approximately 2 cm.
Take a piece of foam plastic of the required size and make a hole in it. Then place the baby in the recess on the material, and it must be secured well. You can do this as follows:
- After the young orchid is inserted into the foam, several skewers are placed around it, which are used to prepare canapés.
- Then stretch any thick thread between them, so that the leaves rest well on it.
Take a small container, pour warm water into it and let out a circle of foam plastic, with the baby
In this case, it is important to ensure that the plant does not touch the water, so it is advisable to take polystyrene foam of the proper thickness. The distance from the base of the plant to the water should be at least 3-5 mm. If you do not comply with this requirement, then the base of the baby may simply rot.
There is no effect from the structure; you can plant the plant closer to the water, about 1 mm. Perhaps such close proximity will stimulate the growth of the root system
If you do not comply with this requirement, then the base of the baby may simply rot. There is no effect from the structure; you can plant the plant closer to the water, about 1 mm. Perhaps such close proximity will stimulate the growth of the root system.
We invite you to watch a video about growing roots in water with polystyrene foam:
In the greenhouse
In order for the baby to grow roots faster, it needs to be placed in conditions that match the habitat of this exotic flower - the tropics with high humidity. We'll have to build a mini-greenhouse. To do this you should prepare:
- small plastic cup;
- some drainage material;
- sphagnum moss;
- plastic bag;
- plastic bottle.
Once everything is ready, you can proceed:
- make several drainage holes in the cup - excess liquid will drain through them and air will pass through;
- place drainage on the bottom of the cup;
- sprinkle some moss;
- Make two opposite holes at the top of the container for support;
- set the plant so that the baby stands on a support and the leaves rest on the edges of the cup;
- cut the bottom of a plastic bottle and place it on a glass with a plant.
The greenhouse is ready, now you should place it in a well-lit place.
Air the baby daily by raising the bottle for a few minutes. You need to spray the plant 2 times a week, but so that the ox does not get into the area from which the roots should appear. Experienced flower growers advise adding a complex of fertilizers to the water twice a month.
The moss in the cup cannot be compacted - it must be loose and airy.
We invite you to watch a video on how to grow roots for a baby orchid in a greenhouse:
Natural
A method in which a baby’s roots are grown without separating her from her mother. The algorithm of actions is as follows:
- Buy sphagnum moss and soak it in warm water for about half an hour.
- As soon as it swells well, form a small nest out of it.
- Wrap the base of the baby with moss so that it does not fall; you can attach it with a thread. This must be done very carefully, as the baby is very delicate and can be easily damaged.
- Take a stick-stand and secure the peduncle so that the heavy arrow does not fall and break off.
If the air in the apartment is dry, then you need to wrap the moss with the baby in cling film or put a plastic bag on the peduncle to create a greenhouse effect. Don’t forget to remove the bag daily to ventilate the cuttings.
The moss is sprayed every day, with “Kornevin” – a root growth stimulator – added to the water.
As soon as roots 5 cm long appear, you can start planting the baby.