Why doesn't indoor calla lily bloom?
- View the full image
Why doesn't calla lily bloom?
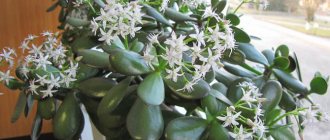
What calla lilies look like
Reasons for lack of flowering
How to get a plant to bloom
Callas belong to the aroid family and are divided into two groups.
The first includes rhizomatous plants descended from the Ethiopian calla lily. They have white large flowers. The second group includes tuberous varieties with variegated colors, originating from callas Eliota and Remani. White and colored calla lilies are cared for differently. The former prefer high levels of humidity, so they need periodic spraying. They do not shed their leaves during the dormant period and like spacious planting containers. Representatives of the second group do not grow higher than 65-70 cm and completely shed their leaves when they rest.
What calla lilies look like
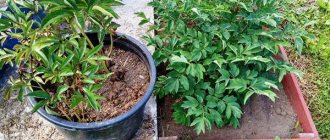
Callas have a thick root system, which often reaches the surface of the soil. The leaves of the flower are distinguished by an oval-heart-shaped shape with a pointed tip and a solitary arrangement. The leaves are rich green, glossy and fleshy, 7-15 cm long and 6-13 cm wide.
Some varieties are distinguished by white inclusions on a green background.
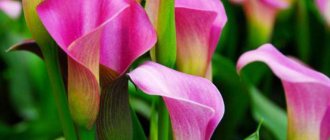
A thick vertical stem is crowned with a candle-shaped spadix, formed by very small bright yellow or orange flowers. The candle is wrapped in a peduncle, like a blanket, which has the shape of a funnel. In natural callas, this cover is white on the inside and slightly greenish on the outside. Hybrid varieties have stipules in various bright and pastel colors.
In nature, the plant blooms from May to August and at this moment they are very decorative. This is exactly the effect that flower growers want to achieve when planting calla lilies at home. But flowers have a rather capricious character and do not always fulfill the owner’s wishes.
Reasons for lack of flowering
Calla lilies begin to bloom at the age of two, so there is no need to sound the alarm if the young plant does not gain color. But if the flower is already mature, but does not form buds, then you should understand the reason for this behavior, of which there may be several:
- Failure to comply with the conditions of the rest period. If a flower is not allowed to rest in winter, then it refuses to bloom at all.
- The plant stops blooming if the root is not divided every two to three years.
- A pot that is too large or small can also cause a lack of flowering.
- Shallow embedding of the tuber into the ground.
- Calla does not form buds if it senses an excess of nitrogen fertilizers, which contribute to the growth of green mass.
- Insufficient hydration.
- Incorrect care.
Planting calla tubers
At the end of February - beginning of March, before planting in the ground, calla tubers are planted for germination. If the tubers have wilted a little, before planting, keep them in a damp cloth for 2-3 days until they become elastic again and the buds are clearly visible on the surface of the tubers.
Carefully inspect the tubers.
If you notice damage on them or signs of dry rot, which often appears due to improper storage, strip the tuber with a sharp knife to healthy tissue.
Lubricate the wound surface with brilliant green and let it dry.
To prevent fungal infections, before planting, treat calla tubers with any fungicide intended for treating tubers and bulbs. The drugs Fundazol and Vitaros, which have a systemic effect, are well suited for this purpose. They not only destroy fungi on the surface of the tuber, but are also absorbed by the plant, providing it with long-term protection. Dry the tubers a little before planting.
In the photo: 1. cleaning the wound surface of calla tubers 2 and 3. Treating the wound surface with brilliant green 4. treating calla tubers in the foundation
Fill a small pot with nutritious earthen mixture to about 2/3 full. The mixture should have a slightly acidic reaction. Soil composition for planting calla lilies: peat, humus or compost, leaf or garden soil, washed sand (2:1:1:0.5). Compact the soil in the pot and place the tuber on top.
Cover the tuber with the prepared soil mixture. The planting depth for calla tubers is 1.5–2 cm from the top of the tuber to the soil surface.
Water carefully, being careful not to wash away the soil. Place the pot in a bright place
Calla develops well at daytime temperatures of about +15...+20 °C. It doesn’t matter if at night the temperature of the calla lilies drops to +13…+15 °C, the difference between night and day temperatures is beneficial for the plant.
in the photo: 1 and 2. planting a tuber in a pot, 3. watering a newly planted calla tuber
Calla lily roots grow in all directions. To prevent them from coming to the surface of the soil, as soon as the sprouts reach a height of 5–7 cm, add another 2–3 cm layer of soil to the pot. Keep the soil moderately moist. Tubers do not tolerate excessive watering and stagnant water, so drain the water from the pan immediately after watering. Once every 2 weeks, feed with a solution of complete mineral fertilizer for seedlings. Fertilizing with liquid gumized fertilizer brings good results.
The photo shows sprouted calla lily tubers in pots
When the soil in the garden warms up to +15°C and the threat of frost has passed, calla lilies can be planted in open ground. Calla does not like direct sunlight, so choose a place for it that receives full sun until noon. Prepare a hole measuring 30x30 cm for planting, add half a bucket of humus and peat into it and mix well.
Carefully remove the plant from the pot. Despite the fact that calla lilies have powerful roots, they are very fragile and cannot be restored if damaged.
Place a ball of earth in the hole.
in the photo: preparing the planting hole and planting calla lilies
Gently fill the area around the roots with soil. When planting, it can be deepened again by 1.5–2 cm, so that during care you do not accidentally damage the surface roots.
Water and wait until the water is completely absorbed into the soil. After watering, mulch the plantings with peat to prevent the formation of a soil crust.
in the photo: planting calla lilies in the ground in May
How to get a plant to bloom
The most important condition for calla lilies to bloom is a properly organized rest period so that the plant has time to recover and gain strength. To do this, after flowering (in autumn), you should move the flowers to a cool place, stop fertilizing and gradually reduce watering to nothing. Plants must remain in such conditions for at least three months. After the above-ground part has dried, the tubers are dug up, moved to a container with dried sand and sent to a cool place.
In the spring, the tubers are treated with a manganese solution for the purpose of disinfection and kept in a moistened cloth. When the callas show signs of growth, they can be safely planted in the prepared soil. The duration and abundance of flowering largely depends on proper planting.
It should be remembered that tropical beauties prefer acidic soils, so it is recommended to enrich the soil with peat.
When actively growing, callas need abundant irrigation and the soil should not be allowed to dry out. You also need to regularly apply balanced fertilizers. In order for the plant to set buds, phosphorus and potassium fertilizers should be applied. “Zircon” is also a good flowering stimulator.
Callas should be kept at a temperature of at least 22 degrees and air humidity of at least 80%. To ensure tropical conditions, you need to spray or place containers of water nearby. Plants should be replanted every two to three years. To do this, the flower tubers are divided, separating the small children from the mother root.
To successfully grow calla lilies, it is recommended to follow a number of rules:
- choose planting material wisely - the tubers should be large, soft and slightly wrinkled. The larger the root, the sooner flowering will occur.
- compliance with storage conditions during the dormant period
- competent choice of landing container - it should be small, no more than a liter
- compliance with landing rules. First, the tuber is buried halfway and watered for several days. And when the first leaves appear, add soil
- care during flowering consists of trimming faded flowers. This stimulates the growth of tubers and ensures abundant flowering
Infectious diseases of calla lilies, methods of combating them
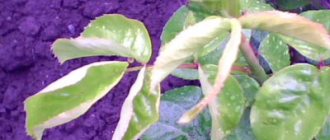
As a result of improper care or poor-quality planting material, poor soil, calla lilies are susceptible to infectious diseases. They quickly make themselves felt: the color of the plant fades, the calla leaves curl or turn yellow, dry out, and the stems become brittle.
To avoid the death of the plant, it is necessary to calculate the cause of this condition and take the necessary measures in time.
Anthracnose
Anthracnose is a fungal disease of calla lilies.
This disease is quite common among these beauties.
Calla lily anthracnose has the following manifestations:
- depressed brown spots appear on the leaves;
- over time, the spots become larger in size, a red border appears on their edges, and white mold appears in the center;
- leaves crack and dry out;
- the stems weaken;
- the flowers fade and curl.
The causes of such damage are:
- increased air temperature;
- excessive air and soil humidity.
Fighting methods:
- remove damaged leaves from the plant and soil;
- reduce watering;
- move the plant away from batteries;
- treatment with fungicides (Fundazol, Fitosporin-M).
Powdery mildew
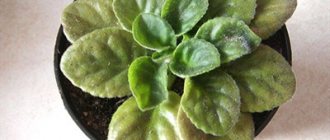
Powdery mildew develops due to infection of calla lilies by fungi.
With such a disease, a white coating appears on the leaves of the plant, which very quickly increases in volume and after a while covers all the leaves of the flower. Externally, the coating looks like grains of flour that abundantly cover the surface of the calla lily. Over time, the affected parts turn black and disappear.
- removing damaged leaves (if there are not very many of them);
- fungicide treatment;
- moderate watering.
Gray rot
Gray rot of calla lilies is caused by the fungus Botryts cinera.
Unlike anthracnose, gray rot can affect all parts of the plant: leaves, stems, flowers. Diseased leaves become covered with a gray coating, and gray-green spots appear on the flowers. Over time, the flowering part acquires a brown tint and becomes covered with a gray veil.
- increased air humidity;
- excessive watering;
- planting in contaminated soil;
- infected planting material.
Fighting methods:
- remove all infected leaves;
- moderate saturated watering;
- treat the plant and soil with fungicides (Rovral, Fundazol).
Root rot
Calla lily root rot is caused by a fungus of the genus Fitovtora.
Signs of calla lily disease:
- leaves and flowers dry out;
- the plant quickly weakens;
- gray mold can be seen on the soil;
- the roots become rotten.
Causes of the disease:
- high air temperature;
- increased air humidity;
- excessive watering;
- overfertilization;
Fighting methods:
- transplant into dry soil and water very moderately at first;
- move the plant to a cool, well-ventilated area;
- review feeding practices;
- treat with fungicides (“Ridomir”, “Profit-gold”).
Bacterial rot
Bacterial rot of calla lilies is caused by bacteria of the genus Erwinia.
When the disease occurs, the root of the plant and the base of the leaves darken and eventually rot. The surface of the leaves becomes yellow. The plant does not dry out, but rather rots.
Causes of the disease:
- increased temperature and humidity;
- excessive watering;
- excessive fertilization with nitrogen.
Eradicating bacteria is very difficult.
It is necessary to moderate watering, treat the plant with fungicides and replant it in healthy soil.
Reasons why a plant does not produce color
Originally from the African tropical forests, calla lilies feel especially good in the southern latitudes of the country, where, with good care, they can bloom almost all year round. It is possible to achieve such an excellent result by understanding the reasons for the lack of color and following a set of rules.
Before taking any action to make the plant bloom, it is worth understanding the factors that may interfere with calla lilies.
Among the main reasons for the lack of color are:
- Insufficient watering
- Small plant pot
- Weak or small tubers
- Incorrect soil composition or depleted soil
Most often, the gardener knows the conditions in which he grows calla lilies and can guess what exactly is preventing the plant from blooming. Having figured this out, you can try to correct the situation.
How to help a plant bloom
There are several basic recommendations that will help you get a calla bud. First of all, you need space for the tubers, regardless of whether the calla lilies are planted in open ground or in an indoor pot. Crowding and the appearance of children interfere with the normal development of tubers, which negatively affects flowering. When replanting, you need to carefully separate the bulb shoots from the mother bush and replant them in a separate pot. Each tuber must have at least one bud. It is also recommended to remove excess leaves.
Fertilizing the plant
To achieve abundant and long flowering, regardless of the variety of calla lilies, it is necessary to periodically fertilize. If the plant is transplanted into open soil for the summer, then it will be enough to feed the calla lilies once a month with any organic fertilizer, but during the flowering period it is better to add mineral fertilizers, urea and eggshell infusion. Homemade callas require constant feeding with complex fertilizers at least once every two weeks.
Excessive amounts of nitrogen fertilizers lead to increased leaf growth, and this negatively affects flowering. When flower stalks appear and throughout the entire flowering period, it is necessary to give the plant phosphorus-containing and potassium fertilizers.
Rest of the flower
Calla is a plant that periodically needs rest. In winter, you need to stop watering it and let the leaves dry out on their own. It is recommended to sprinkle the tubers in the ground with sawdust and keep them in a dark, cool place and water them very rarely and little by little only to avoid unwanted drying out. During this period, calla bulbs gain strength.
The minimum rest period is one and a half to two months.
From mid-spring, you can start abundant watering, and in the summer you can take them out into the light or plant them in open ground, which has a great effect on strengthening the tubers and subsequently leads to long-term flowering. If this is not possible, you can place the pot with calla lilies in the fresh air, loggia or balcony. In this case, the plant should be protected from excessively scorching sunlight.
Water requirement
Calla needs abundant watering. The best would be soft, settled, warm water. Drying out the soil will delay the flowering of calla lilies for up to six months. Ideally, callas need a tray with water. In this case, you need to ensure that the water in the pan does not stagnate. This will have a bad effect on the calla lily root system. If watered irregularly, this plant may stop growing altogether. This is especially true for white calla lilies. This species naturally grows in marshy or very wet soils. Colored callas are not so demanding when it comes to watering.
Preparing tubers for winter
Tubers cannot be left in the ground over the winter, as they will not be able to withstand frost. They need to be dug up in mid-September, carefully inspecting the entire root system. If damage is found, they should be repaired and treated with a disinfectant. Next, the tubers are laid out to dry in a shaded place that will be well ventilated.
Tubers can be treated with potassium permanganate both in spring and autumn. If this event is carried out in the fall, then after processing the tubers need to be laid out again to dry. After this, the planting material is folded into a paper bag and placed for storage in the refrigerator, in the lowest compartment. With the onset of spring, small shoots, called children, separate from the main tuber. All material for planting is treated with potassium permanganate, after which they can be planted again.
Optimal conditions for the growth and flowering of calla lilies
Calla loves warmth and moisture. She will feel especially comfortable at air humidity of 70 to 80%. That is why it is recommended to spray the plant or wipe the leaves with a damp sponge. You can reduce the intensity of watering after flowering has ended.
Slightly acidic soil is best suited for calla lilies. The ideal combination would be a mixture of sand, soil and peat in equal proportions with the addition of humus. If this is not possible, you can water the calla lilies in universal soil with a weak solution of table vinegar at the rate of 10 ml per five-liter container of water. This method can also oxidize the soil for other plants.
Calla is very sensitive to sudden changes in air temperature. Such changes are detrimental to the vegetative system of the culture. The most optimal temperature for calla flowering is from 18 to 24 C. During the rest period, it is recommended to reduce the temperature to 10 C, but this must be done gradually. Only small daily temperature fluctuations have a positive effect on calla lilies.
By putting together all the rules and approaches to the plant, and also trying to put them into practice, the gardener can achieve good and stable calla flowering. In this case, the person will receive pleasure both from the result and from the process of care itself.
Requirements for conditions of detention
Let's get acquainted with the most important nuances of keeping indoor calla lilies.
Lighting
Calla has high demands on the level of illumination. Perhaps this is the most important point when choosing where to place a flower at home.
Sunlight should be plentiful, but indirect. It is good to keep calla in partial shade under conditions of sparse lighting. In summer, it is better to place the plant near a window, but do not forget to protect the delicate flower from direct sunlight.
In the dark winter time, callas acutely feel the lack of sun. And even during the dormant period, plants must be sufficiently illuminated - otherwise development, flowering, and other negative consequences may be delayed.
In general, for normal development and growth, calla lilies must be illuminated for at least 12 hours a day in summer and 8 hours in winter. If your apartment’s climate and location cannot provide such conditions, you will have to additionally illuminate the calla lilies artificially.
Temperature
In nature, callas grow in warm climates, so they cannot tolerate low temperatures. The optimal year-round temperature is +15-25 degrees: in summer +22-25, in winter +15-18.
White callas love cooler temperatures - during the growing season they should be kept at +18-20 degrees, in winter - at +10-12 degrees. The transition from summer to winter temperatures should be gradual, without sudden jumps.
Sudden temperature changes should not be allowed, as such shocks are detrimental to the plant. In the mildest case, the calla lilies will stop blooming. Too much heat is also unacceptable, especially in combination with dry air: such a microclimate can lead to calla lily damage from pests.
It is permissible to grow a flower on the balcony only in summer, but in winter you should definitely move the plant to a heated room.
Air humidity
This parameter should be high - dry air is not suitable for callas. The ideal humidity level for the plant is 70-80%.
And if in summer it is possible to provide the flower with normal living conditions, then when winter comes, working batteries often make the air in the apartment dry. To avoid problems, spray the air around the plant with a spray bottle. You can also place the pot on a tray with expanded clay pebbles moistened with water. Use the same measures in the summer if the weather is dry.
Why calla lilies do not bloom in open ground and what to do, how to make them bloom
Growing calla lilies at home requires following certain recommendations regarding planting and further care. This popular ornamental plant for active growing season needs sufficient light, heat and a well-chosen container. But there are situations when the expected flowering phase is not observed, which greatly upsets the owner. To understand why calla lilies do not bloom, you need to take a closer look at the main causes of such negative consequences and methods for eliminating them.
The appearance of new bulbs and the reproduction of calla lilies
Calla lilies have bulbous rhizomes. They divide, there are more of them, they grow and occupy an ever larger area. Excess must be regularly dug up and replanted or thrown away. The bulb is transplanted into well-drained soil. You need to choose a sunny place for planting.
After planting the bulbs, the soil must be watered generously.
The bulb should be planted horizontally. The hole should be approximately 10 cm deep. Water the soil generously so that the tuber begins to grow well. You need to separate the bulbs with your hands. Each one must have at least one kidney.
Growing seeds for seedlings
Typically, calla lilies are propagated in this way by breeders. But if you grow it at home, the seeds are first soaked for 6 hours in a natural plant biostimulator - potassium humate. Then they are laid out on a tray with a damp towel. Cover the top with the same towel and place in a warm place for a week. Make sure that the seeds do not dry out. The towel should be damp, not wet. When the seeds germinate, they need to be sown in trays with soil and left in a warm place until shoots appear. Discard ungerminated seeds. Then you can transplant the seedlings into a pot.
Completion of the growing season
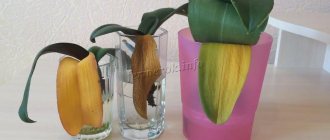
The crop continues to grow as long as it is in moist soil. The growing season ends in September – October. The leaves begin to gradually die. As yellowing begins to appear, watering should be reduced. After 2-3 weeks it should be stopped completely. The leaves should dry out on their own, allowing the remaining microelements to enter the tubers.
If calla lilies grow in a pot, you don’t have to dig them up. Move the plant to a cool place (balcony, veranda)
It is important that the rest period lasts at least 3 months. Otherwise, the calla runs the risk of not blooming.
Why doesn't calla lily bloom?
There are several main reasons that cause the lack of flowers on callas. In general, they are the same, both for growing an African guest in open areas and at home.
In the open ground
Garden callas do not respond well to being planted in the shade. It is better to choose a place for planting in a slightly dark place where the sun's rays appear in the first half of the day. Placing calla lilies in a clearing in the open sun is also dangerous; there is a high probability of burns on the leaf blades. For callas to bloom, the light must be diffused.
Planting on a hill can also cause calla lilies to not bloom; it is recommended to choose a site in the lowlands. Even close proximity to groundwater is not a threat to them. Thickened or shallow plantings often lead to such negative consequences. The distance between callas should be 30-40 centimeters, and the planting depth 10-20 centimeters.
Calla lilies often do not have flowers when planted in soil with high acidity; the soil should be neutral. To achieve flowering from callas in the garden, you should not overdo it with the application of nitrogen-containing preparations.
At home
When kept at home, callas bloom only twice a year (in May and October). If flowering does not occur, then it is worth reconsidering the growing conditions. Common reasons include:
- frequent movement of the flowerpot from one place to another;
- overgrown tubers;
- abuse of transfers;
- lack of lighting;
- nutritional deficiencies;
- errors in care during the active growing season.
It is better to add fertilizer mixtures to the soil in January-March, once every 7 days.
Can water cause death?
Many gardeners make a big mistake when they start watering both in the greenhouse and in the open ground with tap water. It's convenient, connected to the tap and lei. Convenient for you, but for cucumbers it can cause death. Water the cucumbers only with settled water and not in metal containers.
Water the plants several times throughout the growing season with water enriched with beneficial substances. These can be aqueous solutions prepared in advance:
- on chicken droppings;
- for humus;
- by leaps and bounds;
- on onion skins or garlic.
It is not difficult to prepare them and it is beneficial to fertilize them with these components several times:
- before boarding;
- immediately after disembarkation;
- when the first two or three full-fledged leaves are formed;
- during flowering;
- during the fruiting period.
I would especially like to draw attention to chicken droppings. This is the richest source of nitrogen, which is extremely important for healthy growth and abundant fruiting of cucumbers.
In addition to nitrogen, it is the richest source of beneficial microelements and vitamins. With such nutrition, the cucumber simply does not have the right to grow unhealthy.
Factors causing lack of flowering
In order for callas to bloom regularly, you need to know what factors adversely affect the plant:
- disturbances in care when the ornamental crop is dormant;
- not dividing the root, the procedure should be performed once every 2-3 years;
- unsuitable flower container, it can be either small or very large;
- surface embedding of tubers into the ground;
- excess of nutrients in the soil substrate;
- lack of moisture;
- errors in care.
Caring for newly planted tubers
As soon as the callas are planted, watering should be stopped for about 1.5-2 weeks, depending on weather conditions, since the tubers already end up in fairly moist soil.
If watering is not stopped, the root system can succumb to the process of rotting and die. If after the specified period the sprouts are not visible, the flower should be slightly moistened, trying not to touch the tuber itself when watering. After the leaves appear, the bush should be watered 2-3 times a week, taking into account the weather conditions of the region.
Ways to make a plant bloom
Often, novice gardening enthusiasts do not know what to do to make calla lilies bloom. But there are several effective ways to achieve the formation and blooming of buds.
We provide proper watering
Callas are moisture-loving plants and need regular watering. The optimal frequency of irrigation activities is every day or every other day, the main thing is that the water is constantly in the pan. Water procedures are especially useful for feces at the stage of bud opening. It is effective to give a flower a shower or expose it to summer rain.
The recommended humidity level for rhizomatous callas is 70-80%, and for tuberous callas in the range of 50-60%.
Calla lilies should be moistened as soon as the soil dries to a depth of 1 centimeter. The main thing is not to allow the soil mixture in the pot to dry out completely, otherwise the flowering phase will be delayed for six months. It is advisable to use settled and soft liquid for irrigation; cold water is the reason for the lack of flowering in calla lilies. When the bud blooming stage is over, white varieties of calla lilies are watered as rarely as possible, and colored varieties only begin to be moistened after 1-2 months.
Tips and tricks for gardeners
If you want to acquire such a luxurious and profusely flowering plant as calla lilies, then you must adhere to the following recommendations:
- You need to place the flower pot on the windowsill, where the sun shines in the first half of the day.
- The container for transplantation should be spacious, with a height of at least 60 centimeters. The radius from the calla lily's growth point should be 20 centimeters.
- You should not ignore feeding procedures; the flower responds to them with gratitude. Not only ready-made nutritional compositions, but also traditional methods are suitable for these purposes. You need to form a groove around the decorative planting and place fragments of fruit peels and seed husks in it. They should be sprinkled with soil mixture.
- Irrigation activities must be carried out exclusively with filtered water or at room temperature. Watering and tea leaves are also useful.
- To avoid troubles when growing an African guest, it is necessary to remove the top layer of soil and replace it with a new, fertile one. The main thing is to do everything with caution, otherwise there is a high probability of injury to the root system. This technique allows us to further reduce the frequency of transplantation work.
- White varieties of calla lilies require more moisture than colored ones; bright light is more important for them, and you should not throw them away if they have dropped their leaves during the rest period.
It is not for nothing that callas occupy one of the leading positions among ornamental crops used in home floriculture. This unpretentious plant grows and develops quite normally in room conditions, the main thing is to maintain a certain temperature regime and humidity level.
Calla lilies in a pot: care at home
Many gardeners have a question: why calla lilies do not bloom at home. The fact is that caring for a plant at home requires compliance with special conditions. This culture is most sensitive to light and humidity indicators, because in nature it grows in open areas around water bodies.
Lighting
The most important parameter when choosing the location of a pot of calla lilies. The plant loves bright and diffused light. The pot should be hidden from direct sun to prevent burns.
The duration of illumination is required for at least a third of the day, which in winter requires an additional light source in the evening.
And for flowering to occur, half a day is needed in diffused light, which is taken into account in the spring before the color sets, while the sun still does not sufficiently illuminate the window sills.
Temperature
Calla lilies are grown within a temperature range of 15 to 24 degrees.
In the summer season, the plant will feel good on the street or balcony. At night when temperatures are cool, it is best to bring the pot indoors.
Attention! In winter, sudden changes should not be allowed and the plant should be kept at 15–18 degrees. Callas are afraid of drafts, as a result of which they may not bloom the next season.
Callas are afraid of drafts, as a result of which they may not bloom the next season.
Watering and humidification
A large amount of moisture will have a beneficial effect on the growth and flowering of callas. But this does not mean that you need to flood the flower. Regular watering is sufficient to prevent the entire soil from drying out. Callas with colored flowers can tolerate short-term drought without deterioration, but only in rare cases.
During flowering, zantedeschia needs increased moisture, and after flowering it must be reduced to the previous regime.
There is no need to specifically increase the humidity, but during the heating season or hot summer days, spraying with water at room temperature is useful.
Advice: during the flowering period, it is better to replace spraying by regularly wiping the leaves with a damp sponge to prevent the flowers from falling off prematurely due to moisture entering the core.
Feeding and fertilizer
You can provide plants with all the necessary minerals and trace elements in a timely manner using fertilizers.
Complex fertilizing is applied three times a month to moist soil.
Important! If the pot is constantly in partial shade or in a cold room, then the need for increased nutrition increases and fertilizer is required once a week. Nitrogen content in the soil is especially important for lush growth and flowering.
Its deficiency is manifested by lethargy of leaves and stunted growth, lack of flowering
Nitrogen content in the soil is especially important for lush growth and flowering. Its deficiency is manifested by lethargy of leaves and stunted growth, lack of flowering. But its excess is also harmful, as it leads to yellowing and drying of the leaves and the absence of flowers.
But its excess is also harmful, as it leads to yellowing and drying of the leaves and the absence of flowers.
Nitrogen and phosphorus are contained in superphosphate and potassium nitrate, which are added to the soil before flowering.
During the flowering period, universal compositions for flower crops are suitable.
Caring for calla lilies during the rest period
The rest period for some varieties varies in duration and usually occurs after flowering has ended. The plant may completely lose its leaves, which is more typical for garden crops. On the windowsill, calla lilies slow down their growth and therefore need to change their maintenance conditions:
- air temperature drops to 15–18 degrees;
- watering is reduced to 2–3 times a month;
- fertilizing is excluded during the winter months; from spring, it is introduced gradually 2 times a month (organic compounds are preferred - infusion of nettle or manure).
This video shows how you can store calla tubers in winter.