Gloxinia did not wake up after wintering
The storage area for gloxinia tubers should be cool and dark. If the gloxinia tuber is mature and healthy, then as soon as you put it in the light and water it little by little, shoots begin to grow. Sometimes gloxinia wakes up on its own, and when you take it out into the light, it already has a shoot. However, in practice it does not always work out as it should.
Gloxinia does not wake up on time due to the fact that the rest period was too short, less than 4 months. It is quite possible that the winter was too dry and the tuber dried out. But in any case, gloxinia wakes up on its own. It just takes patience.
To avoid overdrying of the tuber, pots with gloxinia in winter should sometimes be lightly watered or sprinkled with water. Or you can place gloxinia tubers in plastic bags, adding a little soil or damp moss. Close the bags or seal them tightly. The bag will maintain constant moisture, and due to the fact that the bag is transparent, you will have the opportunity to observe the gloxinia tubers in winter. At the first appearance of leaves, you can immediately plant gloxinia in a pot.
If gloxinia does not wake up after wintering , it means that the gloxinia was sent to wintering too young, which did not have time to form a tuber, or the tuber has rotted.
If a gloxinia tuber was purchased in a store and it did not wake up from hibernation after last year’s flowering, it is possible that the tuber was sold of very low quality. Many gardeners complain about this problem. Outwardly, the tubers look quite safe, but in reality it may turn out that they are already old, or infected with some kind of infection or pests. The strength of such tubers is only enough to bloom for one season.
Dig up the tuber, examine it: if it is very wrinkled, then most likely it is lost. Break or cut it: the tuber should be slightly yellowish or pinkish when cut. If this is the case, then dry the sections, sprinkle with crushed coal, you can treat them with regular brilliant green or fucorcin (raspberry liquid, a strong antiseptic, has an antifungal effect, sold in pharmacies). You can treat the tuber with epin or zircon to increase the vitality of the tuber and stimulate it to form shoots.
If the gloxinia tuber is brown on the cut, then most likely it is gone. If the brown color is only on one edge, cut off all the rot, treat the tuber as described above and plant in new soil.
If you want the purchased tubers to be able to survive the winter without problems, then immediately after purchasing gloxinia tubers at home, treat all planting material in a solution of potassium permanganate or phytosporin. This treatment is aimed at preserving gloxinia tubers from rot.
The next step is to treat the gloxinia tubers with Actellik or Fitoverm. These drugs will help get rid of thrips, spider mites and other pests of indoor plants.
If you purchased gloxinia in a pot, change the soil and treat the tuber. The soil that is sold in pots along with plants is very poor.
Perhaps the tuber is already old and has simply died. Gloxinias live for three to four years. If you really value this particular variety of gloxinia, try to root a cutting or leaf in advance.
Main diseases of gloxinia: symptoms and treatment methods
The most common cause of slow growth and lack of flowering of gloxinia is various fungal infections. For treatment to be effective, you need to learn to distinguish between their symptoms.
Did you know? Late blight is a disease so dangerous that the founders of Marxism seriously considered it as one of the causes of bourgeois-democratic revolutions in Europe. One way or another, it was late blight that caused the famous Great Famine in Ireland in the middle of the 19th century, destroying almost the entire potato crop for four years in a row.
Late blight
The causative agent of this most dangerous infection is the Phytophthora
. The degree of harmfulness of this parasite is evidenced by its very name, literally translated from Greek as “plant killer.” Phytophthora feels very bad in dry, heated, intensely lit soil with good ventilation, but as soon as at least one of these conditions is violated, the fungus instantly becomes active.
After 7–10 days, the first symptoms of the disease can be observed on the indoor plant, namely:
- light coating on the inside of the leaf plate;
- chaotically located spots on the stem and the outside of the leaf (the color of the spots is brown, purple or brown, a characteristic feature is the presence of a light edging);
- areas of soft rot on all above-ground parts;
- if the disease overtakes the plant during the flowering period, the buds dry out and fall off.
Modern science has developed many fungicidal drugs that help fight late blight quite quickly and effectively. However, the problem is that most of them are extremely toxic, and therefore cannot be used indoors. So, it is very important to recognize the “enemy” as quickly as possible and try to defeat him using more gentle methods.
To do this, first of all you need to remove all the affected fragments, and then carefully treat the plant:
- a weak solution of potassium permanganate;
- garlic infusion;
- aloe juice diluted with water in equal parts;
- kefir diluted with water in a ratio of 1:10 and infused for 3-4 hours.
Find out also how to care for gloxinia after flowering.
If the disease progresses, you can use a proven remedy - the biological product Fitosporin-M. It is non-toxic and completely safe.
Fusarium
Another name for this disease is tracheomycosis. Its causative agent is fungi of the genus Fusarium
, activated by high humidity and insufficient watering. Unlike late blight, with fusarium blight, gloxinia leaves are not covered with plaque or spots, but simply wither, sag, first acquiring a watery structure, and then gradually drying out.
The development of the disease is especially visible on the upper part of the flower. Before treating gloxinia affected by Fusarium, it is necessary to eliminate the causes that provoke increased development of the fungus. The flower itself must be thoroughly washed with slightly warm water and treated with Fundazol. Usually the drug is used three times with a week's break.
At the final stage of treatment, you can treat the flower with Fitosporin-M, Previkur or Alirin-B. The drugs Benomil and Vectra also show high effectiveness, but these drugs are quite toxic.
Gray rot
The causative agent of gray rot is the mold fungus Botrytis. Like any fungus, it is activated by high humidity, however, an additional factor that increases the likelihood of contracting this disease is not dry soil, but sudden changes in temperature.
Important! Gray rot spreads very quickly to neighboring plants, so the affected specimen must be immediately placed in strict quarantine.
The characteristic symptoms of gray rot are brown spots on the leaf blade with a gray coating similar to mold. At first, the lesions are small, but they soon grow and merge into a single mass, becoming lighter in color and becoming covered with the fluff characteristic of any mold. As the disease develops, it covers the entire plant, the stem becomes covered with light yellow rings, the buds soften and fall off without opening.
It is usually not possible to defeat a spreading fungus with “soft” preparations, so many gardeners immediately resort to potent fungicides.
In particular, the plant can be treated with such means as:
- "Horus";
- "Teldor";
- "Switch."
The advantage of these drugs is that, while highly effective, they are classified as moderately hazardous to the environment and can be used even indoors, albeit with all necessary precautions.
Powdery mildew
Powdery mildew is another common disease of indoor plants that is fungal in nature. Infection usually occurs through the soil or from contact with other flowers. If the pot is in a well-lit place and watering is not carried out regularly, the likelihood of infection increases. The main symptom of powdery mildew is a whitish coating that appears on the back of the leaf and small white spots on the outside.
Contrary to the existing misconception, these spots do not have a fibrous structure: the name “mealy” comes from the fact that in the first stages of the lesion the leaf looks as if it had been sprinkled with flour. Control methods are treatment with homemade disinfectants (aloe juice, garlic, etc.) or the use of non-toxic fungicides and immunostimulants.
In addition to the same “Fitosporin-M”, Gamair, “Baktofit”, “Planriz” and “Pseudobacterin-2”, as well as “Immunocytofit” and “Novosil” show high effectiveness against powdery mildew.
Root rot
As you can guess from the name, the causative agents of root rot (and they can be various fungi, including the above-mentioned penicillium, late blight and fusarium, as well as pythium, diplodia or rhizoctonia) do not develop on the green parts of plants, but underground, in the roots; more precisely, if we talk about gloxinia, tubers. Therefore, external signs of damage are not so obvious.
However, as a rule, root rot is characterized by slower growth and rapid wilting of the flower, and watering does not eliminate the situation, and sometimes even worsens it. As the disease progresses, the leaves begin to become covered with brown wet spots and fall off. In the end, the plant dies, that is, literally rots “on the vine.” To combat the disease, an urgent transplant of the flower into a new pot with fresh soil is most often required.
As for special preparations, you can try using diluted ones for watering in accordance with the instructions:
- "Alirin-B";
- "Maksim";
- "Trichodermin";
- "Tricholavit";
- "Fundazol";
- "Previkur";
- "Discor";
- "Mikosan";
- "Vitaros";
- "Gamair";
- "Glyocladin."
Important! Some experts recommend using the drug “Topaz” to combat root rot of indoor plants, however, due to the very high toxicity of this product, resorting to it is too dangerous.
Chlorosis
Chlorosis is not a fungal infection, but a systemic disease associated with disruption of photosynthesis processes in the green parts of the plant. This condition is caused by a deficiency of minerals in the soil, primarily iron, as well as zinc, magnesium, nitrogen, etc. Chlorosis is very easy to diagnose: the leaf blade loses its rich green color and becomes more yellow (the veins may remain green).
In parallel, the disease is accompanied by other signs of weakening - slowing growth, reducing the size of young leaves, drying out their tips, curling, falling, etc. A specific treatment for chlorosis consists of feeding gloxinia with iron, but this mineral must be in chelated form (associated with organic acids ), otherwise the plant will not be able to absorb it.
The easiest way for this purpose is to use one of these preparations for watering and spraying:
- "Antichlorosis";
- "Ferovit";
- "Ferrylene";
- "Micro-Fe";
- "Brexil-Fe" etc.
rust mushroom
It is more correct to call this disease rust fungus or simply rust. It can be excited by various mushrooms belonging to the genus rusty - for example, Puccinia
or
Phragmidium
.
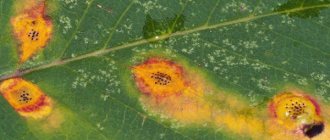
Characteristic symptoms are brown, yellow, red or orange spots on the outside of the leaf blade and so-called pustules (a collection of fungi in the form of a kind of wart) on the back. As the disease progresses, the spots increase in size and merge, the affected leaf turns yellow and falls off.
Among the fungicides effective against rust pathogens are the following:
- "Oxychom";
- "Strobe";
- "Ordan";
- "Bayleton";
- "Vectra";
- "Abiga Peak";
- "Hom."
Did you know? The plant owes its name to the 18th century German botanist Benjamin Peter Gloksin. However, by an interesting coincidence, in the German language there is a word “glocke”, meaning “bell”, to which gloxinia flowers are very similar in shape (there is even a strong, albeit erroneous opinion that the word “gloxinia” comes from “glocke” ").
Anthracnose
This disease can be caused by several types of fungi, in particular Kabatiella
,
Gloeosporium
and
Colletotrichum
. However, depending on the specific type of pathogen, the symptoms of the disease can vary greatly.
In particular, the development of anthracnose on gloxinia can be suspected by one of the following signs:
- the appearance of small yellow spots on the leaves, in the center of which you can see a dark dot or, as the affected area increases, a gray ring;
- the spots are larger, have a red or brown color and a yellow edging, round or oval in shape, gradually the tissue in the affected area dries out and crumbles, forming a hole;
- the spots cover both leaves and stems, are large in size, brown in color, and there are fluffy pustules inside the spots (in the first stages of the lesion, a darker depression is visible in the center of the spots).
You can fight anthracnose using such products as Oxychom, Abiga-Pik or Strobi.
Phyllosticosis
The causative agent of the disease is pathogenic fungi of the genus Phyllosticta
.
The disease is diagnosed based on the following characteristic signs:
- red or purple dots on the green parts of the plant;
- over time, each dot grows into a spot with a darker edge, which gradually dries out and crumbles, forming a hole;
- If you look closely, you can see dark, round-shaped fungal spores on the affected areas.
Phyllosticosis can be cured even on those leaves where foci of infection are visible, so there is no need to mercilessly remove all fragments affected by the disease - you can first try to carry out a therapeutic treatment of the flower.
To do this, you can use one of these fungicides:
- "Vectra";
- "Oxychom";
- "Strobe";
- "Abiga Peak";
- "Skor";
- "The keeper";
- "Vitaros".
We recommend reading about planting gloxinia and caring for it at home.
Gloxinia did not have time to form a tuber
If gloxinia is grown from seeds, and the seeds are planted late, then the gloxinia may not have time to form a tuber . Gloxinia blooms only at six to seven months of age, when it grows six to seven pairs of leaves. In this case, the young gloxinia does not need to be sent for wintering, because the gloxinia may be completely lost. In winter, try to maintain sufficient humidity and light to prevent gloxinia from stretching out.
To understand whether gloxinia will overwinter or not, count the leaves: if there are only four or five pairs, then such a small gloxinia cannot be sent for the winter. Gloxinia will form buds when it has grown at least six pairs of leaves.
Also, the tuber does not have time to form when growing gloxinia from a leaf or cutting, especially if the cutting is too long and is deeply buried.
Do not overuse watering. Due to waterlogging, gloxinia may also not have time to form a tuber.
Gloxinia shoots have become very elongated
Gloxinia shoots become very elongated after wintering, when the room is too warm and there is insufficient lighting. Add lighting, periodic air spraying and wet cleaning will help reduce the temperature in the room. Strong stretching of shoots can also occur in insufficient lighting plus overfeeding with nitrogen fertilizers. Add light, do not feed with nitrogen fertilizers.
Gloxinias can elongate due to varietal characteristics; some varieties of gloxinias are prone to elongation of shoots. It is advisable to trim the elongated shoot. The tuber will give a new shoot. The cut shoot can be rooted, and it will also have time to bloom. If an extended shoot is left, it will most likely fall and take root. It will receive nutrition from its newly formed roots, and in addition draw nutrition from the tuber. A new shoot may grow on the tuber, but it will be weak, will not bloom, and the tuber will become weakened and may not survive the winter.
Why do the buds dry out?
One of the reasons why buds dry out is lighting. Too much light is bad, too little is also a disaster. Therefore, when choosing a place for a pot with gloxinia, it is necessary to take this feature into account and position the plant so that the lighting level is optimal. Then the flowering will be abundant and bright.
Also among the reasons that can lead to gloxinia buds drying up without blooming are:
- excessive soil and air moisture;
- cold;
- high temperature in the room;
- stale air;
- drafts;
- excessive or insufficient feeding;
- dry air.
As you can see, there are a large number of factors on which the duration and abundance of flowering depends. And when a problem is identified, it is worth considering all of them in order to provide timely assistance to the flower and not lose it.
Watering the plant is the next point that needs to be paid attention to. If it is carried out incorrectly, the buds do not open, the leaves die, and the root system suffers.
Proper watering is important for gloxinia. Water must flow to the roots through the soil, so it is carefully poured over the edge of the pot so as not to flood the rosette. Excess water is removed from the pan so that the roots do not begin to rot. During cold weather, watering can be reduced to spraying, but it is necessary to monitor the condition of the soil and prevent it from drying out, understanding that for normal growth the plant needs moderate moisture. For watering and spraying, only settled water at room temperature is used.
Gloxinia requires special attention during the heating season. At this time, the air in the room is quite dry; under such conditions, the buds rarely open. It is recommended to periodically spray the flower, however, in this matter one should adhere to the “golden mean”. Excessiveness harms the plant.
These are the main points of care, the violation of which can disrupt the proper growth and flowering of gloxinia. But besides them, you should understand that if the temperature is too low and in drafts, gloxinia buds also wither and fall off.
Now about feeding. The lack of nutrients in the soil does not allow the plant to gain strength and fully realize itself: to form flower stalks and bloom. If the buds turn black and then begin to dry out, then this is a sure sign that the soil has a low amount of microelements. This means that the indoor flower needs feeding. Phosphorus-potassium fertilizers are best suited for these purposes.
Peduncles also dry out when gloxinia is damaged by pests of indoor plants such as:
- spider mite;
- thrips.
If they are detected, the flower should be immediately treated with insecticides.
Gloxinia leaves have turned yellow
Gloxinia leaves turn yellow when overwatered. If the plant is flooded, it is immediately noticeable by the leaves. It may happen that the tuber begins to rot. Urgently remove the gloxinia tuber, inspect it for rot, treat it with phytosporin or other drugs, and replace the soil.
Gloxinia leaves may turn yellow due to lack of nitrogen. In general, fertilizing with nitrogen-containing fertilizers is recommended only at the beginning of the growing season, when the stem begins to grow. Subsequently, it is better to fertilize with fertilizers in which the content of phosphorus and potassium is much higher than the nitrogen content. Remember that overfeeding with nitrogen can lead to rot of the gloxinia tuber.
Chlorosis of Gloxinia leaves . Chlorosis can be caused by too hard water. Water for watering gloxinias should be settled and warm. Soften it with a drop of vinegar or lemon juice. Chlorosis can be caused by low soil acidity or high ash content. Change the soil.
Spots appeared on gloxinia leaves
Spots on gloxinia leaves may appear from too bright lighting. Shade the gloxinia, otherwise it will get sunburn. Spots on gloxinia leaves can appear from excessive watering, as well as if you water with too cold water. Spotting of gloxinia leaves can be caused by drafts. Small spots on gloxinia leaves may indicate the presence of pests on the plant. Insecticide treatments are needed. In addition, gloxinia can be affected by various viral diseases, for example, tomato ringspot virus.
Preventive measures
In order for gloxinia to bloom safely, it is necessary to systematically prevent possible problems:
- Monitor soil moisture, avoiding excessive moisture and drying out.
- Use good drainage.
- Use warm water for irrigation.
- Avoid getting water on leaves, buds and flowers. Do not spray the plant.
- It is better to water gloxinia through a tray.
- Sometimes spray the air around the plant.
- Replant gloxinia every spring to prevent soil depletion.
- Use hydrogel to prevent the substrate from drying out.
- Use complex fertilizers.
- Provide sufficient lighting without direct sunlight.
- Keep gloxinia in a warm room, away from drafts.
- Inspect the plant regularly.
- Systematically use Epin or Zircon to maintain the immunity of gloxinia.
Gloxinia leaves curl
Curling of gloxinia leaves is possible if the room is too dry and hot. However, even if the air humidity is too high or the soil is excessively waterlogged, gloxinia leaves also curl, bend, short stalks form, or the formation of deformed flowers is observed. Adjust watering of gloxinias. Treat gloxinia with actellik or fitoverm against spider mites. Curling of gloxinia leaves can be caused by an overdose of potassium fertilizers.
Gloxinia does not bloom
Gloxinia does not bloom due to overfeeding with nitrogen fertilizers. Nitrogen only stimulates green growth, but slows down flowering. Delayed flowering may be affected by insufficient lighting, low ambient temperature, low humidity or insufficient watering. Flowering can also be affected by improper or too short wintering, as a result of which the tuber did not have time to prepare for the next season. In order for gloxinia to bloom well next season, it needs a rest period of four months.
For gloxinia to bloom fully, it simply needs good lighting. Gloxinias love light! From the moment they awaken, immediately place pots with gloxinia tubers in places where there is a lot of light, or organize additional lighting, otherwise the buds may not appear at all, and if they do appear, there may be few of them, or the flowers may not be fully formed and may turn out to be empty flowers , or not fully open.
The size of the pot also plays an important role. To grow gloxinia, it is better to choose a small, low and wide pot rather than a deep one. In a large pot, gloxinia will take a long time to grow the tuber to the detriment of flowering. For an adult gloxinia tuber, the pot should be about 9-12 cm in diameter. And after gloxinia begins to actively grow, it is necessary to fertilize with phosphorus-potassium fertilizers.
In addition to the pot, gloxinia annually needs replanting and new fertile soil. You can make the soil mixture for gloxinia yourself: humus, coniferous soil, leaf soil, sand, perlite or hydrogel, peat. But before use, it must be calcined for pests and pathogens. Spread the soil on a tray and bake it in the oven for 20-30 minutes.
If it is not possible to make your own soil mixture, then you will have to use a store-bought mixture, but fertilize more often.
Structure and features
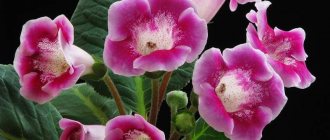
Gloxinia begins to bloom in March. Flowering lasts up to three months. The flowers of the plant are single, emerging from the axils, large, oblong, velvety. The shape resembles a bell. The peduncles are soft, so large, tall bells may droop. The diameter of the flowers is 8-12 centimeters. The buds have 4 stamens. The nectary is ring-shaped or absent. The corolla is tubular, consists of round petals with a corrugated edge, arranged in one or several rows.
The corolla can be plain: white, purple, red, crimson or cream. It can be two-color, have a border, contrasting specks or spots. The base and edges of the petals most often have different colors . Some varieties of gloxinia, instead of an open corolla, have an elongated tube and small bent petals. From 8 to 40 buds can form on one plant.
The petioles of gloxinia leaves rot, the buds rot, turn black and die
In gloxinia, leaf petioles rot, buds rot due to excessive waterlogging, too acidic soil pH, as well as excessive amounts of nitrogen-containing fertilizers. Change the soil, adjust the watering. To avoid overdoing it with nitrogen, use only complex fertilizers that contain phosphorus and potassium in addition to nitrogen. Additionally, carry out two or three treatments with phytosporin, Maxim or another fungicide to preserve the gloxinia tuber from rotting.
If gloxinia's buds turn black and die , then most likely the winter was too cold, the soil is too poor and there is not enough nutrition, or there is severe overwatering. Typically, problems with flowering are solved by fertilizing with phosphorus fertilizers and additional lighting. Treat with fungicides. If the problem is not corrected, then most likely there is a problem with the tuber: it has begun to disappear.
Necessary conditions for healthy flowering
With proper care, gloxinia blooms from spring to early autumn . To ensure healthy flowering, certain conditions must be met:
Warm, bright room, preferably an east window.- If the soil is formed at home, you need to prepare a mixture of leaf, turf soil, humus and sand in a ratio of 2:1:1:1.
- Drainage is required to prevent stagnation of water in the pot. It is recommended to use expanded clay and crushed foam.
- Correct and timely feeding.
- Prevention of diseases and pests.
- Suitable pot size. Do not use a container that is too large, otherwise the plant will grow tubers instead of flowering.
- Sufficient lighting in humid air.
- In order for the flowering period to last longer, faded flower stalks must be removed immediately.
- Maintain periods of rest.
- Proper care after flowering. At the end of flowering, the plant is prepared for wintering. The dry above-ground part of the plant is cut off, leaving a small stump of 1-2 cm, and the pots with tubers are removed to a cool, dark place. At the end of February, the tubers are carefully removed, cleared of soil, rotten parts are cut off, the sections are disinfected, dried for a day and planted in a new substrate.
In order for gloxinia to bloom again, the stem is cut off after flowering, leaving several pairs of lower leaves. Stepchildren grow from the sinuses. Only the most powerful of them should be left. At this time, it is important to fertilize with a high concentration of nitrogen. These procedures will stimulate the growth of new leaves. When buds appear, you need to apply fertilizers containing potassium and phosphorus. Repeated flowering is always less lush than the first.
ATTENTION : The age of gloxinia must be taken into account. The older the plant, the less it blooms.
You can additionally read about caring for gloxinia at home here, and here we talked about the rules of watering and fertilizing.
Gloxinia produces a barren flower
First, on the gloxinia , as usual, the sepals open, and inside, instead of a bud, there is a green pea, a barren flower . After some time, the peduncle on which this underdeveloped bud grew turns brown.
Perhaps the gloxinia tuber was stored at too cold a temperature. Cut this peduncle and wait for the next peduncles. After a while, watch how new buds open, perhaps everything will return to normal without additional intervention. Try a few more sprays with Epine to help the plant relieve stress and help the formation of normal buds.
Gloxinia's buds do not fully open
Gloxinia's buds do not fully open , and then turn brown and become soft. This is quite possible, if gloxinia has too many buds and does not have enough fertilizing, it is simply not able to cope with flowering. In this way, gloxinia itself regulates its flowering. This may be a varietal feature.
It is possible that it bloomed too early or late, when the daylight hours are short and there is simply not enough light for it. Typically, this occurs during the off-season.
Under-opening of buds may result from an attack by spider mites or thrips. Treat with insecticides.
All the leaves of Gloxinia began to wither
If gloxinia's leaves begin to wither in the fall, this means that gloxinia is preparing for winter. Reduce watering to a minimum. Wait until the gloxinia has completely withered, cut off the upper part of the shoots, leave only a small stump and send the gloxinia tuber for the winter. It can be in the same pot, or it can be in a plastic bag, as described in problem 1.
If gloxinia’s leaves begin to wither during the growing season, then most likely there is a problem with the tuber. It rotted from too much waterlogging. Dig up immediately, cut off the affected leaves, treat the tuber with fungicides and plant in fresh soil.
Care after flowering
Flowering time can be significantly extended with proper care . Many varieties and types of synningia have a tendency to bloom again, especially if the first one was early. Usually it is not so lush and abundant, and the flowers are much smaller.
After flowering, gloxinia should be carefully examined for the presence of a growing point on the stem. If there is one, in a month the plant will produce new flowers.
Trimming
pruning may be necessary to stimulate re-blooming . In this case, the above-ground part (leaves and stem; 2-4 lower leaves may not be removed) is cut off and a shoot about 2 cm long is left. Soon after this, the second growth of gloxinia occurs: side shoots appear.
It is not at all necessary to leave all the side shoots , one or two of the strongest will be enough - the rest are cut off so as not to weaken the plant. After a month, new buds begin to develop on them.
During the period of bud set, synningia must be fed with fertilizer
How to make gloxinia bloom again
If your gloxinia has bloomed and no longer forms flower stalks, and you want to force the gloxinia to bloom again , cut it back to 2-3 pairs of leaves. In 1.5-2 months, the gloxinia will grow a new stem, and your favorite gloxinia will bloom again. Repeat flowering can be stimulated by fertilizing with phosphorus-potassium fertilizers.
The rights to the images belong to myhome-flowers.ru, dimetris.com.ua, forum.prihoz.ru: Sweet Berry, flickr.com: smalla, CameliaTWU, philipbouchard, Meighan, Larra Jungle Princess, carolinesoer, kasmil, Gerbera2009, ??? ??, livingflame, Sirelroka
