Images of plants provide rich material for the development of speech. One of the most interesting and popular varieties of this large topic among teachers is the section devoted to colors.
Bright drawings attract attention, so preschoolers perform speech exercises with them with great interest. Various pictures for children on the topic Flowers can be used with both children and older children.
All visual material for kindergarten on this topic is divided into 2 groups - subject and plot images.
Subject pictures
These are small cards with realistic images of popular garden and wildflowers. The younger children use such visual material, the more famous flowers it should represent. The basic set most often includes:
- dandelion;
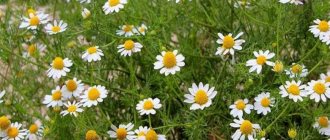
- chamomile;
- poppy;
- rose;
- bell;
- tulip;
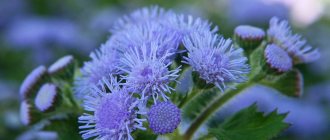
- cornflower;
- lily.
Dandelion Chamomile Poppy Rose Bell Tulip Cornflower Lily Narcissus Lily of the Valley
Images should be bright and as similar to the original as possible. It is very useful to use object pictures for children in classes. Flowers not only with drawings, but also with the names of plants.
Older preschoolers can also be offered black and white drawn images of certain flowering plants (of course, along with colored ones). Coloring books, separated into separate sheets, are great for this.
During classes, flowers in pictures for children can be supplemented with photographs or separate sheets on a transparent background from the herbarium.
Children 4-5 years old should be able to clearly distinguish about 10-15 different garden and wildflowers and be able to describe them in detail. For preschoolers aged 6-7 years, this figure approximately doubles, i.e. they should be well versed in 20-40 items.
bell chamomile St. John's wort cornflower Ivan tea dandelion poppy lily asters peonies pansies tulips
Story pictures
Illustrations with plot images must also be in the “methodological piggy bank” of teachers. Parents can also use these paintings for home activities with their children. The content of plot drawings can be very different, for example:
- Seasonal changes in nature (the appearance of primroses or the last autumn asters in the garden).
- The work of people to create flower beds on a summer cottage or during the greening of the city (adults and children plant and water flowers in the courtyard of a house or on a personal plot).
- Funny situations (how we collected a bouquet for mom).
You should definitely use pictures from the series Children with Flowers, in the Forest or March 8th.
- Paintings on rare themes (meadow flowers or flowering poisonous forest plants) can be purchased as a ready-made set or you can select suitable images yourself, choosing them from special children's books or magazines.
Speech development tasks
Here is a set of exercises that can be used to conduct speech therapy sessions with preschoolers of different ages:
- Select a flower pattern and count in order (from 1 to 5), continuing the row:
one dandelion - two dandelions - three dandelions... one chamomile - one cornflower - one poppy -
one daisy -
The child must carefully examine the picture with the selected flower, and then turn the card over and describe in detail what he saw. Then you need to turn the card over and check for errors.
Ask them to name as many meadow or garden flowers as possible. The task can be complicated if you additionally indicate the color or remember only medicinal plants.
Offer to carefully examine one of the plot paintings, and then describe it in as much detail as possible or ask as many questions as possible about the illustration.
Take one subject picture with a flower and show it to the children. Let each of them, in turn, come up with a word that describes this drawing. For example: the cornflower flower is blue, bright, small.
- Choose one picture from the Wild Flowers set and show it to the children. Let everyone name what happens:
- cornflower blue - eyes, river, bouquet; chamomile - glade, tea, shampoo; poppy - field, roll, blush;
- Forget-me-nots - dress, ribbon, sky.
- Ask to name flowers that can be said to be:
- bright; aromatic; lush; large; invisible; beautiful; white;
- red.
- Offer to describe the similarities and differences between the couples:
- rose/peony; bell/lily;
- chamomile/daisy.
- Select appropriate illustrations and ask the children to correctly name:
- bouquet of daisies - chamomile; field with poppies - poppy; bush with roses - pink; a wreath of buttercups - ranunculus;
- The color of cornflower is cornflower blue.
- You need to make up a story using a series of plot pictures about how:
- a flower grows from a seed; plant a flowering plant in a pot;
- weave a wreath.
Games
With pictures on the topic Flowers you can organize many useful speech games. Here are some examples:
The presenter must describe the flower whose image he takes from the table. The rest of the children guess the name. The one who answers correctly first becomes the leader.
The first player selects one card from the Flowers set and says the name of the plant that is depicted on it. The next child must remember the name that begins with the last letter of the named word, and then choose the appropriate picture. (Example: Rose-Astra-Pansy-Iris-Lilac, etc.)
Invite the children to collect a large bouquet of flowers. The presenter says, for example, “dandelion flower” and puts the corresponding card on the table. The second participant in the game must repeat the named plant and add his own. The next participant says the previous two names, adding his own. The game continues until the children remember and repeat the sequence correctly.
- I am a poet, my name is Tsvetik
Invite the children to come up with short poems about flowers based on the selected drawings. For example, Summer flowers or Primroses. This can be either individual or collective creativity. Successful poems need to be written down and beautifully displayed on a special stand.
Let each child choose one picture of a flower. He should not show the drawing to anyone. From available materials (ribbons, scarves, paper), everyone must create a suitable costume.
Then all the heroes come to the ball and each participant tells a short story about himself (where the flower grows into which this or that child turned into, and its other distinctive features). Children guess the name.
If they succeed, the author of the costume and story receives a token.
Invite the children to come up with a fairy tale about the flower whose image the presenter chooses. Each child must say one sentence, in turn. The finished story can be written down by asking the children to make suitable illustrations.
Give the children paper and pencils. Ask them to draw any fantastic or mythical flowers, and then come up with a name, features, and place of growth for your “creation.”
The presenter selects one subject picture on the topic. Then he invites each player to talk about what can be done with the selected flower. For example: grow, draw, give, buy, find, etc. The drawing passes from one player to another.
If the card has gone full circle, then it must be transferred again. Each child will repeat their word and add another word to it (grow it in a flowerbed, draw it in a notebook, give it to mom, buy it at the market, find it in the forest).
If one of the participants forgot what he said earlier, then the adult presenter should prompt him (for this it is better to make notes in a notebook). Then the card is sent to the third circle, the children need to come up with a third word for their phrase.
If the child cannot do this, then he is out of the game. The winner is the one who composes the longest sentence.
Children really enjoy activities and games with object pictures and are of great benefit to their speech development. The compact size of the visual material allows you to use the pictures not only in kindergarten and at home, but also when traveling.
Source: https://orechi.ru/razvitie-rechi/tsvety-kartinki-dlya-detej
How to draw a fat woman, why I like it
My grandmother grows a fat plant. This is my most favorite flower. Popularly, the fat plant is also called the money tree. It does not bloom with bright flowers, it is very inconspicuous, but there is a story associated with it. When my sister and I were very little, we tore off the leaves of the fat plant - these were the money with which we played at the store. Of course, we were scolded for this, so we tried to tear off the leaves unnoticed, where it was not visible. This flower is dear to me with joyful, pleasant memories.
Pictures of plants for children
Plants play an important role in our lives. We know indoor and wild plants. Indoor ones grow on our windowsills in pots, and many children are very familiar with them.
If you are introducing children to plants in class, you can try asking the question: what houseplants do children know? Surely they will name at least a few.
Medicinal plants are also of great importance: many medicines are made from them. When telling children about medicinal plants, do not forget to mention plantain. Children should definitely know what a plantain looks like. The kids run a lot outside and often fall, scraping their knees.
Plantain can be the best medicine for wounds and scratches if you apply a clean leaf to the wound in time. Plantain is our reliable friend on hikes, when there may not be medicine at hand. The juice of this plant is often infused with alcohol and drunk for colds.
How to draw a blooming cactus in a pot
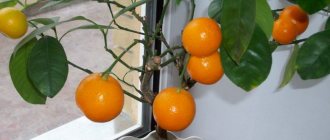
Once upon a time, the cactus was a rare plant that could be seen in the deserts of Africa or America. Now we consider the cactus to be an ordinary houseplant. In the south, some cacti are prepared as dishes. Some types contain liquid beneficial to the body. The cactus absorbs maximum moisture and then grows quietly in the desert without requiring much water.
We suggest you draw this plant. But not desert, but homemade - in a pot.
1
The basis
Draw a horizontally elongated oval.
2
Top
Draw two slightly curved lines down and connect them with a vertical line. You will get the top of the pot.
3
Bottom part
Draw two lines down, tilting them at a slight angle. Connect.
4
Plant
We begin “planting” the cactus. Draw a large circle, part of which intersects with the pot. Draw the shape using a compass.
5
Extra lines
Carefully erase the circle lines that intersect with the pot.
6
Recesses
The cactus is not perfectly straight. It has depressions like grooves.
Draw the other side of the plant as well.
8
Big spines
It's time to decorate the cactus with spines.
9
Little thorns
Decorate the rest of the lines with small thorns.
10
Additional lines
The last detail is two additional vertical lines on the cactus. Now the drawing can be considered complete.
11
Coloring
Color the cactus any shade of green. The rest of the details can be colored as you wish.
12
Collage of stages of drawing a cactus
If you see an error, please select a piece of text and press Ctrl+Enter.
evrikak.ru
How we learn colors and shades
2 September 2013, 20:15 •
General development
Gradually, Alice and I begin to develop color perception. This is one of the stages on the path to knowledge and understanding of art, the development of imaginative thinking and awakening interest in creativity.
As you know, creativity is one of the main paths to the development of the right hemisphere. And it is the correct perception of color, shape, tactile sensations (or, as it is also called, skin vision) that together will lead the child to harmony, which can subsequently become a way of self-expression in art.
Now our children are in their most active period of sensory development. We can let the child feel color with his eyes, skin, and understand his attitude towards this or that color. The sense of color is not only a manifestation of artistic abilities, but also the ability to reflect the surrounding world. Therefore, it is important that the child learns to notice colors and enjoy them.
Our knowledge of color standards began when Alice was about a year old. At 1.2, Alice was putting red, blue and yellow objects into piles. At 1.5, Alice was already tolerably sorting five or six colors:
By the way, you can download these cards here. The set contains 11 primary colors.
Acquaintance with color began through simple familiar objects. For example, through IKEA dinnerware sets. The cups were successfully stacked inside each other, which especially attracted Alice at that time.
Sorting colors quickly gets boring, so I was soon thinking of ways to draw Alice’s attention to the difference in colors. For example, we were looking for a pair of multi-colored socks and gloves from last year, and we were looking for felt-tip pens for their caps. If the cap was not there for a long time, we drew something on paper with it and applied the cap. So for some reason it was easier to find.
They also guessed the colors! The lids with a drop of paint were screwed onto ordinary jars of water. While the jar is standing, the water in it is colorless and transparent...
But as soon as you shake the jar properly, the water magically turns color...
Which needs to be guessed and matched with a jar of paint. My colors turned out opaque because I used gouache. If you use food gel paints or watercolors, the transparency will be higher.
Recently the boxes got confused and put on the wrong lids:
And we helped them find their own lid in the right color, while I named the colors. Gradually, I began to clarify that the box that Alice called brown was not just brown, but a copper color. And gray is not just gray, but silver.
We cut out stencils from cardboard and applied them to different colors of paper to find the right shade. Here I have posted these stencils for download, all you have to do is buy colored cardboard.
Not quite on topic, but we are learning to work with tongs, as Maria Montessori bequeathed. Large balls already lend themselves well.
By the way, Maria Montessori everywhere used didactic materials in her work for children to study color and its gradations, considering it necessary.
When we sorted things out a little with the tongs, it was time to not just fold the items, but sort them again by color. I cut out and placed colored pieces of paper in the bottom of the cake pan.
Here is another variation of our sorter. We arrange the beads into cells. This time with my hands.
In general, the surest way for a child to classify colors is to first introduce the basic pure colors - red, blue, yellow, etc. Then show the child the inner power of color - introduce the concepts of “dark” and “light”. And then talk about individual colors and complex shades, studying them by type of mixing. This is, of course, ideal.
- We also came from color to shade gradually.
- I have long wanted to do something special for Alice, to not just limit herself to sorting cubes of different colors, but to feel the depth of color, consider glare, reflexes, and come into contact with what color originally brings to us - living materials, not plastic toys.
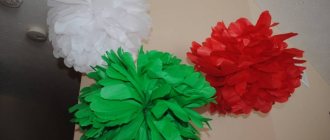
- And I made a flower sorter.
Periodically, we went and collected compositions like these, and then sorted them into cells with colored inserts, filling our installation. Of course, I changed the colored papers depending on the current bouquet. Alice almost never makes mistakes in shades; she immediately understands which color the flower she chose is closer to, even if it does not completely match the color of any of the cells.
It all started with the fact that we, having learned the basic names of colors (and we got 12 of them: 7 colors of the rainbow, black, white, gray, brown, pink), began to add shades to them. Soon we had light green, lilac and beige colors. Then, finally, cards from the hardware store came into play:
Learn to draw a flowerpot with daisies step by step
When drawing flowers, you can always give free rein to your imagination and creativity. You can use different techniques, materials, implement any ideas and play with the difference in colors. On our website we already have a sufficient number of creative works that depict bouquets, a drawing of a lily of the valley, a rose or a dandelion, a vase, etc. In this drawing lesson we suggest drawing a flowerpot, or rather, indoor daisies in a pot. The stages of work are not at all difficult. Follow the instructions carefully and you will succeed.
1
Auxiliary lines
We recommend drawing two even cross lines in the center of the sheet. Use a ruler for this. Starting from them, it will be much easier to draw a picture.
2
Top of the pot
Indoor plants are usually planted in beautiful clay pots. They have a peculiar shape. The upper part protrudes slightly and differs in size.
3
Bottom of the pot
We depict it in the form of a trapezoid. It is enough to add two straight lines on both sides. And draw a semicircular bottom.
4
Flowers
For example, we chose to draw daisies in a pot. Carefully repeat the details as in the picture. If you have any difficulties, you can look at more detailed instructions on how to draw a daisy step by step.
Erase the lines that intersect.
Using the same principle, we depict the following flower heads. We start with the simplest elements – the middle.
Add the petals, first on one side.
Then - on the other.
5
Erase the lines
We will no longer need auxiliary parts. It's time to get rid of them. Erase carefully with an eraser.
6
Greenery
Like most flowers, it has green leaves. We draw them in the form of thin, sharp shapes that resemble tongues.
7
Color it
To make the drawing play with different colors and look more interesting and impressive, it needs to be painted. You can offer this to your child as a coloring book or do it together. The choice of color is at your discretion.
8
Collage
9
Choose the appropriate color and draw on the site
If you like to color online, we suggest using online coloring of flowers in a pot. Your child will definitely love this activity!
Choose how you want to paint.
Video for the material
If you see an error, please select a piece of text and click
Ctrl+Enter.
Did you like the instructions?
6 Yes No 0
More instructions on this topic:
evrikak.ru
Flashcards for learning colors
August 18th, 2016 Alexandra Voronova
Cards for learning colors. Cards accompanied by short riddle poems.
| Like spring foliage, Like grass in a meadow, Like fir trees on a slope, This is our color... ( green )! | Like the sky, like the sea, Like a forget-me-not in a field. What color is this? Well of course... ( blue )! |
| Like chicken wings, Like butter from a butter can, Buttercup that you found in the garden. This color is of course... ( yellow )! | Like a tomato and a rose, Like cheeks from frost, A traffic light is a dangerous color. What color? Of course... ( red )! |
| Like a bird cherry flower, a leaf from a notebook, like an inept hare. This color is of course... ( white )! |
- Click on the pictures, enlarge and download to your computer.
- Also on the topic of flowers you can view:
- >> Children's poems for learning colors;
- >> Geometric shapes.
Educational video for children
Educational activities Winnie the Pooh
You can leave a comment or a link to your site.
Source: https://tili-mili-tryamdiya.ru/?p=4654
Stencil cards for learning color
With my youngest son, I am learning colors using the “100 Colors” kit. All their colors are divided into 10 main categories: red, orange, yellow, green, blue, purple, white, gray, black and brown. It was these ten primary colors that I prepared my cards for. If someone doesn’t have the “100 flowers” set, you can cut out such pictures yourself from colored cardboard measuring 7*10 cm.
My cards are made for an interesting introduction to flowers for a child. I found “colored” poems on the Internet and matched them with drawings. I want to share, maybe someone will also like my work.
The game consists of 36 cards with poems and 83 cards with stencil drawings.
In the cards with poems, it is highlighted in color which color card needs to be prepared, and in italics – which stencil pictures are needed.
While reading the poem, I place a color card under the stencil pictures. The game is fast and fun. You can also play with stencil cards in another way - apply them to any objects - children really like this game!
How I did it.
I printed the cards on matte photo paper with a density of 160. (When printing from a file, select “borderless” in the settings so that everything fits on the sheet). Then, using a stationery knife and nail scissors, I cut out what would be a window that would be interesting to show in color. After that I laminated everything.
I did this at home. Stationery stores sell sheet sets of 100 sheets of A-4 format for laminate. They can be easily processed with an iron. (It may be a little expensive, but it will definitely last for a long time. And now I’m doing a lot of things for the child). My density is not more than 150 microns (2*75).
You put a white sheet of paper, then a sheet of cards in the film, then a white sheet again and iron it at medium temperature. The film changes color from matte to transparent and becomes denser. After laminating, I cut out the cards with a utility knife and the corners with nail scissors.
I put everything in a tea box.
First, you can introduce the basic colors, and then even these same picture cards are suitable for introducing the shades from the “100 colors” set. For example, cherry - cherry, wave - aqua, milk - milk, chocolate - chocolate, etc.
Here you can download a PDF document with all 119 cards.
I'm also attaching photos of the finished cards. It is sometimes better to see once than to hear a hundred times.
Source: https://mamadelki.ru/raspechataj-i-sklej/kartochki-trafarety-dlya-izucheniya-cveta.html
Cards of primary colors and their shades, examples of games with them
I wonder how many colors the human eye can recognize?
Since ancient times, scientists have determined the number of colors and shades recognizable by humans in different ways. They now agree that there are about 150,000 color tones and shades.
Moreover, the human eye under normal conditions can distinguish about 100 shades of color background. The ability to recognize more colors can be trained.
Artists, decorators, designers and people of similar professions can distinguish about 150 colors by hue, about 25 by saturation and up to 64 by light level.
The harmonious environment of the surrounding space, the beauty of nature, painting, contemplating works of art, and, of course, games to study colors and their shades will help develop these abilities.
We bring to your attention cards - primary colors and their shades in gradations from dark to light, which can be downloaded below. Cards without color names.
It is better to print them on photo paper (matte or glossy of your choice).
Each card has a duplicate - this is necessary to implement the color perception games described in this article.
You can use the cards to study the primary colors: black, white, gray, purple, blue, green, orange, yellow, brown and red. And also to study the gradation of their shades from dark to light.
The game is suitable for children from 1 year.
Examples of games with cards of colors and their shades.
1. Study of primary colors.
Begin the study by offering your child cards with two colors.
For example, we show the child 2 cards - red and green. Take a green card and, showing it to the child, say: “This is green.” Then take a red card, saying: “And this is red.”
Place both cards again in front of the baby and ask him: “Show me the green” and then “Give me the red.”
Be sure to reinforce the names of colors in everyday life - at home, on a walk - ask your child to show red and green objects. Or, pointing to an object, ask: “What color is it?”
The main and very important thing is not to scold or get angry with the child if he confuses or does not want to name the colors. Not right away, but it will definitely happen when the child pleases you with his knowledge. For every correct answer, even if it is elementary in your opinion, praise, kiss and hug your beloved baby.
We find pairs of identical color cards.
This game not only develops color perception, it also develops your baby’s thinking. Place 2 of 3 contrasting colors (green, blue, red) in front of the child. Give each color a pair. Place all the cards randomly on the table. Point your child to one of the colors and ask him to find the same one among the others.
You can do the same with shade cards. Moreover, at first it is better to use shades of different colors, and then several shades of the same color.
We arrange the cards into groups.
Place 2 contrasting colors and their shades (for example, yellow and blue) in front of the child, mix them and suggest putting them into groups.
Then do the same with the colors of groups that are closer to each other, for example, red and orange, blue and purple, etc.
Using this game you can try playing with the whole family or between several children. There are as many color groups as there are participants. Each participant is assigned their own color. All colors are mixed and each participant chooses his own color from the heap, arranging its shades in a gradation line.
Development of photographic memory for colors.
Several cards with colors and shades are laid out in front of the child. First use contrasting colors, then close ones.
Show your child the color card (preferably 5-10 seconds). Let him find the same one among the cards on the table.
We arrange colors and their shades according to gradation from dark to light and vice versa.
To teach your child to lay out cards of colors and shades according to gradation correctly, you can use 2 methods:
Place a sample in front of your child. The main color and gradation of its shades are drawn on the sheet. The kid lays out the cards according to the pattern.
Using the "pyramid" method. Place cards of the same color group in front of the child. Offer to find the darkest color and put the card aside. Then, from the remaining ones, let the child again choose the darkest one and again put the card aside next to the first one chosen. Do the same with the rest of the cards.
When all the cards are laid out correctly (no matter how), be sure to review with your child the gradation of color cards: first the darkest color, then lighter, then even lighter, etc. until the brightest. Draw a line under the cards with your hand and tell your child that this is what the sequence of cards looks like from dark to light.
Similarly, teach how to lay out cards in gradations from light to dark.
"Colorful Cribs"
For this game, in addition to cards with primary colors and their shades, we will also need various paper animals, dolls, etc. , in general, those who can be “put to bed.”
Images of animals can be cut out from magazines and newspapers.
Take one set of cards of the same color group, place them in front of the child and tell them that these will be cribs for animals, since they are very tired and want to sleep. Place an animal on each of the cribs with your child.
After this, give the child another set of cards - a duplicate and tell them that these will be blankets. The animals are cold to sleep, so you need to cover them with blankets, but so that the color of the “crib” matches the color of the “blanket.” Let the baby choose a “blanket” for each “crib”.
If the color does not match, tell him that this little animal is uncomfortable sleeping and asks to replace the blanket.
If your child wants to arrange more animals, give him other color sets. But be sure not to give out a duplicate until the child has sorted out the animals, otherwise both color sets may get mixed up, which will make it even more difficult for the child.
Sing songs to the animals to help them fall asleep. Let some get out of bed earlier than others - they slept or wanted to go to the potty.
You can offer the child to arrange the cribs not randomly, but according to the gradation of their shades. This can be argued by the fact that the color beds must be located in this order, otherwise the animals will not go to sleep.
Download, play, share with us your fantasy games with color cards.
Envelopes for storing cards.
For convenient storage of cards, templates for making envelopes for each color group have been added to the file.
flower for drawing step by step with children
The floral theme is one of the most beloved in creativity. Observing gardens, flower beds and even indoor plants, a child from a very early age receives a lot of different impressions; by the age of 6-7 this topic seems familiar to him and therefore accessible. Both at home and in art lessons, flowers especially often appear in children's drawings. They have practical uses: tulips and lilies of the valley for greeting cards for March 8, and carnations for Victory Day. The variety of colors in nature, the richness of their shapes and shades allows us to use step-by-step drawing techniques with maximum benefit for children. Starting with simple pencil sketches, you can gradually increase the complexity of drawing techniques and develop new skills.
How to draw daisies
A simple and delicate wildflower lends itself easily to pencil, but looks even more beautiful in watercolor.
Make sure that the child is provided with everything necessary.
He will need:
Stages of drawing a daisy
- We start with a pencil sketch. The flower should occupy the top half of the sheet of paper, with an evenly small distance to the edges.
- Paint the petals white. We draw the brush from the edge to the center, while changing the angle of the brush and turning the sheet as convenient.
- Fill the middle with ocher, leaving the very bottom unpainted. Let's make it darker. Using a toothpick, add a few brown, white and green dots in a circle around the middle.
- Using the side of the brush, draw a green line—the stem of the flower.
For children, chamomile is one of the most convenient summer flowers that can be combined into a bouquet when painting step by step with watercolors. At the same time, pay attention to the competent construction of the composition. It is advisable to take an odd number of flowers of different sizes and “maturity” and arrange them evenly.
How to draw roses
The scheme for drawing a rose with paints (watercolor, gouache, etc.) is suitable for children who have been creative for a long time and already know a lot. You will need the same supplies as above, just without the toothpick.
Stages of drawing a rose
- We create a contour drawing of the bud in pencil or gouache (the first option is recommended for not very experienced artists, the second for more advanced ones). Lightly paint it with a neutral shade of red, not too light and not too dark.
- We accent the edges of the petals with paint of a darker shade.
- Add a large spot in the middle with white gouache and lighten the edges here and there.
- Draw the stem and leaves. Using darker gouache we add thorns and make the stem voluminous. Draw the veins on the leaves.
- We emphasize the stem and edges of the leaves with brown gouache, and the spots on them with white gouache.
- We make a light blue background, starting from the upper left corner: here it is the most saturated, then it becomes more and more transparent. We leave blue spots here and there.
How to draw tulips
To paint tulips, we suggest trying acrylic paints. The child will get acquainted with some new techniques and discover the possibilities of this bright, juicy palette.
Prepare
- acrylic paints in tubes
- paper
- brush
- container with water
Stages of drawing a bouquet of tulips
- Create the background. To do this, squeeze out drops of yellow and white paint onto the entire surface of the sheet and begin to brush it, as if smearing them. In the upper part we make the background more transparent, for this we add water with a brush. Let the sheet dry.
- Using a wide brush, pick up yellow paint and make the first petal approximately in the middle of the sheet, and others nearby to make a flower.
- We draw several of these flowers, placing them in the middle horizontal third of the leaf.
- Using a smaller brush, paint the veins on the petals with orange and red paints.
- We draw green stems and leaves, use different shades of this color.
Acrylic paints are suitable for painting on wood, plywood, plastic and other surfaces. A child can use such a scheme to create a real picture or decorate some interior items.
fruktoviysad.ru