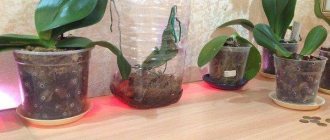
Propagation of orchids by vegetative method is in the simplest and most accessible way for the average gardener. Sprouts are formed on adult plants naturally under normal conditions.
Even a beginner who has never done this can grow, separate and plant it. You just need to know how to do it correctly, otherwise the process can be lost and all your efforts will be wasted.
Growing an orchid shoot on a peduncle
The shoots (children) of orchids directly depend on the mother plant. Therefore, they need to be provided with the highest quality care and the most favorable growth conditions:
- First of all, ensure sufficient lighting. The light should be bright, but diffused for 12-14 hours a day. Direct sunlight on a western or eastern window is acceptable. If it is impossible to provide the plant with natural light, the plant is illuminated with phytolamps;
- daytime temperatures should be between 22-28 °C, night temperatures should be approximately 5-6 °C lower. Temperature differences are necessary for more confident photosynthesis. Recommended temperatures should not be exceeded or decreased. This can cause stress in the mother plant and inhibition of development;
The difference between day and night temperatures should be about 5-6 degrees.
- air humidity should be as high as possible. It must be increased by all available means. High air humidity is also important for the rapid development of the plant, as the stomata open and the orchid captures more carbon dioxide molecules per unit time. Carbon is essential for building cells. It is optimal to keep humidity at 70%, but not lower than 50%.
Important! A factor in the health of an orchid is access to fresh air, as well as its circulation.
Watering and fertilizing as usual. In nature, orchids produce shoots and gain vegetative mass during the rainy season, when elevated temperatures are combined with an abundance of sun and moisture.
Plant stimulation with hormonal agents is only permissible for adult, large and healthy plants. Otherwise, there is a risk of depleting a young or weakened plant.
Next, we will take a closer look at the orchid shoot: how to separate it and plant it?
Planting in an air greenhouse
Much more difficult than a regular landing. The greenhouse is created from a pencil and a plastic glass or bottle. Holes are made not only in the bottom, but also in the sides. The first are drainage, and the second are for pencils. Moistened soil from bark and moss is poured into the container, but a small amount of peat is added. A little space is left in the greenhouse.
The process is placed on a pencil. The root system should be in the air and only touch the substrate with its tips. The container is placed on a warm and well-lit windowsill. The shoot remains in the greenhouse until the roots grow to seven centimeters, and then it is transplanted into a regular pot.
If everything is done correctly, the baby will not only quickly take root and settle in, but will also quickly grow.
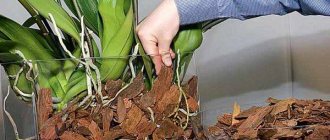
Separation from the mother plant
The shoot is removed from the peduncle after it has grown at least 2-3 leaves and at least two pairs of roots more than 5 cm .
The same must be done with the shoot that formed below, near the roots of the mother plant. When inspecting the root system, be careful - try to cause as little harm and damage as possible.
In general, it is not necessary to separate this process. You can leave it and in the future get two plants in one pot, which will bloom twice as luxuriantly.
If the shoot appears on the orchid stem itself, it is not touched and left on the mother plant.
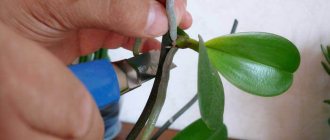
The procedure for planting a shoot is carried out with a sharp, disinfected knife, scalpel or other cutting instrument. If it is not possible to carefully separate the shoot, it can be cut off along with a short fragment of the peduncle. The cuts must be treated with crushed charcoal or cinnamon.
Attention! It often happens that the baby, while still on the peduncle, tries to bloom. This should not be encouraged under any circumstances - the flower stalks of children must be removed without fail.
Finding children for transplantation
Reproduction by children begins with the right approach to the entire process.
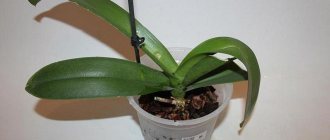
The baby orchid grows on the peduncle after the flowering period. If you look closely at the stem, you can see small tubercles covered with scales on it. These are dormant buds. It is from them that the baby orchid begins to grow, but not always. It can also grow from the axil of a leaf. Although in fact these are root shoots, which are a new round of flower development.
If after the orchid blooms the peduncle remains green and viable, then it is likely that a new shoot will appear from the dormant buds. If the peduncle begins to dry out, then a new stem will begin to grow from the root.
The baby looks like an independent plant in miniature. First, a stalk appears, then several leaves form on it, and a little later their roots appear.
Important! Over time, these leaves may dry out, but there is no need to worry. They give nutrients to young roots.
How to plant an orchid shoot at home?
So, the separation is done, how to plant the sprout? It is planted in a perforated pot of suitable size as an adult plant. A fine bark substrate is required . A few days before separating the shoot, it is strongly recommended to treat it and the adult orchid with epin. This is done to more confidently adapt the plant to new conditions, as well as to minimize stress.
It is better to separate the shoot with a small fragment of the peduncle . It is highly advisable to treat the sections with charcoal or cinnamon and dry them in the shade for 1.5-2 hours. The substrate is poured into a suitable pot to fill 1/3 of the volume, the young plant is placed inside, and the empty space is filled with the substrate. Before planting the shoot, the substrate can be moistened with a sprayer , but it should not be wet.
Planting baby orchids.
Before rooting the shoot, you need to make sure that the plant is secured so that it does not wobble in the pot when accidentally moved. There is no need to press the substrate. If the plant sways, it can be secured by tying it to the pot with women's tights. When the shoot is sufficiently rooted, the garter can be removed. Rooting lasts on average 2-4 weeks , depending on the conditions of detention.
Transplanting a Dendrobium shoot - a guide for beginners
The Dendrobium orchid is capable of producing children much more often than its popular relative, Phalaenopsis. The sprouts can grow independently on the mature pseudobulbs of the mother flower. In this case, it is enough to wait for the leaves and good strong roots to appear. You can separate the baby from the trunk when its root shoots reach 5 centimeters in length. They grow for about 5 months.
Interesting! Article - orchid transplantation.
The junction of the adult orchid and the shoot must be carefully cut off with a sharpened knife blade or carefully broken off with a gradual rotational movement - that is, “unscrew” the baby from the mother culture.
The sections must be dried for half an hour and powdered with crushed coal or cinnamon; you can use garden pitch. The planting scheme and principles of initial care are the same as for baby Phalaenopsis. With proper maintenance, the young plant will bloom within 2 years after transplantation.
Further care
Watering is not carried out for the first few days. This is done so that the microtraumas of the roots are healed. Then water it using the dipping or soaking method. The second method is more preferable, since fresh pine bark does not absorb moisture well.
The frequency of watering depends on the conditions of detention , the condition and type of the shoot itself. In summer it can be daily. Keep an eye on the substrate and plant roots.
Care for the shoot as if it were an adult, recently transplanted plant. You can, for example, treat the roots with a root solution for better rooting.
For the first 10-14 days, you need to choose a shaded place for the shoot , excluding direct sunlight.
After this period, the orchid is placed in its permanent place of growth and care is provided aimed at gaining green mass and expanding the root system.
Advice! To achieve better results and rapid development of young orchids, they can be grouped in a florarium/orchidarium - a place where high humidity and bright lighting are maintained.
Soil for planting
You can use both moss and pine bark. The first one will need to be irrigated daily, which is not very convenient and is only suitable for those plantings that will be kept in conditions of high humidity. Most often, preference is given to the latter option, which allows you to obtain more moisture-intensive soil. The main thing is to take pieces of at least one centimeter, and not dust. You can buy bark at any specialized gardening store.
To keep aerial roots, which are highly sensitive to watering and fertilization, safe, it is better to use both materials. The soil is made from clean pine bark, and sphagnum is laid on top. This soil mixture allows you to minimize the care requirements of the orchid. The gardener can water the shoot even with hard water.
Possible risks
The shoot of an orchid from an adult plant, in fact, differs only in size. Therefore, the risks and rules for transplanting it are the same as for an adult . The best prevention is to keep the plant in favorable conditions. When planting, try to be careful with the roots of orchids - they are quite fragile and can be easily broken.
Pest damage is possible if the plant is weakened and neighboring ones are already infected. It is necessary to maintain plant hygiene and not place them too close to each other. In case of an attack of paranoia, orchids can be sprayed with actara.
Orchid pests.
When can I drop it off?
You can remove the shoot from the parent only when it is ready for this. There is no need to rush: the branch should get a little stronger.
How to understand that the shoot is ready for separation
How to take a shoot from an orchid: transplant options and examples at home
The florist will understand that the daughter is ready to separate from her parent by several signs:
- 5 leaves appeared on the young shoot. Thanks to the leaves, the plant feeds and breathes independently.
- It has grown healthy strong roots (at least three). Do not replant before the length of each root reaches 5 cm.
- The shoot should mature on the mother flower within 5–6 months. It is not recommended to separate it earlier.
A strengthened and healthy shoot can be separated and transplanted into a new pot to grow a new orchid. This is one of the main methods of propagation of this flower.
The optimal temperature for transplants is 20–25 °C, suitable air humidity is 50–60%. It is best to separate the shoot in summer or spring, but this depends on the condition of the adult orchid. As a rule, an orchid does not produce shoots in winter.
Young shoots rarely grow on an adult orchid. His appearance can be considered a stroke of luck. This will allow you to grow another flower in the room. Most often, the shoot appears in the warm season - in summer, late spring or early autumn.
Important! A child with weak roots cannot be planted; it may die. You need to wait until the roots get stronger, otherwise the shoot will not take root in the new place.
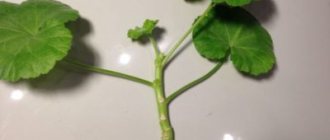
Daughter shoot near the root at the base
Is it possible to separate the baby if the orchid is blooming?
Inexperienced gardeners have difficulty noticing that an orchid has a baby on its trunk. Not every flower lover knows what to do if an orchid is blooming at this time. In this case, it is advisable not to replant the young shoot, but to wait until flowering ends. Separation of shoots is a serious stress for a flowering plant. In addition, during this period, the daughter’s roots have not yet formed, so she will not survive on her own.
Important! You cannot cut off and replant several children from one mother plant at once. This can destroy the parent.
Daughter shoots need to be separated so that they do not destroy the parent
If it grows on a peduncle
Very often there are situations when an orchid gives birth to a baby on a peduncle. How to transplant a young shoot is described below.
Detailed instructions on how to remove a baby orchid from a peduncle:
- Using a sterile pruner, cut off the young shoot, capturing part of the peduncle, but leaving 1–2 cm on the parent branch.
- The cut area for disinfection is sprinkled with crushed activated carbon and allowed to dry.
- The base of the shoot is cleared of scales to allow roots to grow.
- Expanded clay, tree bark and wet moss are placed in a plastic cup with a hole in the bottom.
- A horizontal support is installed on top that will support the plant. Additionally, you can install a vertical support to hold the stem.
- The branch is attached to the support so that its lower cut does not touch the ground. The shoot should hang in the air, this will allow the plant to take root.
- The plant is covered with a large plastic bottle or eggplant with the bottom cut off, placed in a warm place and watered regularly.
Important! You must wait until the roots grow. Then the branch can be transplanted into the ground.
This rooting method is widespread among gardeners because daughter shoots often grow on the peduncle.
Tools must be disinfected
How to properly care after the procedure?
An orchid needs warmth, light and moisture, while their excess is harmful. Favorable conditions for orchid babies:
- temperature – +25 °C;
- humidity 50–60%;
- calm light;
- protection from burns from direct scorching rays of the sun;
- regular watering of dried soil with filtered water - after three days;
- spraying leaves with water;
- nitrogenous fertilizers at the roots after watering or spraying with fertilizers - monthly;
- Make sure there is no standing water in the pot.
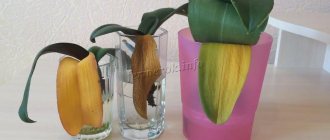
Care is also provided for the mother plant after the children have been separated. Yellowing leaves, a stunted and drying plant are signs of violation of the rules of replanting or improper care of it.
An orchid reproduces by shoots - children that appear on an adult plant : on the stem, peduncle and at the base. Shoots with strong roots are planted in a pot with substrate. Children without roots are placed in a greenhouse or on foam to grow roots.
To transplant shoots, a number of rules are followed. Failure to comply with the instructions can result in yellowing of the plant leaves, rotting of the roots, etc. An orchid is a fastidious plant and will die without proper living conditions.
How to raise a baby to the state of a flowering plant
Phalaenopsis orchid babies
So we figured out how to transplant a baby orchid, now we just need to find out how to care for it in the future. Young phalaenopsis plants are very delicate and require care. They can easily be ruined by even slight overdrying. The first watering after planting is carried out only on the 2nd or 3rd day. Then water as needed, but usually no more than once a week.
During the first year, the sprouts are grown in a small greenhouse. Or, in its absence, put a transparent plastic bag on the pot. If at this time the baby produces a peduncle, it is better to remove it. Otherwise, the young plant will weaken and may even die, having spent all its energy on producing flowers.
After the children are strong enough, they are carefully transferred to a larger pot. You can now use a larger substrate for planting. Now caring for them is similar to caring for adult plants. Watering as needed, fertilizing orchids during the period of intensive growth from March to October.
With proper care, a baby phalaenopsis will bloom within 2-3 years of cultivation. At first there may be only a few buds on the flower arrow. As the orchid grows and develops, their number will increase.
And also when growing, do not forget about pests. Most often the following species appear on phalaenopsis:
- Scale insects are a difficult pest to eradicate. You can bring it into the house when purchasing a new plant. The fight against it involves manual collection of pests and treatment with insecticides.
- The whitefly is a rather small and dangerous pest. The fight against it involves the use of systemic insecticides. You can also try placing special glue traps.
- Thrips are another fairly common pest. Everyone fights them - also using a card.
Growing a phalaenopsis from a baby is not at all difficult. The main thing is to try and then you will definitely succeed.
Phalaenopsis flowering
Caring for a transplanted baby
Proper care will help a young orchid grow into a beautiful adult plant. The florist must provide the necessary conditions for both the transplanted child and the parent. Then the flowers will survive and will delight the owner with their beauty for a long time.
Additional Information! The orchid loves a warm shower, so in the summer months the flower can be placed in the shower for 5-7 minutes.
The condition of the transplanted appendage must be closely monitored. If the leaves turn yellow, the flower withers and dries up, it means that the grower violated the rules for transplanting the shoot or did not properly care for the plant. Secateurs and soil must be disinfected to avoid infection. The cut site is also treated with activated carbon or mustard.
Yellowing leaves are a sign of dry soil or sunburn. It is necessary to water the plant and place it in the shade. If the orchid is watered too often and abundantly, rot will form on the roots, and then the flower will need treatment. Root rot and leaf wilting can be caused by pests. Then it is necessary to use insecticides and special preparations to treat plant diseases.
The root is grown using wet sphagnum
Stimulation of root emergence
It happens that a young orchid does not grow roots. There are several ways to grow the root system on a separated child. Good methods are to float the scion on foam and suspend it above the ground. But there is another effective way to help your child develop a healthy independent root.
How to grow roots on a daughter shoot of an orchid:
- Moss (sphagnum) is soaked in water for half an hour.
- The soaked and swollen moss is rolled into a ball and tied with thread.
- They make a small greenhouse: put drainage in a plastic glass with a hole in the bottom, and then moss (sphagnum).
- A support for the sprout is placed outside, which will not touch the moss.
- The underside of the baby is treated with a root growth agent (for example, “Kornevin”), which is added to the water for irrigation. It is necessary to alternate the use of water and the product: today they water it with water, and after 2 days - with Kornevin.
- The baby is placed in the moss, pressed tightly against it, secured from below and tied to a support.
- Sphagnum moss is watered and sprayed daily.
- The entire structure is covered with plastic film or a greenhouse and placed in a bright place, protected from the burning rays of the sun.
This method can be used even for children growing on the mother plant. The wet moss is fixed to the base of the parent's peduncle and the roots of the daughter shoot are waited for.
The roots will grow no earlier than after 3 months. Sometimes the extension process can take six months.
The reason for the lack of roots lies in insufficient lighting, inappropriate fertilizer or lack of moisture. First you need to eliminate the cause, and then grow the roots. If the flower does not have enough light, you can install a phytolamp. The plant needs regular, but not excessive watering and fertilizing. An orchid will not survive without roots, so the grower should begin growing the roots of a young flower as soon as possible.
The orchid must receive enough heat, light and moisture, but their excess can be harmful.
Temperature and watering
You need to care not only for the children, but also for the mother’s flower. After the appearance of offspring, an adult orchid needs increased attention and careful care. It needs to be fed with nitrogenous or complex fertilizer and provided with a warm, moist environment.
Necessary conditions for a parent:
- temperature 20–23 °C;
- air humidity 50–60%;
- muffled light;
- protection from direct scorching rays of the sun.
Caring for the mother flower:
- regularly water the dried soil;
- Spray the leaves with water every day;
- the flower can be fertilized at the root or sprayed with fertilizers;
- Make sure that water does not accumulate in the pot.
The transplanted baby does not require special care. It must be kept in a greenhouse for a year. The temperature inside the greenhouse must be at least 25°C. For the first time after transplantation, the baby is watered on the 4th day. The soil should dry out a little, so the plant should not be watered daily, but once every 2-3 days. For irrigation you will need filtered or settled water.
After a month, the baby is fed with nitrogenous fertilizers. Then it needs to be fertilized every two weeks. A young plant requires 2 times less fertilizer than an adult flower. Only a healthy plant with strong roots can be fertilized. Before fertilizing, water the soil abundantly.
After transplantation, the young shoot is placed in a greenhouse
The greenhouse should be placed in a well-lit place, but direct sunlight should not fall on it. It is best to place it near an east or west window. The baby is growing quite slowly: in three years she will become an adult orchid and will look incredibly beautiful.
Growing a young orchid at home on your own is quite difficult. If a baby appears on a flower, it must be planted. This is one of the main methods of orchid propagation. The flower of this species is very whimsical and requires good care.
Coffee capsule Nescafe Dolce Gusto Chocochino, 3 packs of 16 capsules
1305 ₽ More details
Hot chocolate capsules Nescafe Dolce Gusto Chococino, 8 servings
334 ₽ More details
Greeting cards
Features of orchid propagation by children
Of all the variety of orchids, the Phalaenopsis variety is successfully propagated by shoots or babies (they are also called keiki). The appearance of offspring on exotic flowers occurs by dividing the peduncles. To do this, plants are artificially stimulated to provoke the birth of children by changing the ambient temperature and reducing watering and fertilizing.
What should be the soil for replanting an orchid?
You can use standard soil for planting “for orchids”, which is sold in stores. It is not difficult to make such a soil yourself, using equal parts of sphagnum moss, peat, finely ground pine bark and small pieces of charcoal.
You can use a regular plastic cup as a pot. It is transparent, so it will be easy for you to observe the development of the root system.
| Note! Be sure to make drainage holes. You should not plant small keiki immediately in a large pot. |
Photo pixels/Teona Swift: You can use soil “for orchids”.
When to replant keiki orchids: optimal timing
A baby can be planted from any flower when the length of its roots reaches 5–6 cm. There will be at least 3–4 roots, and it will also have at least 3–5 well-formed leaves.
Thanks to the leaves, the shoot independently breathes and photosynthesizes. There is no point in removing it ahead of time: it will not take root in a separate pot. The main thing here is patience and proper care. Keiki must grow on the mother bush for at least six months. It is best to replant them in spring or summer.
How to recognize a pseudobulb?
The growth of an orchid is an extremely fascinating spectacle. Many flower growers try to observe changes in their pets every day. And adjust the feeding and watering schedule in accordance with the periods of growth and flowering.
As a rule, there are no problems with the baby, which is formed on a peduncle from a bud. It's hard not to recognize her. The difficulty is with the so-called root cake. Therefore, when an inexperienced collector notices a new growth on the basal part of a flower, he is confused, trying to guess whether it is a baby, a peduncle or a new root.
It is relatively easy to distinguish the root from the peduncle and the baby. A new growing root forms next to the old roots. During the growth process, the root “breaks through” the leaf. And after 2-3 weeks, a blunt “nose” appears on the root. It is characteristic only of the root system. And it will help dot all the I’s.
Peduncle, or in common parlance an arrow. It also develops quite specifically. As a rule, the tip of the peduncle appears “from behind the axil” of the leaf. But there are frequent cases of the formation of a peduncle in the root part. Then it becomes not so difficult to confuse it with a root baby.
The main signs of a growing basal baby are:
- the baby, like the peduncle, can form “behind the axil” of the leaf;
- the baby has a sharp tip;
- oval shape;
- within a few weeks it should take on a “boat” shape;
- If a flower suddenly has another growth point, we can say with confidence that a new baby has formed.
Curious! Often, a gardener can observe for several weeks the development of a peduncle, which later turns out to be a baby. These are the surprises nature gives us!
Watch a video about the difference between a root and a peduncle on an orchid:
Also useful will be materials about growing orchids from seeds and about Thai orchids.
How to plant a shoot: step-by-step instructions
The sequence of actions in the process of transplanting a shoot depends on the presence of roots and the location of the child’s attachment.
From the roots
A young orchid sprout with roots is planted in new soil. To obtain the desired result, you must strictly adhere to the rules.
- They start by preparing the pot according to this algorithm: place a layer of expanded clay on the bottom, and lay out the substrate on it.
- Water the soil with a solution of potassium permanganate.
- Cut off the shoot.
- Make a hole in the soil and place the sprout there.
- The roots are sprinkled with substrate.
- Cover with a greenhouse (plastic bottle).
Without root
A shoot that does not have roots is not planted in the ground.
Accelerating rhizome growth is possible in two ways:
- The first method involves the steps below:
- The baby is placed in a greenhouse made from a plastic bottle, which will retain heat and humidity.
- The bottle with the shoot is suspended over a pot of substrate and wait for the shoot to take root.
- The second method of rooting an orchid sprout involves other actions:
- The baby is placed in polystyrene foam.
- Make a hole through which the base of the shoot is pulled.
- The structure is placed in a glass of water and secured.
- The foam is covered with a greenhouse on top or wrapped in polyethylene film.
The shoot is kept under water until roots appear. - The plant with roots is transplanted into the ground.
If it grows on a peduncle
The method described below is common, since daughter sprouts are more often stuck on the peduncle.
- Prepare a plastic cup by making a hole in the bottom.
- Clear the base of the shoot from scales, as this will allow the roots to grow faster.
- Place a layer of expanded clay on the bottom of the prepared glass, and a substrate on it.
- Place a horizontal support on top to support the plant.
- To secure the stem, install a vertical support.
- Attach the shoot to the support, not allowing the bottom cut to touch the ground. Hanging the baby in the air will allow the roots to grow.
- Cover the structure with a plastic eggplant without a bottom, place it in a warm place and water regularly.
Important! After the roots grow, the young plant is placed in the ground.
Another way to grow roots in a baby orchid that appears on a peduncle:
Which baby can be placed
First, let's figure out what a baby is. This is a small shoot that forms on the peduncle and has a root system. This “baby” is formed after the plant blooms. At this time, a young shoot with a bud or a miniature daughter shoot is formed on the stem. It cannot take root because it has no root. At first, it feeds from the mother’s “body” until it acquires its own root system and throws out the first leaves. When the “baby” acquires five leaves and the roots grow to 5 cm, the baby can be planted, as it has become stronger and gained strength for independent growth. With natural growth, this takes about six months. Some gardeners try to influence the speed of this process and spray the children with a stimulant and rub them with moss. However, children who grew up without human intervention take root better and subsequently develop.
When “babies” appear on the mother’s “body,” caring for the flower remains the same
It is very important to plant the baby on time, because if the roots grow too long, they may be damaged during planting due to their great fragility. The orchid releases the baby when it is ready to reproduce
There are times when the threat of death forces a flower to begin to reproduce. A kind of concern for procreation. If, for example, during watering the growing point turns out to be flooded or the roots have rotted, then development is at risk, and the flower devotes all its strength to starting to reproduce.
Consequences for the mother flower
Some gardeners believe that the baby does not need to be separated, which will make the bush more lush and larger. But that's not true. The mother plant spends a lot of energy and vital resources on growing a new shoot, and its own development is suspended.
Important! If a baby stays on an adult flower longer than expected, it may also stop growing or die.
If all the necessary stages of separating the offspring are followed, the adult plant will quickly continue to grow and will bloom with renewed vigor in due time.
How to properly plant an orchid without harming it?
As the baby grows, the conditions for caring for the orchid change. The plant should be kept in a warm, humid atmosphere and the percentage of nitrogen in the substrate should be increased.
When carrying out the operation, in order not to damage either the adult or the young flower, you must strictly adhere to the established rules:
- plant the shoot only after flowering has ended;
- use a sharp, sterile instrument;
- Be sure to disinfect all cut areas.
Preparing items for the procedure
It is recommended to transplant the baby orchid into a thin pot with holes in the bottom and a diameter of 8-10 cm. The soil is prepared by mixing:
- sphagnum moss;
- ground tree bark (pine);
- charcoal.
Materials you will need:
- activated carbon – 1 tablet (or crushed cinnamon);
- expanded clay;
- alcohol.
To perform transplantation operations at home, prepare the following tools:
- pruner;
- sharp knife or scissors.
Tools are disinfected.
Transplanting a plant into a separate substrate
Transplanting a new plant into a separate substrate is quite simple, but you still need to know some details. First you should prepare for this procedure. To do this, the separated cuttings (described above on how to properly trim the baby) need to be soaked in water for at least 15 minutes. If desired, you can add a growth enhancer to the water (any one is suitable, but you need to dilute it correctly - following the instructions). Why is soaking necessary? Wet roots are more flexible and less susceptible to being placed in a pot.
Now take a container for the plant. You need to lay a drainage layer on its bottom. You can use vermiculite, expanded clay or ceramic shards. Choose the option that is convenient for you. Next, the plant is lowered into the pot and held so that the leaves are higher than the top point of the pot. The substrate is carefully poured so as not to injure the roots. In this case, you need to lightly tap on the sides of the pot so that the soil is evenly laid. But do not pack the soil mixture too tightly, as aerial roots need access to carbon dioxide for nutrition. Leave the plant in this form for two to three days, after which you can water the plant.
What can be used to speed up the formation of the root system in a baby orchid? A good choice would be one of the following drugs, which can be purchased at a specialty store:
"Ribav-Extra". The manufacturer positions the composition as a root former. It is used to treat flowers, as an anti-stress agent and to accelerate the formation of roots in young plants, ensuring their better survival. The composition is diluted on the basis that two drops of the product are needed per liter of water. "Zircon". This drug is universal. That is why, when diluting it, you need to make a weaker solution than indicated in the instructions, so as not to harm the orchid. For a child, it is enough to add four drops of the product to one liter of warm, settled water. The drug itself belongs to the group of phytohormones, so it can be considered one of the best feeding options. The basis of the product is an extract of Echinacea purpurea. "Radifarm". The drug is developed on the basis of various plant extracts. It is able to actively stimulate the growth of the root system, ensure better survival rate and guarantee the survival of plants
For an orchid, it is important to dilute the composition correctly: add one drop of the product to a liter of water. "Etamon." The product has positively proven itself as a stimulator of root system formation
The main advantage of the product is the presence of phosphorus and nitrogen in the composition, which are necessary for the orchid. Correct dilution of the composition requires that you add one ampoule of the product to a liter of water.
As you can see, separating a baby from an adult orchid is a simple procedure. To ensure everything works out exactly, you need to follow the recommendations given. This is a guarantee that the plant will take root and no problems will arise. Remember that you cannot separate the baby while the orchid is blooming. Wait until the flowers fall and the plant enters the resting phase. Pruning small plants from the mother specimen during the flowering period is stressful for the plant, which can lead to a deterioration in its health: lethargy, falling leaves, and stunted growth.