Gorgeous bright gladioli are the favorite flowers of many gardeners. These plants can decorate any area, always look great, and can also be used for cutting. Gladioli are often grown in open ground, however, pots can also be used. In the article we will learn how to grow gladioli in pots, find out all the intricacies of this process, and get acquainted with the varieties most suitable for this purpose.
Description
Gladiolus is a bulbous perennial plant belonging to the iris family. The flower is also found in the wild: in some Asian, South African and European countries. Scientists have currently discovered about 200 species of this wonderful plant.
External characteristics
Gladioli grow quite tall, have smooth straight stems reaching 50-200 cm. The leaves of the plant are very elongated (see photo), sword-shaped, also very long (50-80 cm).
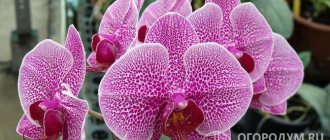
As for the flowers, they are the main decoration of the plant. The buds have an elegant funnel-shaped shape and always consist of six petals. The shades of the buds can be different: most often they are yellow, pink, purple, red tones. A special feature of the plant is its inflorescences: the buds do not grow singly, but are collected in oblong groups consisting of approximately 15-22 flowers.
Preparing bulbs for storage
The bulbs are shaken off the ground, the roots are cut off and the children are separated. Then they are washed under running water, treated with a weak solution of potassium permanganate and dried in a dark, ventilated room for several days.
Store in cardboard boxes with ventilation holes, turning the corms on the other side several times a month. Do not cover with peat or sawdust. You can cover it with paper. The optimal temperature during the dormant period is 10 degrees, so the boxes are placed in the cellar or vegetable department of the refrigerator. In February, the corms can be sprayed with Kornevin's solution to prepare the gladioli for planting in the spring. Babies are stored in the same way, but at lower temperatures, about 5-6 degrees.
Varieties
Since gladioli grow quickly and quite strongly, not all varieties are suitable for planting in a pot. It would be right to choose varieties that are not very tall: species reaching a height of 25-60 cm are best suited. Next, we will get acquainted with the most popular varieties of gladioli suitable for pot growing.
Tinkerbell
The variety belongs to the butterfly-shaped species, it looks very beautiful and impressive. This gladiolus grows to a height of 45-75 cm, which is quite suitable for pot cultivation. The color of the petals is orange, bright, while the throat of the buds is yellow.
Moscow white stone
A domestic hybrid reaching 60 cm in height. The plant is very unusual and beautiful, it has graceful petals with a corrugated texture. Note that about 40 buds bloom simultaneously on this gladiolus: the spike-shaped inflorescence turns out to be very lush and elegant.
White City
This is a primrose gladiolus, which boasts a bud diameter of about 5-7.5 cm. The color of the petals is snow-white, the inflorescence consists of 23 magnificent buds
Bow Peep
Dwarf gladiolus: pot growing is ideal for it. The plant usually reaches half a meter in height, sometimes it can grow up to 65-70 cm. The buds have an unusual corrugated texture and are colored in a delicate apricot shade.
Georgette
A very beautiful variety, also suitable for open ground. The color of the petals is red and yellow.
The best varieties for mobile flower beds with photos
Atom
Height 40–60 cm. There are 6–8 buds on the shoot. The petals are scarlet or red-orange, with a silver edging. Blooms up to 30 days.
Prince Claus
A thin-stemmed variety up to 50 cm high. The inflorescence contains from 5 to 9 buds. Flowers with a pleasant aroma, white with a crimson pattern similar to petals.
Natalie
Height 45–60 cm. Inflorescence of 15 buds. The petals of gladiolus variety Natalie are soft pink, with a crimson center.
Ramusus Robinetta
Grows from 35 to 60 cm. There are 5–8 buds on the shoots. The flowers are reddish-crimson, large - up to 10 cm.
Green Star
There are 15–25 flowers in the inflorescence. The height of the plant is about 90 cm. The flowers are large, with corrugated petals of a bright light green color.
Growing conditions
Let's find out what conditions are best suited for growing potted gladioli.
Location and lighting
Gladioli love abundant but diffused lighting. It is better not to keep the flower in direct sunlight, as this can cause burns to its delicate petals. In a pot, gladiolus can be placed on a balcony or windowsill, protecting it from the midday sun.
In summer, you can also place the pot in the garden: always in a well-lit area. The flower needs 12 hours of daylight. In winter, this condition cannot be achieved with natural light, so artificial lamps must be used.
Temperature
Although gladioli are heat-loving plants, they can also thrive in moderate temperatures. The optimal temperature is considered to be +20 degrees. Flowers do not like extreme heat and may even die if they are grown indoors in the summer without ventilation and air conditioning. The plant also needs to be protected from wind and drafts.
Priming
The substrate for potted gladioli must be fertile and permeable. During its rapid growth and flowering, the plant consumes a lot of nutrients, so it is necessary to take care of fertilizing the soil in advance, before planting.
The soil structure should be light, loose, and have excellent permeable qualities. The best choice would be to purchase a specialized substrate at a flower shop.
Choosing a pot
Choosing a suitable container for growing gladioli is not an easy task and is very important. As for the material, in this case it can be anything: plastic, ceramics, clay. In addition to containers, you can take a closer look at flower pots and flowerpots, which can also be used to wonderfully decorate your space.
It is very important to select a pot commensurate with the height of the flowers. If we talk about medium sizes, then the diameter of the container should not be less than 30 cm, and its depth should be at least 40 cm. In general, the deeper the purchased pot is, the better.
Choose containers that are quite large, since even dwarf gladioli are quite massive compared to other house flowers. The volume of the pot should be at least six to seven liters, and preferably about ten. Moreover, it is better to plant several gladioli in one container at once: this way the flower arrangement turns out to be more spectacular and lush.
The flowerpot must be equipped with drainage holes: gladioli cannot tolerate stagnant water at all. Place the container on a tray so that the water has somewhere to drain after watering.
When to dig up gladioli
It is imperative to dig up gladioli for the winter. Even frost-resistant varieties left in the ground quickly go wild. Therefore, when planning your flower beds, make sure that there are no plants near the gladioli that will interfere with cleaning.
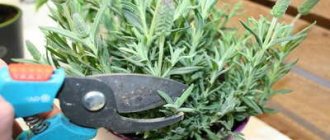
Dig the bulbs no later than mid-September, 35-45 days after the start of flowering. It is important to do this before the rainy season begins to avoid fungal diseases. The stem is cut at the base with pruning shears. Then the bulbs are dug up, being careful not to damage them with a shovel, the roots are cut off and allowed to dry a little.
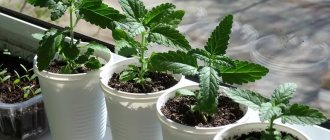
Landing
Let's learn how to plant gladiolus in a pot.
Selection of planting material, preparation
When choosing a gladiolus variety suitable for rooting in a pot, you should first of all keep in mind the fact that not all varieties grown in open ground are suitable for indoors. It is important that the plant is not large in size: otherwise its cultivation in a pot will be problematic. Large-flowered varieties are not suitable for closed ground: their root system grows strongly, and the flowers themselves reach significant sizes.
The best choice would be a dwarf or small-medium flowering variety. Choose a variety that reaches a height of 50-60 cm in adulthood. If gladiolus will grow at home on a windowsill, you can choose an even smaller variety with a height of 30-40 cm.
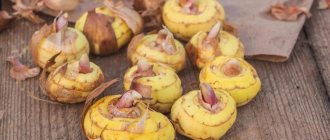
When purchasing planting material, pay attention to the condition of the corm. It is important that it is not damaged, rotten, healthy, and strong. There should also be no stains, mold, or very dry areas. The size of a tuber suitable for planting is usually 2-4 cm.
Preparation
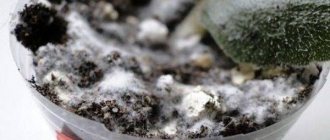
Inspect the bulbs and free them from dry scales. Under the scales, pockets of bacterial and fungal infection are often hidden: therefore, be sure to remove them.
Then the planting material should be disinfected in a fungicide solution. This treatment will help gladioli resist fungal diseases. Cytovit is the best solution: soak the bulbs in its solution for 6-12 hours. Additionally, you can treat the planting material with a root stimulator, which will help the bulbs take root faster and grow more actively.
Preparatory procedures are carried out in advance: about 2-3 weeks before rooting itself. The time from disinfection to planting should be spent in a closed, dry container. By the time of planting, healthy specimens will already sprout. Planting material that has not sprouted can be safely thrown away: it is unfit for further use.
Landing dates
The best time to plant these flowers is spring: from the end of March until approximately May 15th. In southern latitudes, planting can be done earlier, but for most of our regions warmer times are still suitable.
Process
- Drainage is poured into the bottom of the pot, which is designed to protect the gladiolus roots from excessive moisture. You can use expanded clay, gravel or broken ceramics or tiles as drainage.
- A layer of fertile soil is placed on top of the drainage. The soil is well moistened.
- The bulb is buried 7-12 cm. When planting several bulbs in one pot, leave a distance of 6-7 cm between them.
- Cover the bulbs with soil and compact the soil a little.
- Place the pot in a place protected from drafts and well lit. During the germination period, rainwater should not be allowed to enter the container - that is, you should not leave the plant outside for the first time.
Better to grow indoors or outdoors
There is no definite answer to this question, since gladioli are equally suitable for landscaping gardens and for decorating balconies or loggias in city apartments. All you need to do is: plant them in a flowerpot or beautiful and spacious pots.
Pay attention to the information about when you can replant gladioli.
Of course, when cultivating gladioli at home, the grower is assigned more responsibilities (for example, regular watering), but at the same time, in open soil, the likelihood of plants being damaged by pathogens will be much higher.
Gladioli can be called a universal flower crop, which is perfect for growing both in open areas and in flower pots. In both cases, the process of planting and care cannot be called very complicated, so taking into account some recommendations from experienced gardeners, you will soon be able to get an excellent decorative addition for your garden or home.
Features of care
Let's find out what kind of care gladiolus needs when growing it in a pot.
Watering
Flowers in pots dry out faster and more often than those growing in open ground. Therefore, the approach to watering in this case should be special. Although drought should not be allowed, these plants cannot tolerate waterlogging even more. The optimal watering regime is three procedures per week. If the weather is very dry, you can water more often.
During moisturizing procedures, make sure that water does not get on the buds and foliage. If moisture gets in, the vegetative part of the gladiolus may begin to rot. In addition, only soft and warm water should be used for irrigation.
Top dressing
In order for gladiolus in a pot to actively grow and develop and bloom luxuriantly, it needs regular feeding. You can use a complex mineral composition or a universal fertilizer for flowering plants.
Potted gladiolus is fed for the first time after its first leaf has formed. In this case, it is recommended to use nitrogen and potassium. After the appearance of the fourth leaf, a second feeding is carried out. Nitrogen and potassium are added again with a small addition of boric acid. When the sixth leaf appears, 10 grams of nitrogen and 15 grams of potassium are added.
During flowering, feed your gladiolus with a complex mineral composition that includes all the necessary microelements. At the end of flowering, feed the plant with potassium and phosphorus: these minerals will help the bulb recover and strengthen.
Attention: in addition to mineral fertilizers, you can feed your gladiolus twice a season with a growth stimulator: Zircon or Epin.
Loosening the soil and mulching
The soil in the pot should always be loose and permeable. The loosening procedure will help ensure this. It is advisable to carry out the procedure after watering, when the soil on top has already dried out a little. Loosening will help break up the dense crust that has formed and increase the permeability of the substrate.
To prevent the water from evaporating too quickly, it is recommended to mulch the surface of the soil in the pot. Humus and peat are suitable as mulch, which will also nourish the soil.
Garter
Although gladioli in a pot do not grow too long, a garter will not harm them. Under the weight of the inflorescences, the stems of the plant can fall to one side and break: it is best to prevent this problem. This often happens when there is insufficient lighting: in this case, the stems grow too weak and frail. Tie the plant carefully so that its stems are not pinched.
Trimming
After flowering has finished, there is no need to trim gladioli immediately. The bulb feeds through the leaves, grows stronger and grows in the ground, and is restored. By cutting off the leaves and stems early, you will deprive it of nutrition: therefore, you will not have planting material for next year.
Wait until the foliage dries naturally, continuing to water and feed the flower moderately. After the leaves have completely dried, the green part is trimmed: 6-9 cm of the stem remains on the surface.
Wintering
After trimming the pot with the bulb, place it in a cool and dark room. At the beginning of October, remove the tubers from the ground and inspect them for spoilage, rot, or damage. If in doubt, treat each bulb with a fungicide or disinfectant.
Dry the bulbs under natural light, then put them in the refrigerator for winter storage. It is best to place planting material in cardboard boxes. If you have a basement, it is better to store gladiolus tubers there.
Reproduction
Potted gladioli can be propagated in several ways:
- seeds;
- tubers;
- corms.
Next, we will consider each option in detail and find out its features.
Seeds
This method is not very suitable for amateur cultivation of gladioli, since it is time-consuming, troublesome, and the result often differs from what was expected. Seed propagation is usually used by scientists for breeding purposes: in this way new varieties of gladioli are created.
Note that when using this method at home, the result is often a plant that is very different from the mother plant: with a different color of the petals, bud sizes, even height. However, if you are determined to try this difficult propagation option, we recommend collecting the seeds yourself. Take planting material from plain gladioli: their maternal properties are preserved in the best possible way.
Tuberbuds
In gladioli, tubers are thickened scales on the stems. One bulb can produce from 15 to 100 such children per season. Tubers with a diameter of 0.5-1 cm are optimally suited for further reproduction. If the children are too small, you can grow them in nutritious soil.
It is recommended to plant gladioli tubers in the spring: first in a common container. The container is covered with film, ventilated, moistened, and the most favorable conditions are created. In such an improvised “kindergarten”, the children germinate within a month, after which they are seated in separate pots. The plants will be able to bloom at the end of the current season.
Corms
The most common and most effective method. The corm replaces the mother corm and is located on the second tier of the gladiolus root system. If the size of the corm allows, it is usually divided into several parts before planting: this way you can grow not just one flower, but several.
Caring for dahlias in pots
From the moment of planting, the soil is loosened every other day after each watering. Loosening prevents the formation of dry crust and improves soil aeration. With the appearance of the first shoots, the soil surface is mulched with humus or peat. Mulching with organic matter nourishes plants and prevents moisture evaporation.
Top dressing
Feeding calendar:
- In the phase of 2–3 true leaves, nitrogen fertilizer is applied (3 teaspoons of urea per 5 liters of water).
- In the phase of 5–6 leaves, they are fed with phosphorus-potassium and nitrogen fertilizer (urea 15 g, potassium sulfate 15 g, superphosphate 30 g per 10 l of water). A ready-made universal mixture for garden plants is also suitable.
- Immediately after the appearance of flower stalks, give any nitrogen-phosphorus fertilizer.
- During flowering, only a phosphorus-potassium mixture is added once (superphosphate 30 g, potassium sulfate 20 g per 10 liters of water).
- A week after flowering, phosphorus-potassium fertilizing is repeated. It is necessary for feeding the bulbs.
Garter
A garter will be required for medium-sized and thin-stemmed dwarf varieties with a large number of buds. Gladioli are planted in groups, they grow, and if the pot is too crowded, they can deviate to the side. The flower stalks also bend under the weight of the flowers. In this case, the plants are tied to supports. Wooden skewers are stuck at the walls of the pot along the perimeter and the stems of falling flowers are tied with a soft rope.
Care after flowering
- After flowering, care as usual. When the above-ground part dries completely, the stem is cut off, leaving 2–3 cm. Stop watering.
- 1-2 weeks after pruning, the bulbs are taken out of the pot, cleaned of soil, roots removed and laid out to dry.
- After 2–3 weeks, the planting material is packed into a box. Store in a dark place at a temperature of +3...+8 °C with an air humidity of 70%.
Problems
Gladiolus in a pot is threatened by the same diseases and pests as in open ground. Fortunately, since the plant is located in a “closed area”, it is still less likely to be affected by misfortunes.
The greatest danger comes from fungal diseases and pests such as aphids and spider mites. Gladiolus is affected much less frequently by caterpillars in a pot than in a flower bed. Sometimes viral diseases also occur: such gladioli must be urgently destroyed along with the tubers.
Important: hybrid and selection varieties are more likely to get sick, since genetically their immunity is quite weak.
It is necessary to begin treatment only after it has been reliably established what exactly the flower is sick with. It is also important to establish the cause of the problem. Most often, the causes of the disease are associated with improper agricultural practices or waterlogging of the flower.
Pests
As for pests, it is better to carry out preventive spraying than to destroy them later. The insecticides Karbofos and Aktara are suitable as preparations: they are also used if treatment is necessary.
To prevent slugs and thrips, you can sprinkle the soil in pots and flowerpots with tobacco crumbs. You can also use regular salt or dry mustard powder as a protective measure: such safe substances are best suited for home use.
So, we learned how to grow gladiolus in a pot. The method is excellent for cultivating dwarf and small varieties of plants. Gladiolus looks amazing in a pot, decorates any landscape and interior, and caring for it is no more difficult than usual.
Propagation of gladioli in pots
To repeat a successful variety, it is better to choose methods of propagation by tubers and corms.
Seeds
The method is good for long-term selection work. It is impractical in home floriculture because the plants lose their varietal characteristics.
- Prepare containers 15–20 cm high and a nutrient substrate from turf soil, humus and river sand in equal parts. A store-bought soil mixture for seedlings, diluted with sand (2:1), is suitable. Sow in mid-February.
- The seeds are laid out in grooves according to a 3 × 3 pattern and covered with a centimeter layer of soil.
- Water and cover with film. Care as for ordinary seedlings.
- Transfer to the street at a stable temperature of +12 °C.
In the fall, ripe bulbs are collected and stored until the next season.
Dividing corms
- In spring, the bulbs are prepared for planting according to the standard scheme: processed and germinated.
- Then the tuber is cut into 2-3 parts so that each remains with one bud and a root tubercle at the bottom.
- The cut areas are disinfected with a 1% solution of potassium permanganate or brilliant green and sprinkled with wood ash.
- Dry for two days and plant in pots in the usual way.
Gladioli from divisions will bloom simultaneously with plants from whole tubers, and by autumn they will form full-fledged bulbs.
Tuberbuds
The simplest and most popular method of reproduction. Tubers or babies are small bulbs that grow on an adult tuber and replicate the parent plant in everything. In the fall, they are separated from large bulbs, dried for a month and stored until the new season.
- For planting, select children with a diameter of 0.5–1 cm. Remove the dense scales, which inhibit germination, and keep them in a warm, deep pink solution of potassium permanganate for 10–15 minutes.
- They are planted on a sand cushion (like adult tubers), covered with a 5 cm layer of soil and watered generously with Epin solution (1 ampoule per 7 liters of water). The pot is covered with film and left in a bright place at a temperature of +18...+25 °C. The greenhouse is ventilated daily. Water as the top part of the soil dries so as to maintain moderate humidity.
- When the sprouts appear, the film is removed. Care for it like an adult plant. This season the flower stalks are removed. Gladioli from children bloom from the second season.
How to plant bulbs?
Before planting the bulbs, it is necessary to make proper preparation. You should consider how gladiolus grows in a container.
Preparation of material before planting
The best time to plant bulbs is April or May. Although, some experienced gardeners practice planting as early as March, it depends on when the bulbs woke up.
First you need to remove all the husks from the material. The main thing is to be careful in this matter, since if the sprouts are damaged, the bulb becomes unusable. If there are dried and dark spots, culling is required, although there are cases when the bulb can be revived. To do this, the damage is cut out, and the cut areas are treated with brilliant green, sprinkled with crushed charcoal or lubricated with a fungicide solution.
The best planting material has a diameter of 3-5 cm. Such bulbs will produce a powerful peduncle.
Material processing
To avoid worrying about someone deciding to eat your flowers in the future, you need to treat them against pests. There are many ways to do this today:
You may be interested in: When to dig up gladioli in the fall in 2022: the most favorable days for digging up bulbs Dates for planting gladioli in the spring according to the 2022 calendar of gardeners Growing gladioli in pots outdoors
- Before planting, the bulbs need to be soaked in copper oxychloride, Bordeaux mixture or a solution of potassium permanganate;
- You can use store-bought products, following the instructions exactly (Aktara, Maxim, Fundazol and others).
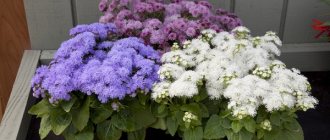
Ideas for landscaping at the dacha with gladioli
You can decorate your summer cottage with gladioli planted in containers, flower pots or flowerpots in a very original way. For this purpose, beautiful but compact varieties are selected. Floral arrangements can be made romantic and delicate if you choose flowers of the appropriate color scheme. You can also place bright accents in the garden or near the house if you make a colorful and bright composition.
Which container to choose
Before planting gladioli in pots for growing outdoors, you need to choose the right container. Even dwarf varieties of this flower reach quite large sizes. Therefore, immediately choose a container that is spacious. Its volume must exceed 6 liters. It is most convenient to choose pots or flowerpots with a capacity of 10 liters or more. The container must be high so that the root system of the flower has space to develop.
These flowers grow poorly if the soil is too wet. Therefore, holes are provided at the bottom of the planting container to remove excess liquid. A layer of broken brick or other drainage material is placed at the bottom of the flowerpot.
For planting, take a loose, moisture-permeable soil mixture containing a large volume of humus. Otherwise, the plant will not develop due to lack of nutrients. Ready-made universal-purpose flower soil is well suited for growing gladioli. You can mix the soil mixture yourself from loam or black soil with coarse river sand. To enrich the soil with nutrients, a small amount of wood ash is introduced.
Questions and answers about planting gladioli
Is it possible to plant gladioli before winter?
To form a root system, gladioli require low positive temperatures (10-15 °C); active shoot growth occurs at 20-25 °C. However, in order for the corms to develop well, they must first be stored at temperatures of about 3-9 °C. During this period, the root system is not yet formed, so low temperatures cannot delay the development of the plant.
Corms can withstand not only low positive temperatures, but also short-term negative ones, but their development is delayed. Large corms die at minus 2 °C. Therefore, planting before winter is possible only in the southern regions with shelter to create a wintering regime similar to the storage regime.
A baby with a hard, dense shell can more easily tolerate low temperatures, which can be observed during warm winters in the Non-Black Earth Zone. In such cases, it can withstand temperatures down to minus 4 °C.
Those gardeners who provide conditions on the site that protect the soil from freezing also plant gladioli before winter.
Gladiolus, variety 'Little Fawn'. Stand My Ground
Is it possible to grow gladioli for the New Year and March 8th?
This is possible, but for normal plant growth in winter, additional lighting is necessary, maintaining a certain air and soil temperature, humidity and good air exchange - ventilation. All this is difficult to provide in a residential area.
In specially equipped greenhouses, gladioli bloom at any time. However, the process of preparing planting material and culture conditions are very complex. For example, to obtain cuttings by March 8, corms are dug up early, for cutting by the New Year, corms from the previous year’s harvest are preserved under certain conditions.
Employees of the Main Botanical Garden in Moscow have developed a light culture of gladioli. Articles describing their methods were published at different times in the journal Floriculture.
How to ensure that gladioli do not bloom all at once?
There are several ways:
- plant corms of varieties with different flowering periods at the same time;
- plant corms of the same variety at different times;
- plant corms of the same variety that are unequal in size at the same time, since plants from small planting material bloom later than from large ones.
Is it possible to cut a corm with two shoots?
A corm with two sprouts is cut if they want to propagate a variety and get many flowering plants. Cut vertically, making sure that part of the bottom is preserved on both halves. Immediately after the operation, the cut is sprinkled with crushed coal or filled with brilliant green and planted.
Is it possible to plant a baby with a cracked shell?
You can plant such a baby if it is not affected by fungal and bacterial diseases, which can be noticed when examining the tubers.
During the winter the corms dried out greatly. What should you do with them before planting?
A healthy corm will never dry out. If it wrinkles and becomes hard, then it is undoubtedly affected by some kind of disease. If the corm has been stored at elevated temperatures, it may dry out a little, but will remain healthy. Before planting, such corms are soaked for several hours in a warm solution of baking soda (one teaspoon per 1 liter of water). However, it is better to soak the planting material in a solution of microelements (see Table 2).
I bought an interesting variety. How to reproduce it faster?
If you bought a baby, then you need to increase the growing season for it, that is, plant it early in a greenhouse, under film or in boxes at home. If there is one or more corms, then before planting they are cut into several parts so that each part contains one bud and part of the bottom.
Is it possible to plant a baby in a shell without cleaning it?
You can plant it in a shell, but the baby will not germinate longer. To speed up germination, before planting, it is soaked for a day in a warm 0.2% solution of potassium permanganate or 0.1% baking soda. After planting the children, water the area well and cover with film until shoots emerge.
Popular articles Using amphoras in landscape design