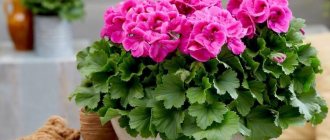
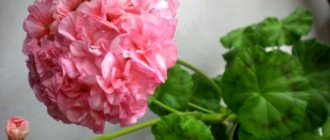
Bright, lush flowering most of the year, a tart, bitter-floral aroma, unpretentiousness of the plant - thanks to these qualities, geranium has firmly become one of the most beloved indoor plants in the world. In today's review we will talk about the basic rules for caring for this flower at different times of the year, how to propagate and replant it correctly, as well as what diseases you may encounter and for what reasons.
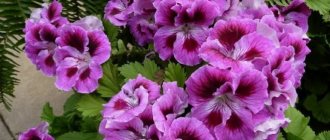
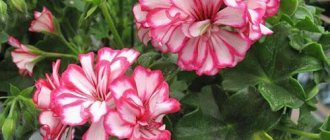
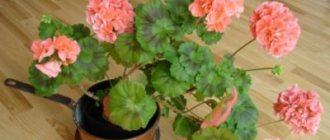
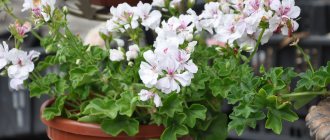
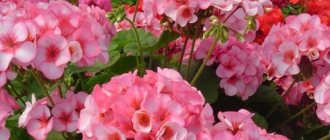
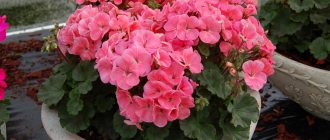
Geranium flowers come in many colors
Geranium or pelargonium - who is it and where does it come from?
Geranium (pelargonium) is an unpretentious, herbaceous or semi-shrub flower brought from Africa in the 17th century. Based on the data in the Latin (geranium) and ancient Greek dictionaries (γεράνιον), it can be understood that the name of the plant was given based on the external resemblance of the shape of the fruit to a crane’s beak.
The geranium group consists of 400 varieties. Although Africa is the birthplace of the houseplant geranium, pelargonium has become widespread on almost all continents due to its bright, voluminous flowers and general decorative qualities. Interest in some varieties of pelargonium is due not only to the external characteristics of the flower, as can be seen in the photo, but also to its medicinal properties.
The first mentions of indoor geranium in Russia date back to the middle of the 18th century.
Signs of lack of moisture or overwatering
Does geranium like water? This question is asked by most beginning gardeners. The plant loves moderate watering. Overmoistening of the soil leads to rotting of the root system. This is reflected in the appearance of the flower. The leaves begin to turn yellow, peculiar water pads appear, and wilting and lethargy of all organs are observed. Gray mold is found on the leaf blade.
Healthy blooming geranium
Important! If not only the leaves, but also the stem begin to rot, this means that an irreversible process has begun - rotting of the root system. It will not be possible to save the plant.
Geranium tolerates a lack of moisture better, however, if you do not water the flower for a long time, the leaves will begin to dry out at the edges and dry spots will appear. As a result, the plant will shed its foliage and will not delight you with its beautiful bright flowering.
Types of indoor geraniums: photos and names
What do different varieties of geranium look like? For ease of perception, we have placed the types of indoor geraniums along with photos and names in the table:
| Types of indoor geraniums, name | Peculiarity | Photo |
| Zonal | A wide variety of colors, long-term flowering, height from 14 cm to 70 cm. | |
| Royal | Large flowers with grooved or wavy petals, spots or stripes. It blooms in the second year, flowering duration is 4 months. Height – up to 15 cm. | |
| Fragrant | A large number of different flavors (apple, nutmeg, kiwi, almond, etc.). Terry foliage, carved along the edges. Color: pink or purple. | |
| Ivy-leaved | Ampelous, shoots up to 1 m. Leaves look like ivy. Color: from white to black-blue. Flowers are up to 5 cm in diameter. | |
| Unique | Dark green with a spicy aroma, dissected foliage. The flowers are similar to royal geraniums. Color: red with white center of the inflorescence. Pink or white coloring is less common. | |
| Angel | Externally, the inflorescences resemble “Pansies”. Height - up to 35 cm. Long-term flowering. Color: white, pink, purple, lilac (with stripes or spots). | |
| Succulent (can be cortus-leaved, humpbacked, fluffy-leaved, fleshy, angular, thick-stemmed) | An exotic variety of pelargonium. Bizarre plant shape, woody stem below. Some subspecies have spines. Sensitive to dry air and frequency of watering. |
Aftercare rules
Caring for a plant after flowering has its own characteristics:
- A complex fertilizer is applied under the geranium root, which dissolves in water.
- Faded flower stalks must be carefully removed.
- The bush needs to be watered every 3-4 days.
- In autumn, the flower pot is visited in a cool place where the temperature does not exceed 12 degrees. This is necessary for the plant to go into winter mode and gain strength.
Proper care will promote the appearance of young shoots and the formation of buds. If this is not done, the geranium leaves may turn yellow and the shoots will become deformed.
Blooming geranium decorates a room or area with bright colors. The culture is undemanding in care and easily propagated. If the plant does not bloom, it is necessary to find out the cause of the condition. Most often, the problem arises due to errors in care, and when they are eliminated, the geranium begins to bloom again.
The best conditions for growing indoor geraniums
Caring for geraniums at home is simple: it is better to choose a sunny place for indoor geraniums, on the south side. At midday, it is better to shade the plant or place the pot so that the flower is not in direct sunlight all day.
Despite the unpretentiousness of the flower, none of the varieties of homemade geranium will tolerate neglect of the watering regime. All types of pelargonium react the same way to excess moisture: sluggish appearance, the appearance of mold, blackening of the stems. The earthen ball should be kept in a moderately moist state. However, geranium does not like spraying the leaves.
The photo shows that pelargoniums of any variety and name feel great in an apartment. In the summer-spring period, the plant is transferred to an open balcony or street.
Geranium indoors
The nuances of growing geraniums at home:
- if you pinch the tops of the stems in a timely manner, you can form a compact, abundantly flowering bush;
- removing dried inflorescences allows new ones to form faster;
- It is better not to add organic fertilizers. This is a catalyst for green growth, and you can’t wait for flowering. An excess of organic matter will destroy geraniums ;
- in a cramped pot the plant blooms more actively.
For the winter, geraniums are brought back into the apartment.
Methods of propagation of pelargonium
At home, pelargonium is propagated by seeds, cuttings and dividing the bush. The first method does not guarantee the preservation of varietal characteristics of the crop. It is believed that a plant grown from seeds blooms more profusely - it forms up to 30 inflorescences per season. When annual pruning of a bush is carried out, the cut shoots are not thrown away, but cuttings are used to propagate the crop. An adult plant is propagated by dividing the bush.
Seeds
Growing pelargonium from seeds
Growing pelargonium at home from seeds is a troublesome task. First you need to buy or collect seed yourself. The seeds are in fruit boxes. The dried inflorescence is carefully trimmed and the fruits are removed. After this, they need to be kept in the fresh air (balcony, loggia) until the seed pods are completely dry.
Further actions:
- Soak the seed in a growth stimulator such as Kornevin for 2 hours.
- Fill a flat planting container with universal soil mixture.
- Plant the seeds in moistened soil to a depth of 1 cm at a distance of 2 cm from each other.
- Cover the container with plastic film to create a special microclimate for the seedlings.
- Place the container in a well-lit place. Seed germination temperature is 24-27°C.
- Caring for seedlings consists of systematic watering. It is better to water the soil with a watering can with a fine sieve to prevent erosion of the soil. The water should be warm, settled and soft.
- When the first 2 leaves appear, the seedlings are picked and transplanted at a distance of 5-7 cm from each other.
- When the sprouts reach a height of 10-15 cm, they are placed in permanent pots by transferring them.
By cuttings
It is better to harvest flower cuttings in March. Cut them with sharp, disinfected scissors or pruners. The cuttings should have 2-3 internodes 5-10 cm long. The cut is sprinkled with a crushed tablet of activated carbon. This will prevent the shoot from rotting.
Pelargonium cuttings
To form roots in cuttings, place the shoots in water or immediately place them in moist soil. The second option requires more careful care - constant moistening of the soil as the top 1 cm layer dries. When planted in the ground, the sprout takes root without stress, and the delicate roots are not damaged during planting.
To make the formation of roots in water faster, you need to add a growth stimulator like Kornevin to the liquid. Pelargonium seedlings do not need large pots, i.e. The root system of the flower is fibrous and is located close to the soil surface.
The optimal diameter of the pot for cuttings is 9 cm. Pots can be plastic or ceramic. The first ones retain moisture longer; if there is an excess of water, the roots in them can rot. Fired clay pots allow air to pass through. The root system in them is less likely to rot.
To plant cuttings, use the same soil as when transplanting pelargonium. When planting, the cutting should be deepened into the ground so that the lower node is in the ground. Root formation will begin from the place where the leaf used to be.
The seedling should be covered with a cut plastic bottle, placed on a well-lit windowsill, systematically watered and ventilated. No dew should accumulate on the inner surface of the bottle. Rooting will occur in 1.5-3 weeks.
Dividing the bush
The result of propagating pelargonium by dividing the bush.
The easiest way to propagate pelargonium at home is by dividing the rhizome. It is better to carry out the procedure during the next transplant. A plant propagated by dividing the rhizome will bloom next summer. Step-by-step instructions for the procedure:
- Water the plant generously 2 hours before propagation.
- Remove the flower from the pot by gently pulling the stems.
- Shake off the root system from the soil.
- Place the bush in a basin of warm water so that the soil leaves the roots.
- Rinse the root system under warm running water.
- Remove rotten, dry and damaged roots.
- Divide the rhizome into several parts with a knife. Each division should have several strong shoots with a growth bud at the base.
- Treat the sections with Kornevin powder.
- Shorten the shoots to 10 cm so that the plant does not waste extra energy feeding long stems and branches.
- Plant the cuttings into prepared pots. Their root collar should be lightly sprinkled with soil.
- Water the soil well with settled water.
- After 10 days, feed the plant with nitrogen-containing fertilizer to activate the process of growing green mass.
How to care for geraniums in spring, summer and autumn: differences
In spring , starting from mid-March, geraniums are abundantly overgrown with greenery and bloom. During this period, mineral supplements are administered once every two weeks, starting with a small dose. In the spring, young foliage appears en masse on geraniums, so it is recommended to first shade the flower from direct sunlight. In mid-May, the plant can be taken out to an open loggia or to the yard.
In summer, care boils down to regular watering, fertilizing once every two weeks, removing faded inflorescences, pinching or pruning geraniums. During prolonged rains, pelargoniums taken outside are either brought indoors or covered.
Caring for geraniums at home at any time of the year is simple, even for beginners. In autumn, flowers are brought into the house. In central Russia, this is the end of September in the absence of early frosts. The first thing you need to do is reduce the frequency of watering. The earthen ball should not be too dry; water it little by little and regularly. The main task of autumn is to prepare pelargonium for wintering. Fertilize plants once every three weeks, in winter - once a month. The geranium itself will begin to bloom less, losing its decorative effect. This is a signal to the grower that the plant is preparing for the last pre-winter pruning. Cut branches can be used for rooting and propagation.
Lighting in the autumn-winter period can not be changed, leaving the flower on the south side. The temperature should not fall below 12 degrees Celsius, the optimal winter temperature is 15 degrees, since the plant needs a period of rest.
By following these simple techniques, you will no longer wonder how to preserve geraniums at home in winter.
Geranium at home
Diseases and pests
At home, geranium may show the following signs of disease:
- black stem - the bush is affected by a fungus (black leg);
- lack of flowers - not enough light, too much fertilizer or the plant was not pruned;
- gray fluff in the lower part of the leaf blades and stem is a consequence of the activity of fungi (gray mold);
- brown tips of leaves - the room is dry;
- yellow and red leaves at the bottom of the stem - the plant is cold or the air in the room is too dry;
- the green parts of the geranium turn red - the room is cold;
- stem rotting - overwatering;
- white circles on the leaves – fungus (rust);
- yellow edges of leaves - lack of light or natural shedding of old leaves;
- bare stem - anti-aging pruning is necessary;
- brown spots on the leaves - lack of moisture;
- yellow spots on the leaves - sunburn.
As for pests, pelargonium residents can become:
- mealybugs;
- spider mites;
- whiteflies;
- cyclamen mites;
- aphid.
How to propagate geranium
There are only two ways to propagate pelargonium: propagation by cuttings and seeds. The differences lie in the fact that when propagated by cuttings, the species characteristic of the variety is preserved, but when propagated by seeds, there is a possibility of obtaining a plant that differs in appearance from the desired one. The second method is best used by professional flower growers.
We propagate indoor geraniums by cuttings
Cuttings can be carried out from spring to autumn; the most successful time for rooting will be mid or late winter. By this time, pruned in the fall, the bush is overgrown with numerous branches. The upper parts of the branches are cut off with a sharp, disinfected knife and lowered into the water. A warm temperature is required. While the mother plant is gaining strength, the cuttings develop roots.
For successful rooting, take a loose substrate. Take the twigs with roots out of the water, dry them in the open air for half an hour and carefully place them in a small hole in a pot that has been spilled with water in advance. It is not necessary to cover the cuttings with a cap from a transparent bag; geranium is not picky and will quickly grow.
Propagation by cuttings
We propagate homemade geraniums by seeds
If you want to get geranium from seeds, you need to prepare the soil. Preparation comes down to the following steps:
- make soil : mix loose substrate with a small amount of humus and sand;
- disinfect the soil with a faint pink raster of potassium permanganate;
- spray the soil with warm water from a spray bottle;
- distribute the seeds evenly and gently press them shallowly into the soil with your finger;
- cover the containers with transparent material or glass.
As soon as the first shoots appear, the film begins to be gradually removed, 15 minutes in the morning and evening. The first waterings are done very carefully; it is better to use a spray bottle. Pelargoniums will grow very quickly; when the first true leaf appears, the film is removed and watering is carried out at the root. When a pair of true leaves appears, the plants are planted in different pots.
Further care for geraniums is carried out according to general rules.
Propagation by seeds
Propagation of geraniums by cuttings
It is most convenient to use cuttings that remain after pruning. The optimal length of the shoot is about 6 cm, and it should have 2-3 leaves. Leave it to sit for a couple of hours so that the cut area dries out, or sprinkle it with charcoal.
You can safely root the cuttings directly into a pot with light soil. Or first put it in coarse sand until the first roots appear - after about 10 days. It does not need to be covered or any special conditions created. Just provide moderate watering and make sure that water does not get on the leaves and stems.
You can leave the cuttings in a glass of water and transplant from there. Make sure that the leaves do not fall into the water, and do not forget to top it up periodically. In 1-2 weeks you will get an almost complete small root system.
Photo: ….
We create comfortable conditions for geranium flowering
Everything you need to follow is very easy to remember. Lush flowering when caring for pelargonium at home is guaranteed with a combination of temperature conditions, regular watering, selected soil and good lighting.
Selecting the soil
The soil selected is light. Adding equal parts of humus and sand is welcome. The following proportions will be successful: 7 parts of turf or garden soil, 2 parts of humus, 1 part of sand or 8:1:1. Drainage is required; expanded clay or pieces of foam are suitable for this.
Soil for geraniums
Light for geraniums
Since the flowering time is a long period, from spring to late autumn, or even the beginning of winter, all attention should be focused on illumination. Geranium loves light. Accordingly, choose a sunny place. On the street, the best location would be a sunny area with natural daytime shading. The north side of the house will not work!
What is the best way to feed geraniums?
Watering should be strictly regular; you should not overwater the soil, but drought will also have a detrimental effect on flowering. The water should be at room temperature in any case. The plant needs to be fed once every two weeks. A compound mineral fertilizer is suitable for flowering plants.
ATTENTION!
No organics!
Temperature
During the flowering period, the most optimal temperature is considered to be from +20 to +30 degrees. When the temperature drops, flowering is reduced; when the temperature is too high, the flowers become smaller and fall off.
Choosing soil for geraniums
Geraniums or pelargoniums need new nutrient soil, more baking powder and good drainage. For young plants, take lighter soil, so you can add peat, vermiculite and perlite. For adult flowers, universal soil or chernozem mixed with sand and baking powder is suitable. The composition must be neutral or, in extreme cases, slightly acidic.
Photo: zen.yandex.ru
Forming a geranium bush: pruning for lush flowering
If we let the growth of pelargonium take its course, we will get long, unkempt branches with a small number of flowers. To prevent such sloppiness, gardeners carry out formative pruning.
How to prune geraniums correctly: first of all, disinfect a sharp knife or blade to avoid infection of the flower. After carefully examining the plant, remove diseased or thin branches. Among the remaining ones, those that thicken the bush are removed.
Using a knife or blade, cut off part of the branch above the leaf node. If the leaf faces the inside, it is better to choose another one, this way we will avoid the appearance of branches thickening the crown. It is permissible to pinch thin branches with your fingers.
All cuts are sprinkled with crushed charcoal or cinnamon powder.
Geranium pruning
Useful properties of geranium
The healing properties of geranium have been known since ancient times. The main healing substance of pelargonium is geraniol.
Traditional healers today use the roots and leaves of the plant for the following ailments:
- insomnia;
- headaches;
- stress, depression;
- radiculitis;
- for bacterial and fungal infections;
- neuroses;
- osteochondrosis, etc.
It is known that pelargonium has a positive effect on skin regeneration, performance and the psycho-emotional state of a person.
How to replant geraniums: tips
Geraniums are replanted in the following cases:
- roots are peeking out of the drainage hole;
- the plant does not bloom, despite intensive care;
- the soil dries out too quickly, which means the pot has become cramped.
If the previous container has become cramped, take a new one only 2-3 cm larger. Wash the pot with bleach for disinfection, dry it and fill the bottom with drainage. Add some fresh soil. To extract, water the soil and gently knock on the walls of the pot. So, the earthen lump gathers around the roots and lags behind the walls of the pot. Carefully inspect the roots; cut off damaged ones with a clean knife. An earthen ball with a flower is lowered into a new pot, the space is tightly filled with new soil. Now you need to water the plant generously and put it in the shade for 5-7 days.
DO NOT FORGET!
A freshly transplanted plant does not need feeding for 2 months!
Geranium transplantation process
Preparatory work before pruning
Already in January, preparations for spring begin for pelargonium. Pots with a trimmed specimen are taken out into the warm light to prepare the buds for awakening. In February, you can water the flower a little by piercing the soil in 4-5 places.
Finally, spring comes and homemade geraniums begin to be pruned, because from lack of light the plant has stretched out, taking on an ugly shape.
The situation will be corrected by pruning, which can begin on February 20 and continue in the spring, until the tenth of March.
Late cutting will delay the flowering period, so it should not be skipped, because it guarantees the development of side shoots and abundant, colorful flowering.
Tool preparation
Before pruning, have a sharp tool ready. Let it be a stationery knife, but not scissors. Their blades compress the stems, causing damage to the plant.
The instrument must be disinfected. You can wipe it with alcohol, peroxide, vodka.
Soil preparation
Preparatory work in the spring includes preparing the soil for replanting geraniums or planting rooted shoots. You can buy ready-made soil, or it’s better to prepare it yourself.
Here are a few compositions:
- Turf soil, humus, river sand in a ratio of 2:2:1;
- Take peat, garden soil, sand in equal proportions;
- Turf and leaf soil, sand, peat in equal proportions.
Before planting a bush in new soil, the soil must be neutralized from various diseases and pests. It is necessary to warm up, steam or freeze. You can simply spill it with a pink solution of potassium permanganate.
What can geranium cause and how to treat it?
Despite its high resistance to diseases, geranium is affected by gray mold, root collar rot and is attacked by aphids and scale insects.
In case of gray rot, the plant is transferred to dry mode and treated with an antifungal drug. It is unlikely that the plant can be saved from root rot. They fight against aphids and scale insects using quarantine regime insecticides (to avoid the transmission of pests to other flowers).
How to get rid of midges in indoor flowers using simple methods. In a special publication on our portal, we will talk in detail about how to get rid of midges on indoor flowers, why they appear, how to avoid their appearance and preventive measures.
What to do: geranium leaves are turning yellow
The first reason is the incorrect concentration of fertilizers, namely an excess of nitrogen. For some time, the plant should be left alone and stop fertilizing.
The second reason may be a pot that is disproportionate to the plant. Try replanting the plant in a smaller pot.
Why doesn't geranium bloom?
There may be several reasons. The most important thing is a lack of nutrients. It will be replenished with complete flower fertilizer. The second common reason is considered to be lack of lighting. Try moving the plant to the sunniest spot in the house.
If the plant is often overdried, then it may not bloom at all.
Geranium bush without flowers
Why does geranium dry out?
The flower may dry out if the pot is too small. Transfer the plant to a larger pot.
The second reason is the proximity to the battery in winter.
Drying geranium
If geranium leaves turn red
There are three reasons: lack of magnesium, low temperature, fungal diseases.
We will compensate for the lack of magnesium with fertilizer, and if we suspect a disease, we spray the geranium with a fungicide.
Blushed geranium
Advice from flower growers
To achieve beautiful buds, you need to know the “character” of geranium. She loves light, so keep the beauty on southern windowsills. And during the flowering period, it’s a good idea to turn on the lighting.
You also need to be careful with watering. The plant is rather drought-resistant. Excess moisture in the pot can cause the roots to rot. Watering is carried out as the top layer of soil dries.
Warmth is required to set flower stalks. The room temperature should not fall below 13-15⁰С. Timely pruning will also allow you to admire the colorful chorus of buds.
Garden world
The host of the “Garden World” program spoke about some more secrets of cuttings, as well as replanting geraniums when spring comes.
- The stem, which has become very elongated after winter, must be divided into several parts.
- Prepare a container for planting. First add drainage, 2-3 cm, then a layer of soil.
- The cuttings, which have been left for 2-3 hours to be covered with film, are planted immediately in the ground, powdering the cut with Kornevin or Kornerost. You don't need a lot of preparation, just powder it.
- Planting: make a hole, deepen the cutting, press down the soil, water with water with Fitosporin.
- Place a bag on top and tie it around the pot to create a greenhouse. There is no need to water frequently; the cuttings will take root well under the greenhouse effect under the film.
The main stem can also be transplanted into another pot by following all planting recommendations. To activate it for lush flowering, you need to make cuts above the bud. This stimulation will help the dormant buds begin to grow.
Larisa Zarubina
Larisa Zarubina and “Garden Guide” also give interesting tips on replanting pelargonium.
So, in order:
- Get the container with the ugly pelargonium bushes out of the basement, since it has become very stretched in winter. Treat them against fungus.
- Then, without watering, remove it from the container and free the roots from dry soil.
- Prepare soil with soil briquettes. Fill the soil briquettes with water to soak them, then mix them with store-bought soil.
- Cover the bottom of the pot with drainage, then with some soil. Transfer the stems with roots, cover them with soil, filling the voids.
- Next, trim the elongated bushes to a stump, preferably at the same level, or leaving 4-5 centimeters,
- There is no need to water, there will be enough water from the moist soil of the soil briquettes. Put it in the light.
Roll the cut cuttings into a peat tablet for rooting.
Dear friends, we hope that we were able to talk quite fully about how to prune geraniums in the spring. We will be glad to receive your feedback. If you have something to share, be sure to write in the comments. Perhaps your addition or remark will help someone avoid mistakes when pruning pelargonium in the spring.
Read further:
How can you feed roses in spring for abundant flowering?
How to prune lilacs in spring so they bloom well. Schemes for beginners
Do I need to prune raspberries for the winter to get a good harvest in the spring?
How to feed strawberries in the spring before and during flowering to get a good harvest
When and how to trim tomato leaves correctly
Do you need to prune garden roses in the fall, when and how to do it correctly
Photos of royal pelargonium and tips for care at home
This variety of geraniums is the most capricious. To achieve lush flowering of the royal geranium as in the photo, you need to know what it doesn’t like:
- compaction of the soil is unacceptable. Therefore, we water only with warm, settled water through a pan;
- the drainage layer should be larger than that of other pelargoniums;
- in summer, the queen should not be taken outside , it is better to leave her on a glassed-in loggia. In case of strong wind or rain, windows should be closed;
- royal pelargonium does not need annual replanting , only when roots appear from the drainage hole;
- In winter, the temperature must not exceed 15 degrees!
So, caring for royal geraniums at home is not much more difficult than caring for other types of this flower.
Choosing a location and lighting
Geranium loves fresh air, but not drafts. If you place it on a windowsill near a window, in summer it even repels insects with its aroma. Do not place the flowerpot directly next to the radiator or in the walkway.
Pelargonium is suitable for moderate lighting, but the sunnier it is, the better it blooms. In winter, we recommend using phytolamps for additional illumination for at least several hours a day. If there is not enough light, the plant turns pale and becomes smaller.
Photo: valstietis.lt
