Many summer residents and gardeners dream of decorating their plot or garden with some beautiful and bright plant, but without spending a lot of effort on growing and caring for it. We know the solution to this problem!
Phlox is an annual flower that will delight you with its bright colors and colors. The seeds of this flower can be sown directly into the ground, but if you are not interested, you can grow plants through seedlings. To help you plant and grow a flower correctly, we have prepared some tips and suggestions.
The numerous colors and types of phlox make it necessary to give preference to one or more, but not all at once. The most common is Drummond's phlox.
When to sow annual phlox seeds for seedlings: optimal timing in 2022
Before you start planting phlox, you need to determine the best time to sow seeds for seedlings. The best times in 2022 are the last days of February, all of March and the first days of April.
Planting dates are so unclear, because each region of Russia has different climatic conditions, so you need to rely on the weather in your area.
In addition, you can focus on the Lunar calendar, the most optimal dates for planting phlox in 2022:
- in February -1, 2, 3, 4, 5, 6, 7, 8, 10, 11, 12, 13, 14, 15, 16, 17, 18, 19, 20, 25, 26, 27, 28;
- in March - 2, 3, 4, 5, 6, 7, 8, 10, 11, 12, 13, 14, 29, 30, 31;
- in April - 1, 2, 5, 6, 7, 9, 18, 19, 20, 24, 25.
Not all gardeners have the opportunity to sow seeds for seedlings on these days; you can do this on other days, but do not forget that there are days on which you absolutely do not need to plant these plants:
- in February - 9, 21, 22, 23;
- in March - 9, 19, 20, 21, 24;
- in April - 8, 15, 16, 17, 23.
Annual phlox seeds can be sown immediately in open ground in April-May if you live in the south or have had a very warm spring.
How to collect seeds
Preparations for harvesting begin when the plants are still blooming profusely. Select and mark the ones you like best by tying a string to the stem. Hybrid varieties marked F1 are not accepted. They do not retain varietal characteristics.
At the time of ripening, the seed pods begin to turn yellow; then, in dry and windless weather, in the afternoon, they are cut off along with the stem. For ripening, they are laid out in paper bags, on which the variety and color of the plant are indicated. They are stored in the same bags until the next season, placed in a dry, dark place.
Conclusion
By following all the instructions for growing annual phlox from seeds, and knowing when to plant them, gardeners will receive a wonderful decoration for their plot, as well as admiring glances and remarks from everyone who sees this miracle.
Popular types
Paniculate
This is one of the most popular and frequently used types of phlox; this variety is a perennial plant that delights gardeners with its fragrance. Their peculiarity is a very powerful and long root system, thanks to which they can grow more than 150 cm in length.
The paniculate appearance of phlox attracts with its incredibly beautiful inflorescences, which glow with bright colors in your flower beds. In addition, their flowers are fragrant with a pleasant honey aroma.
paniculate phlox
Subulate
The main distinguishing feature of this species is its miniature size; the neatly folded branches of this plant give the impression that the flowers are in a small basket.
Subulate phloxes are bush-like plants with sharp and hard leaves. Very small but incredibly cute buds grow on the branches. Phloxes of this species delight gardeners twice a year, from May to June and from August to September.
Subulate Phlox
Drummond
Plants of this type have numerous advantages, for example, they do not fade in the sun and have amazing frost resistance and drought resistance. They amaze not only with their resistance to stress, but also with their beauty.
Drummonda is a small bush; it will fit perfectly into any landscape design, since you can choose absolutely any color.
This plant will free you from any worries, since it is completely easy to care for and can independently spread throughout your site or garden.
Phlox annual drummonda
Phlox divaricata
Phlox spreada is native to North America and is often called Phlox canadensis. Other names for this plant are forest phlox or wild blue phlox.
This is a medium-sized plant that is very different from the previous two types of phlox. The height of the splayed phlox is 20-50 cm. The color scheme of the petals is bluish-lilac, in delicate pastel colors.
This phlox loves well-fertilized soil, but at the same time is perfect for rockeries and rocky areas. It also has a strong sweet aroma and attracts many bees and butterflies.
Not many varieties of this perennial are grown in cultivation, but all of them are 100% worth the time and effort invested in caring for them.
Clouds of Perfume
Phlox Clouds of Perfume forms a turf up to 60 cm wide. In spring, it is dotted with a scattering of charming lavender flowers that fill the flower garden with their aroma.
Please note that this phlox is not resistant to powdery mildew and nematode.
| Petal coloring | Bush height (cm) | Bush width (cm) | Flowering time |
| Lavender | 20-30 | 50-60 | April May |
Landen Grove (London Grove)
From a distance, the Landen Grove phlox bushes can be mistaken for a sea of forget-me-nots. But if you come a little closer, you will be covered with a cloud of subtle aroma that cannot be confused with anything else.
This perennial is quite resistant to powdery mildew, grows well and does not require special care.
| Petal coloring | Bush height (cm) | Bush width (cm) | Flowering time |
| Bluish-lavender | 30-35 | 50-60 | April May |
Fuller's White
White bushes of Fullers White will be an excellent decoration for a spring mixborder.
This phlox is notable for its excellent winter hardiness - it can withstand frosts down to –40°C.
| Petal coloring | Bush height (cm) | Bush width (cm) | Flowering time |
| White with a slight purple tint | 30-35 | 15-30 | April May |
Eco Texas Purple
Phlox Eco Texas Purple is notable for its spectacular dark lilac flowers. It differs from most spreading phlox cultivars in its later flowering period - from late spring to early summer.
| Petal coloring | Bush height (cm) | Bush width (cm) | Flowering time |
| Purple with pink eye | 30-35 | 15-30 | May June |
Popular varieties
star Rain
Star Rain is a popular Drummonda variety, its distinctive feature is the unusual shape of its petals, usually they have a sharp or slightly pointed shape. Thanks to this handicap, the flowers resemble stars; with the help of this variety you can create a real starry sky in a flowerbed.
Phlox drummond starry
Tetra Riesen
This group of varieties belongs to fairly tall plants; they have fairly large flowers; they can reach 6 cm in diameter.
The variety of colors allows you to choose a plant that will exactly suit your landscape design.
Phlox Tetra Riesen
Feuerbahl
If you are a lover of red shades, then this variety is for you. Phlox of this variety is a plant up to 30 cm in length, which has large flowers of only a red-pink hue. Shades may vary in color intensity.
Phlox paniculata Feuerbahl
Twinkling star
It is not for nothing that this variety was given such a name; its flowers resemble twinkling stars due to the pointed shape of the petals and unusual coloring. Often their color is a gradient, from bright colors to soft pink or white.
Phlox drumonda twinkling star
Description of the plant
Phlox drummondii is grown as an annual plant. It grows wild in North America, reaching a height of 15-40 cm.
The Latin name of the genus Phlox comes from the Greek φλόξ, which means “flame” - this is due to the intense coloring of the flowers of the first plants found in nature. The species name drummondia comes from Thomas Drummond, a seeker of interesting plants who, while in Texas, collected and sent seeds of annual phlox to England.
Brief characteristics of the plant:
- The shoots are highly branched, thin, lodging, rather densely leafy, pubescent. Plants reach a height of 15-40 and a width of 10 cm.
- The leaves are light green, narrow, oval-lanceolate, with a heart-shaped base, pubescent.
- The flowers are flat, five-petaled, and form dense panicles. The crown goes into a narrow tube. The flowers are cream, white and different shades of red, pink, purple, sometimes two-colored, tri-colored. Bicolor flowers have variegated petals or their base in a contrasting color, the so-called “net”. They bloom from June to September.
The entire plant is covered with glandular hairs, so it feels a little sticky to the touch.
Step-by-step instructions for planting annual phlox seedlings
In order for incredibly beautiful flowers to appear in your garden or vegetable garden, you must know how to properly plant phlox seedlings. You can learn all the secrets and tricks from us; below you will read step-by-step instructions.
Selection of capacity
There are no strict restrictions in choosing a container for seedlings; any container is suitable for these purposes; you can take a cut bottle or milk carton.
There are also no special restrictions on whether to produce seedlings in a common container or individually. Phlox will grow well in both cases.
When preparing and choosing a place for planting Phlox, you should pay attention to the groundwater level: it should be low, since the plants do not welcome
Seed selection and preparation
The further growth and development of the plant depends on the quality of the seed, so you need to buy seeds from reliable producers. You need to ensure that the seeds are of high quality.
Phlox seeds do not necessarily need to be treated before planting, but if this is important to you, you can soak them in a soluble growth preparation. The dosage should be indicated on the drug packaging.
Growth stimulating drugs help plants sprout faster and young shoots to be stronger.
Soil preparation
To grow phlox, you need to prepare loose soil into which air and water can easily penetrate.
If you don’t want to bother and prepare the soil yourself, then you can buy a universal soil that is intended for flower crops. But if you want to make the soil yourself, then you need to mix the following ingredients:
- peat
- humus
- sand
- perlite
Direct sowing
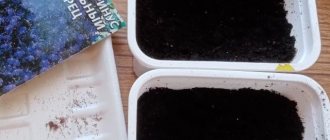
Before sowing, you need to make sure that everything you need is ready: container, soil and seeds.
- Place drainage at the bottom of the container
Drainage will help avoid waterlogging of the soil; you can do without it, but the roots will definitely not rot. You can use broken brick or expanded clay as drainage.
There is no need to put too much drainage material, a layer of 1 cm will be enough.
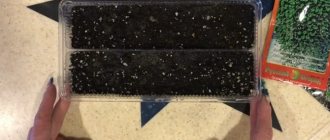
- Fill the container with prepared soil
Place the prepared soil in a container, making sure there are no empty spaces. Also, do not fill the container to the very edges, leave 2-3 cm.
- Moisten the soil in the container
Watering is best done from a sprayer, but this is not the main thing, the main thing is that the water is clean and infused. Never water the soil and sprouts with tap water.
You can only use clean water, it should be a little warm and settled, and in no case from the tap.
- Planting seeds
Here it is necessary to evenly distribute all the seeds over the surface, it is best if the distance between them is a couple of centimeters.
You can distribute it with your fingers, since phlox seeds are quite large in size. If you are not comfortable with your fingers, you can use tweezers.
Phlox seeds
- Soil compaction
After planting the seeds, you need to compact the soil a little; this can also be done with your fingers.
- Watering
Water the seeds with clean, infused water in a thin stream.
- Greenhouse effect
To prevent moisture from evaporating too quickly, you need to create a greenhouse effect, this can be done using a regular plastic bag.
The main thing is that the material with which you cover the container is transparent; not only a bag, but also a piece of glass is perfect
- Transferring a container
After all the procedures, you need to move the container closer to sunlight, for example, to a windowsill. The main thing is that the temperature is within 25 degrees.
Pests and diseases - how to deal with them
Modern experienced gardeners know that various herbal decoctions and folk remedies can repel pests and slow down the development of diseases. But only professional methods based on chemical and biological preparations will help destroy insects and cure diseases.
Yellow phlox
- Snails and slugs. Loosen the soil in a timely manner, sprinkle the paths near the phlox with ash, collect by hand and destroy.
- Nematodes. No high-quality protective measures have been invented - it is better to pull out and destroy the affected plants, preventing the spread of the pest.
- Scoops. Collect caterpillars by hand. In case of severe damage, use insecticides.
- Penny is slobbering. Remove damaged leaves and treat with garlic infusion.
- Green wood bug. Spray phlox with onion infusion.
- Cruciferous flea beetles. Dust phloxes with wood ash in the morning.
Control measures depend on the specific disease or pest.
Growing annual flowers requires additional time associated with sowing seeds and planting seedlings. But even if a gardener has to take time away from household chores in order to plant and care for plants throughout the summer season, he will do it without hesitation. After all, beauty is worth it.
Caring for phlox seedlings after germination
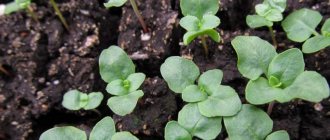
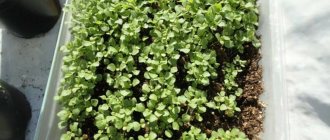
- The first thing you need to do is place the container in a bright and warm place, this was discussed earlier. You also need to turn the container in different directions towards the light during the day and ventilate the greenhouse once a day;
- You will be able to see the shoots in a week; after they appear, you need to remove the cover and lower the temperature by a couple of degrees;
- At each stage of plant growth, the soil should be kept sufficiently moist and watered with a sprayer before germination. When the seedlings appear, you need to water them using tweezers and try not to get water on the plants themselves.
It is also recommended to highlight the plants, since the normal daylight hours are 12-14 hours
Choosing a site for planting, soil
The flower prefers sunny areas with fertile soil. It will grow in a shaded place, but the quality of the inflorescences will become worse. But the flowering period will increase. Wet planting sites should be avoided. High groundwater and lack of drainage will destroy the seedling.
Although it seems undemanding to the soil, Drummond will not be able to grow on acidic or heavy, soaking soils. Light loam works well. Sand, compost, leaf soil, and organic fertilizers are added to heavy loams. The flowerbed is prepared in the fall. Digging is carried out to achieve a crumbly soil structure. All necessary additives are added.
When and how to plant seedlings in the ground
With the appearance of buds, towards the end of May, the seedlings are planted in a flower bed. First, the seedlings are well watered so that they can be easily removed from the container. They dig holes. The distance between them is 15 or more centimeters, depending on the seedling.
The size of the planting hole should be comfortable for the root system of the sprout. The hole is filled with nutritious soil mixture and the seedling is placed there along with a lump of earth. If necessary, add more soil mixture, compact it gently with your palms, and water it with water. Then mulch with dry soil. For the next two weeks, the seedlings are watered every two days with moderately warm water, avoiding waterlogging of the soil.
Caring for annual phloxes (watering, fertilizing, tying)
After the plantings are “moved” to their permanent place of residence, the most labor-intensive part of the work of growing Drummond ends. Further care is not much different from caring for any flower crop. Necessary actions:
- Regularly, moderately water the bush in the morning or evening, a bucket of water per 1 m2 of planting.
- Loosen the soil around the bush 8 times per season.
- In July, they hill up to form the root system, and pinch the shoots to create a bushy bush and speed up the start of flowering.
- Regular feeding is carried out, three times during the summer. The end of May - with manure and superphosphate, the end of June - with fertilizer for flowering plants, liquid manure, the end of July - with ammonium nitrate.
- Constantly mulch the ground around the bushes. Mulch prevents the soil from drying out.
- They tie it up. Tall varieties need a garter, which protects them from damage by the wind. Tied to a peg or fence.
How to properly pluck phlox seedlings
Phloxes tolerate diving very well, so feel free to take on this task. From the general container you need to move them into single cups, which should be quite large.
The same soil can be used, but it must be sprayed with Fitosporin-M solution.
The time of replanting can be determined by the appearance of the plant; it can be replanted when two or three leaves appear on it
Step-by-step instructions for picking seedlings:
- During transplantation, you can damage the roots; to avoid this, you should water the plants several hours before the procedure;
- Drainage material must be placed at the bottom again;
- Next, add the prepared soil, but do not fill the container to the very brim;
- Make a hole in the center of the cup;
- Then pick up the plant along with the root and a piece of soil; this can be done with a fork or some kind of stick;
- Place the plant in the hole, cover with soil and compact;
- At the end of the picking, water the roots, but try not to get it on the plants themselves.
When picking, weak and rotten shoots should be discarded.
Tricks of success
Professional gardeners have their own tricks that they use when growing lushly blooming phlox:
- In extreme heat, it is necessary to mulch the tree trunk circle, which will help avoid overheating of the root system.
- Moldy bread is an excellent fertilizer. Its pieces are soaked for 2 hours in water and dropped near the plant.
- It is necessary to loosen the soil very carefully, since the root is located superficially and is very easy to damage.
Success in cultivation is determined by the condition of the plant. In skillful hands, phlox blooms at the beginning of summer and pleases with its grace until the first frost. Some gardeners grow the flower as a potted crop.
Sowing in open ground in autumn
When sowing seeds in autumn, you need to remember a few important rules that will help you grow beautiful and healthy plants.
- It is necessary to sow seeds at a great distance from each other, as they can grow to very large sizes;
- Planting depth – 25-30 cm;
- You should also add a little peat.
In winter, do not forget to cover the crops with film
Features of care
Caring for phlox at home should be thorough from the moment of planting.
- As mentioned earlier, the first shoots appear within one and a half to two weeks. After this time, the polyethylene is removed.
- It is recommended to periodically turn the containers in different directions so that the sprouts are directed not only towards the sun. The optimal night temperature is 17 degrees.
- You should not water the sprouts abundantly, otherwise there is a risk of getting a black leg.
- Under no circumstances should the top layer of soil be allowed to dry out.
- To avoid burns, it is necessary to shade the plant from direct sunlight.
- As soon as the first leaves appear on the sprouts, they can be distributed into different containers without damaging the thin roots.
- You can fertilize the transplanted seedlings after about a week.
- Before finally planting the plants in the flowerbed, it is necessary to fertilize once every two weeks.
- Also, a week before transplanting, the plant needs to be systematically hardened - taken outside or on a loggia during the daytime.
- It is recommended to plant at the chosen location in late spring, preferably in the evening.
Now let's look at the rules for transplanting phlox to a permanent place.
These plants love partial shade with fertile soil. An excellent option would be light, non-clayey soil with a neutral reaction. If the soil is heavy, you should add compost or coarse sand.
It is important to prepare the site in the fall by digging up the ground and adding rotted manure. Liming of acidic soil is also mandatory.
Before you start planting, the seedlings must be well watered. Holes are dug at a distance of 20 cm from each other. Pour water into the resulting wells and add 150 g of ash. The seedling is placed in a hole, the roots are covered with earth and carefully trampled down. The resulting plantings need to be watered with warm water, and the central part will need to be sprinkled with dry soil. During the first 14 days, it is necessary to water once every two days, and in hot weather - every day. Experienced gardeners recommend pinching the main shoot on the 6th leaf.
Another important thing when growing phlox is caring for the planted seedlings. You need to know that this plant is extremely difficult to tolerate drought, however, excessive humidity is contraindicated for it, as there is a risk of fungal diseases. For one square meter of planting, 10 liters of water are recommended. It is best to water in the afternoon, then loosen the soil and remove weeds.
To help the root system finally strengthen, the plant should be earthed up at the beginning of summer. We must not forget about support for tall varieties - this will protect the shoots from the wind. Mulching with manure in a layer of 2-3 cm can reduce moisture evaporation.
For good flowering of phlox, you should take care of regular feeding, taking into account the growing season.
- At the very end of spring, when the first buds begin to appear, potash fertilizers are added to the soil. To do this, add a glass of wood ash and one tablespoon of potassium sulfate to a bucket of water. This mixture significantly improves inflorescences and resistance to various diseases.
- Exactly two weeks later, the phloxes must be fertilized with a solution of superphosphate mixed in a ratio of 15 g per 10 liters of water. You need to water strictly at the root.
- At the end of June, the best nutrition for the plant will be liquid manure, diluted in a proportion of 20 g per 10 liters of water. This procedure provides the plant with long and colorful flowering.
- Once the seed pods are finally formed, the life cycle of phlox can be considered complete. In the fall, they can be fertilized with a phosphorus-potassium additive. To do this, take 20 g of superphosphate, 10 g of potassium sulfate and 10 liters of ordinary water. Phosphorus is also contained in bone meal, which can be safely added to the soil during loosening. The quality of seeds after such a procedure improves noticeably.
Sowing time
Perennial seedlings are best planted in the spring, but when the air warms up to a fairly comfortable temperature. If the spring temperature in your region is not warm enough, you can cover them with film.
Perennial plants can be planted either using seedlings or directly in open ground.
The main thing is to choose the right place for planting; it should be protected from the wind and be sufficiently lit and warm. You also need to ensure that there is not too much groundwater at the planting site.
Feeding phlox
During the summer it is necessary to feed the phlox three times. If the summer turns out to be rainy, then dry fertilizing is done; if there is not enough rain, liquid fertilizing is done.
The first fertilizing is done when the stems grow. Liquid fertilizer consists of 10 liters of water and 2 tablespoons of urea diluted in it. The composition of dry feeding includes: one bucket of compost or humus and two tablespoons of urea. The components are thoroughly mixed and scattered next to the plants. This amount can feed three phlox bushes.
The second feeding is done during the development of buds on phloxes. To do this, dissolve 60 grams of nitrophoska and 30-35 grams of Rossa and Agricola fertilizers for flowering plants in a large bucket of water. This amount is enough to feed three phlox bushes.
The third and final feeding is done after flowering has ended. For liquid feeding, take a large bucket of water, 30 grams of superphosphate and 30 grams of potassium sulfate. Dry feeding consists of a bucket of peat or compost, 60 grams of phosphorus-potassium mixture or 60 grams of “Autumn” fertilizer. All components are thoroughly mixed and scattered under the plants. This amount of fertilizer can feed 3 to 4 bushes.
These feedings will ensure abundant flowering of phlox next season.
Caring for young animals in open ground
In open ground, young animals should be watered only in dry weather; the soil should not be allowed to flood, otherwise fungal diseases may develop.
Fertilizer and top dressing will also not be superfluous, but you need to choose them based on their purpose. If you want to increase the green mass of the plant, then you need to use nitrogen fertilizers. And, if you want to increase the number of buds and flowers, then use phosphorus and potassium fertilizers.
In order to avoid drying out of the plant, it is necessary to remove dry leaves and flowers. Otherwise, they can take away moisture and nutrients.
Landing Features
You can plant phlox at almost any time of the year:
- A bush planted in late April-early May will quickly take root, but will bloom two weeks later than usual.
- In summer, phloxes are planted already in bloom. The inflorescence must be trimmed, the plant shaded and well watered.
- In autumn, planting should be done in September. Before the cold weather, they must take root and stock up on nutrients for the winter. The phlox will bloom next summer.
The plant should be planted in a well-lit place with deep groundwater. Although the crop loves moisture, excessive moisture in the soil can lead to various fungal diseases and root rot.
The soil must be fertile, loose, permeable and light. The best option is loam with neutral or slightly acidic acidity. Wood ash and compost are added to the planting hole. If the acidity of the soil is increased, then lime is added.
When planting plants, the distance between them should be:
- 60–70 cm for tall bushes;
- 50 cm for medium-sized bushes;
- 35–40 cm for ground cover phlox.
The seedling is placed vertically in prepared holes. The roots are straightened and covered with earth, which is compacted. Each planted bush must be well watered. It is recommended to mulch the soil around the plant with humus or peat.
In one place, under favorable conditions, the crop grows and blooms well for 10 years. But experienced gardeners advise replanting phloxes every seven years. This is done to enhance flowering and rejuvenate the bush.
When is the best time to plant phlox?
Planting in a flowerbed can be done in spring, summer, and autumn. The longest period is autumn. All work is allowed up to 35 days. Dividing begins in August, and planting ends at the end of September.
Important! You cannot waste time, since the transplanted flower must become well established before the onset of frost. Phlox varieties that bloom late begin to be planted in the second half of September.
But it is best to postpone work in such a situation until the spring.
Phlox varieties that bloom late begin to be planted in the second half of September. But it is best to postpone work in such a situation until the spring.
Planting a plant in the spring is possible only after the snow cover has completely melted. The soil should have time to dry out.
Spring planting of phlox
Application in landscape design
Annual phloxes are versatile plants in terms of design. The bushes are compact, constantly flowering. They will be appropriate in every corner of the garden or plot. They can be combined with any type of flora that does not create a shadow where they grow. A mixture of Star Rain phlox is often used to decorate gardens. Plants with different flower colors will harmoniously fit into any design technique.
Some examples of using an annual variety:
- The compact plant can be planted in a large flower pot and placed anywhere on the site.
- Combine star rain with other varieties of Drummond phlox to decorate flower beds.
- In mass planting, border options are created.
- Include annual phlox in mixborders.
Advice! Star rain harmonizes with conifers and cereal grasses.
Phlox varieties. Phlox perennial and annual
Phloxes are flowering herbaceous plants belonging to the Sinyukhidae family. Distribution area: northern regions of America, Russia.
Phloxes from the same species may vary as they are influenced by climatic conditions. For example, alpine ones grow from 5 to 25 cm, bryophytes. Their trunks are branching and covered with evergreen foliage. In a favorable climate, the stem of phlox becomes straight, the height is from 30 cm to 1.8 m. The leaves are located opposite, the shape is elongated-ovate or lanceolate-oval. The diameter of the buds is 25-40 mm, tubular-funnel-shaped.
Most species are perennials, but Drummond phlox and its cultivars are annuals.
Phlox subulate, paniculate, splayed and annual: description
There are several dozen varieties of phlox, but they are all divided into 4 separate groups:
| Description | Peculiarities | Usage | |
| Subulate | Perennial, stem reaches 20 cm. Foliage is narrow, needle-shaped, length up to 20 mm. Color – green (almost until the first frost). Buds - blue, purple, crimson. The flowering period is from late spring to July. | Low-growing and groundcover species | They decorate alpine slides and create compositions in rock gardens. |
| Spread | The trunk is from 20 to 40 cm high. The flowers are small, the edges are wide, narrowed towards the center. Colors range from white to purple. The foliage is elongated (up to 50 mm in length), tough. Flowering period is May-June. | The most unpretentious among all varieties of phlox. It has a rich, pleasant aroma. | In the landscape field. |
| Paniculate | It grows from 40 cm to 1.5 m. The foliage is lanceolate, elongated, reaching 6-15 cm in length. The trunk is erect. Inflorescences are spherical. Flowering - from mid-summer to September. | The most popular. It has a wide variety of varieties with different colors. | For decoration of home gardens. |
| Annuals (Drummonda) | The stem is up to 30 cm. The petals have slightly pointed tips. Flowering duration is from June until the first frost. | Grown exclusively from seeds. There is a delicate scent. | In rockeries and alpine slides, flower beds are decorated. |

