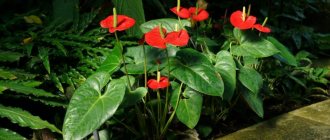
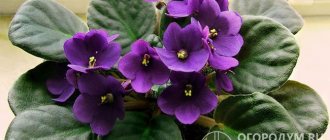
The bright, eye-catching flowers commonly found indoors under the name Gloxinia actually belong to the genus Sinningia. There was confusion with their names. However, this is typical for the Gesneriaceae family, to which both genera belong. Gloxinia varieties with names and photos allow you to get an idea of the culture.
It is widespread and does not go out of fashion in America and Western Europe. In Russia, everyone forgot about the flower for a long time, except for Gesneriev lovers. But with the advent of new spectacular varieties, many of which owe their appearance to domestic breeders, interest in gloxinia is growing.
The varieties are amazing in variety
Difference between Gloxinia and Synnengia
The reason for the confusion between Gloxinia and Sinningia is their strong external similarity.
The first name was given to the flower, discovered in 1785, in honor of the German botanist Benjamin Peter Gloksin. This type of plant had a scaly rhizome.
A few years later, another species of perennials from the Gesneriev family (with a tuberous root) was discovered. It got its name in honor of the Bonn gardener Wilhelm Sinning.
The reason for the confusion was the discovery of another plant species, which seemed to botanists to be similar to Gloxinia. It was called Gloxinia beautiful, despite the fact that it had a tuber instead of a scaly root.
Botanist's opinion
The only difference between Gloxinia and Synnigia is the type of root. In gloxinias, the root is a rhizome covered with scales, and in Sinningias it is a tuber.
Years later, it was decided to place it in the genus Sinningia due to the shape of the root. But by that time, many varieties for home breeding had been developed on its basis, all of them containing the name gloxinia in their names.
Therefore, today these two botanical terms are actually perceived as synonyms, although they are not so in essence. To combat confusion, the designation floristic gloxinia was invented.
Tydea are also sometimes classified as Gloxinias. But scientists have separated these flowers into an independent genus. The differences between them and gloxinias are in the shape of buds and roots.
Description of the idea
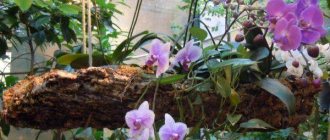
Tydea are herbs or subshrubs. Their maximum height usually does not exceed half a meter, although in the shade representatives of the genus can stretch out. There are also shorter species with a height of just over 10 cm. The rhizome of thydea is a scaly rhizome - a modified shoot. The young stems of this plant retain an upright position, but as they develop they become heavier and begin to bend downwards. This allows the use of such bushes as hanging crops.
Tydea foliage can form a rosette. The leaves have an oblong ovate shape and long petioles. As you approach the top, each plate becomes slightly sharper, and has waves or small blunt teeth along the edges. The leaves are painted in a rich shade of green, and are covered with short fluff on top, creating the effect of a velvety surface. An additional decoration for such leaves are light or slightly reddish veins. The length of each sheet can be up to 10 cm, and the width is about 3 cm.
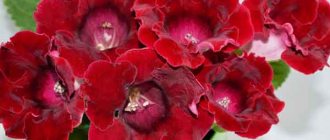
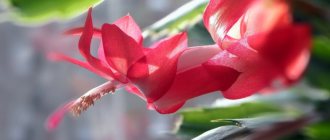
Tydea flowers have some similarities with another representative of the family - Gloxinia (Sinningia), but these plants still have a number of differences. The main one is the smaller size of tidea flowers. In shape they resemble a slightly drooping bell, slightly depressed at the top and convex at the bottom. Because of these shapes, its flowers are sometimes called “slippers.” Their corolla is conventionally divided into 5 lobes, sometimes overlapping each other. The main palette of flower colors most often includes tones of pink and purple. In this case, the inside of the corolla can be painted in a lighter or darker shade. Sometimes it is white with small bright specks. Modern selection has made it possible to obtain flowers of other colors, including white, orange and cream.
Another remarkable property of tidea is its more abundant flowering. The buds open on its bush gradually throughout the entire growth period. At the same time, there can be about fifty delicate flowers on one tidea.
Differences
Many people confuse these two flowers with each other. Gloxinia has a variety called “Tidea violet”. It is called that because it is very similar to its distant relative. Let's look at the differences between these plants.
- Tydea. The root system is a scaly rhizome. The flower shape is shoe-shaped. The leaves are light, pubescent, with small serrations.
- Gloxinia. The root system is tuberous. The shape of the flower resembles an elongated bell. The leaves are dark, fluffy, with larger teeth.
History of origin
Gesneriaceae (lat. Gesneriaceae) are a very pretty family of dicotyledonous plants . It consists of representatives living in hot countries. This family also includes representatives such as Gloxinia and Tydaea, small rhizomatous plants that tend to bloom.
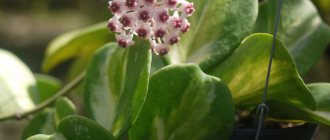
Tydaea is a plant that belongs to the genus Kohleria, the Gesneriaceae family. Representative of herbaceous, perennial plants. Tropical America is considered its homeland. The form is most often in the form of a bush, the leaves are small, slightly elongated, velvety to the touch, the flower is bell-shaped, the color palette is varied. Many other hybrid forms can be found.
Description and varieties
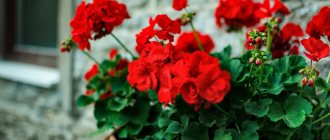
Gloxinia is native to South America. More often it is a low flower, similar to a violet. But there are also varieties that can grow up to 25 cm and higher.
The petiolate leaves of gloxinia reach a length of 20 cm. They have an elongated, oval or ovoid shape. The veins are clearly visible on the plate.
Up to 40 flowers appear on the bush at the same time. And some gloxinia are able to set buds twice a year.
Most Gloxinia indoor flowers cultivated at home are hybrids of the Beautiful and Royal Sinningia. True gloxinias are extremely rare.
Popular gloxinia series include several varieties with different petal colors.
Depending on the crown diameter, gloxinia species are divided into types:
- standard (crown more than 25 cm);
- compact (12 to 25 cm);
- miniature (5 to 12 cm)
- microminiature (up to 5 cm).
Photos and names of gloxinia varieties are shown in the gallery, click to enlarge.
Mont Blanc and Winter Cherry May Queen and Rosalind Kaiser Friedrich Empress Yesenia Hollywood and Black Hollywood Brocade and Impress Chagane and Cleopatra Avanti Kaiser Wilhelm Blanche de Meru Tigrin and Minx
Both simple varieties with one row of petals and double gloxinias are popular in home floriculture.
Although gloxinia is often compared to violets, this flower is different from them:
- the presence of a period of rest;
- larger leaves;
- shape and size of flowers (they are larger and similar to bells);
- smell;
- the presence of a tuber instead of a tap root system.
Subvarieties and their photos
Florists who grow and propagate flowers distinguish a wide range of plant varieties and species. Botanist scientists and breeders have worked hard to ensure that everyone chooses for themselves the option that they like, which is easy to care for and has enchanting beauty.
Mini
Miniature and compact designs that take up little space on the window. With a modest size of the bush, the length of their flowers can reach up to 6 cm. The color of the corolla can be quite varied; there are bicolor or almost black varieties, as well as specimens with double flowers.
Standard
Larger tidea bushes, the size of the flowers remains the same (up to 6 cm). The color of the corollas is presented in an equally wide range of shades and combinations. This group of tidea can also have double flowers, but at the same time it is distinguished by the greatest unpretentiousness.
Multibells
A group of thydea with particularly compact rosettes and very large (up to 10 cm) flowers. The corolla of such flowers opens very wide, and its petals have a jagged edge. Despite their impressive size, the flowers of this type have fewer colors, and double forms are especially rare among them.
American
Amazingly beautiful flower. The peduncle is simply huge, reaches 10-12 cm. The flower is a white bell-shaped flower in the shape of a “tidea” and has a wide red-pink outline, a cream-colored neck. The peculiarity of the species is the size of the flower ( usually flowers in the form of tidea do not exceed 4-5 cm ), and non-standard color.
Cockatoo
It's just a bomb! The flower is white and pink with bright red polka dots, and even terry to the touch. The edges have a wavy shape, the flower is voluminous. A distinctive feature is abundant flowering!
Russian girl
The variety is very similar to American. The petals also have a gradient color. The white core smoothly transitions to a blue-violet border. In cool conditions, the rich shade becomes paler, but does not lose its attractiveness.
Anyuta
A very sophisticated and aristocratic plant in appearance! The flower is shaped like a large gramophone, about 10 cm. The color is white with small and thick red speckles. The edges are wavy.
Lavinia
Lavinia is a unique flower that you can’t take your eyes off ! A gorgeous white flower with a delicate pink coating! The edges are trimmed with some kind of fringe. The spraying has a rich shade at the junction of the petals.
The growing season is manifested by exuberant flowering. The buds bloom one after another. One bush can have up to 50 flowers of different colors and shades! Its beauty and unusualness are so unobtrusive that it will easily fit into any interior and design of your room.
Plant care
Both true and floristic gloxinia (sinningia) come from South America and require the same conditions.
Lighting requirements
Gloxinia is not capricious in terms of lighting requirements. It grows well in diffused light. But it can also be cultivated in partial shade, although the flowers will be smaller.
The recommended length of daylight during the period of bud formation is 12-14 hours.
I keep gloxinia on the north-west windowsill. I noticed that here she feels even better than in a more illuminated place. Irina Petrova, Samara. 3 years of experience in growing gloxinia.
The plant should be protected from direct rays of the sun. Therefore, a flower standing near a south window will need shading.
Signs of a lack of lighting are elongated shoots, pale leaves. You can compensate for the lack of light by lowering the temperature.
During the dormant period, the gloxinia tuber does not require lighting.
How can you pollinate gloxinia at home?
You can purchase gloxinia seeds in a specialized store. But gardeners are often faced with a situation where completely different flowers grow from the seed - not those whose name and image are on the packaging. To avoid such disappointment, you can prepare the plant seeds for sowing yourself. Therefore, the question of how gloxinia can be pollinated is becoming urgent.
These flowers are characterized by cross-pollination or self-pollination. In the first case, pollen from the anthers of one plant is transferred to the stigmas of the pistils of another, and in the second, pollen reaches the pistil within the same flower.
To avoid self-pollination, it is necessary to wait until the bud opens, onto the pistil of which pollen is planned to be applied. After this, using tweezers, you need to remove the stamens from it.
Before pollinating gloxinia grown at home, you should get a clean brush. With its help, you need to collect ripe pollen on one flower and transfer it to another. You need to be extremely careful and make sure that the pollen sticks to the stigma on the pistil.
If fertilization occurs, a seed box will appear on the peduncle. It will take 6 to 8 weeks to mature. When cracks appear on it, it must be cut off to prevent seed from scattering. As soon as you manage to trim the gloxinia box, it must be left in a dark place (preferably upside down in a glass so that the seeds can pour into it) for 4 days until final ripening. Ripe seeds are brown and can be sown in a previously prepared substrate.
Rest period
During the year, a flower goes through 3 periods - active growth, flowering and dormancy. The plant's needs at these stages vary greatly.
The dormant period lasts from mid-October to the end of February.
After removing the above-ground part of the plant, the tuber continues to be watered occasionally for another 2-3 weeks. This is necessary so that he gradually plunges into hibernation.
If gloxinia does not want to go to sleep, it needs to be pushed to do so. Watering is stopped completely, and the pot is moved to a cool place.
Storing a tuber of “dormant” gloxinia
You can store dormant gloxinia tubers in 3 ways:
- in a container in sand;
- in a plastic bag;
- in a pot.
The tuber is dug up, shaken off the ground, and treated with a fungicide. When it dries after processing, it is placed in a plastic container filled with sand.
This container is kept in a dark place at a temperature of 10-12°C.
If you decide to use a plastic bag, then fill it with a mixture of earth and vermiculite (1:1). It is advisable to use a zip bag that is fastened and does not allow air to pass through.
Some gardeners keep such a bag with soil and a tuber in the refrigerator, in the vegetable compartment. But botanists believe that temperatures below 10°C are contraindicated for gloxinias.
If you decide to leave the tuber in the pot, then fill it to the top with sand and move it to a dark, cool place. With this storage method, the tuber is watered once every month so that it does not dry out.
In winter, it is best to keep the gloxinia tuber in the basement or garage. Some gardeners place the pot under the bathtub.
The tuber is periodically inspected for drying out and awakening.
The rest period in young gloxinia
In the first year of life, gloxinias grown from seeds do not yet have time to form a tuber strong enough to survive the winter.
The same situation can arise when gloxinia is propagated by leaves or cuttings if they are deepened too deeply into the soil.
Botanist's opinion
You can determine whether a flower is old enough to hibernate by looking at the number of leaves. If there are less than 12, then you cannot send him into the dark.
The pot with such gloxinia is kept at room temperature, periodically watered and illuminated for up to 14 hours a day.
If a flower does not retire on its own, it is not forced to do so.
Brief rules for growing tidea
The table provides brief rules for caring for your teeth at home.
| Lighting level | Tidea loves the sun, but requires shading from direct rays. East or west windows are ideal for the plant. |
| Content temperature | The flower is satisfied with a room temperature of about 22-25 degrees. In winter it should not be colder than 15 degrees. |
| Watering mode | Bottom watering is often used for flowers. During the flowering period, about 3 days usually pass between waterings. |
| Air humidity | Tidea prefers high humidity, but drops of moisture should not fall on the plant and its flowers. |
| The soil | Light, breathable soil with a slightly acidic reaction is suitable for growing. You can use a universal substrate for violets. |
| Feeding | Feeding should only be done during the period of active development - from mid-spring to September. |
| Transfer | The flower is replanted infrequently - about once every 2 or 3 years. |
| Trimming | The shoots are shortened to stimulate the development of lateral stems. |
| Bloom | Flowering begins from spring to autumn. |
| Rest period | The dormant period usually occurs in winter. |
| Reproduction | Seed, cuttings, dividing the bush and rhizomes. |
| Pests | Aphids, spider mites, thrips or mealybugs. |
| Diseases | May be affected by powdery rot due to improper care. |
Pot
Almost any pot is suitable for tidea, in which its tubers will fit without embarrassment.
The container for the plant should also have a drainage hole to remove excess moisture.
Illumination
Tidea loves the sun, but her bush should not be exposed to direct rays. East or west windows are ideal for the plant. In the southern afternoon, the flower will have to be shaded. Usually, translucent curtains, additional gauze curtains or screens made of thin, slightly translucent paper - tracing paper - are used for this. Thicker paper sheets or blinds should not be used: they will shade the plant too much, and the stems of the plant will begin to reach for the sun. For the same reason, you should not keep flower pots on northern windows. If there is no other place for the bush, you will have to use lighting. Otherwise, the plant will begin to lengthen its shoots and lose its attractive appearance. Lack of light will also have a bad effect on the flowering of the tree.
Soil requirements
The soil should be light, loose and breathable. The plant prefers slightly acidic soil. The best option would be to use a special purchased substrate. The flower does not tolerate stagnant water. Be sure to use good drainage.
The soil for planting must be nutritious. There is no need to plant the plant in a large pot.
Content temperature
Since this species comes from warm countries by origin, it prefers the appropriate temperature. She does not like temperature changes, but prefers a stable thermal regime. So from spring to summer, the ideal thermal conditions for its stay are about 23 degrees, and in winter it should not fall below 15 degrees. If temperature indicators are unstable, the plant may even die. Drafts also have a negative effect.
Watering mode
For watering, tidea use soft and lukewarm water. River or rain water is ideal. In winter, you can use melted snow for this, pre-warming it to room temperature. Distilled water will also work. It is recommended to filter ordinary water for irrigation, boil it or let it sit for about 2 days.
You should also water the tidea carefully, making sure that water does not fall on the above-ground part of the plant. Bottom watering is often used for flowers. The tray of the pot is filled with water so that the soil inside can absorb it. After about 20 minutes, excess water is poured out of the pan so that the ground does not become waterlogged. During the flowering period, about 3 days usually pass between waterings. During this period, the top layer of soil in the container should have time to dry.
In autumn, watering gradually begins to be reduced, reducing its number to once a week. If in winter the plant has completely gone into dormancy and its foliage has dried out, such a plant should be placed in a cool room, where it can overwinter with almost no watering. But the soil ball should not dry out completely during this period.
Humidity level
Tidea prefers high humidity, but its fluffy leaves should not be sprayed in the usual way.
Drops of moisture should not fall on its flowers. To humidify the air near the plant, you can only use a fine spray, being careful not to direct it at the bush itself. Drops of moisture on the foliage can lead to the appearance of light stains, brown spots, and in the worst case, even the development of rot. In addition to spraying tidea, you can use other methods to increase humidity. To do this, the pot with the plant can be placed on a large tray, at the bottom of which wet pebbles, expanded clay, moss or even sand are placed. Any material that can retain moisture will do, but the bottom of the pot should not come into contact with the water in the tray. In addition, you can place open containers of water next to the plant, place the pot near the aquarium, or use humidifiers.
In winter, when the air in the room is significantly dried out by radiators, you should keep the flower away from them. If there is nowhere to move the battery, the battery can be periodically covered with a damp cloth.
If in winter the tidea begins a dormant period and its above-ground part has dried out, there is no need to humidify the air near the plant until spring.
Spraying
To ensure optimal air humidity, the plant can be carefully sprayed periodically in the warm season, but it is important to ensure that moisture does not get on the foliage and flowers, otherwise unsightly brown stains will appear on them. You can increase the humidity in a more gentle way - by placing a flower pot on a tray with wet expanded clay.
Tydea flowering
The tidea plant blooms at home from late spring to early autumn. At this time, small drooping bell flowers of purple or pink shade bloom on it.
Feeding
Tydea should be fed during the period of its active development - from mid-spring to September. Fertilizers for the flower are dissolved in water and applied simultaneously with watering once every couple of weeks. For tidea, the usual complex formulations or fertilizers for violets or orchids are suitable. But they should be applied in a dosage reduced by half. Tidea tolerates a slight lack of nutrients more easily than their excess.
Regardless of whether the tidea goes on winter “rest,” it is not worth feeding it during this period. If the flower has fallen asleep, fertilizing may negatively affect its regime, which may cause problems with flowering in the new season. If the plant remains green, growth stimulation coupled with lack of light can cause it to become overly elongated during the winter months. Such a bush will have to be pruned in the spring to restore it to its former attractiveness.
Tydea that rested in winter manage to accumulate more energy for growth than specimens that did not go into a period of rest. Because of this feature, “sleepy” plants will need less feeding in the next season.
Rest period
In mid-autumn, the house thydea begins to dry out its leaves and shoots - this is a signal to enter a dormant state. The above-ground part of the plant is completely removed, and the tubers are left in a pot, which is transferred to a cool, dark place.
Periodically, the substrate is slightly moistened. In March, the tubers are transplanted into fresh soil or the pot is simply taken out into the light, and the plant begins to grow again.
Trimming
The plant can be periodically subjected to formative pruning to maintain a neat appearance, but this procedure is not necessary. To prevent the plant from losing its decorative appearance, faded flowers, leaves and shoots should be removed from it in a timely manner.
Diseases and pests
The flower is often affected by fungal diseases (late blight, powdery mildew, septoria, downy mildew, gray rot).
To avoid this, it is necessary to ventilate the room with plants, but this must be done in warm weather.
Suitable chemical control agents include:
- previkur;
- topaz;
- any fungicides.
- Anthracnose is a disease that can cause a flower to die. It is expressed by small dark spots on the surface of the plant. For treatment and prevention you can use: fungicides, copper oxychloride, cuproxate, oxychome.
- Ascositosis and Phyllostictosis are diseases that appear due to high air humidity. Characterized by brown and red spotting. Affected leaves must be removed and burned. Treat the remaining plant with copper sulfate, Bordeaux mixture or fungicide.
- Also, the plant can be infected with viruses, bacteria and pests.
- Thrips - affect the entire plant (leaves, stems and flowers). Before processing the plant, it must be replanted. After transplantation, treat with any of the insecticides: fitoverm, actara, karate, etc.
- Spider mite. You can notice it by the web that it leaves on the surface of the plant and soil. To get rid of the pest, you need to remove all damaged leaves and treat the plant with an insecticide.
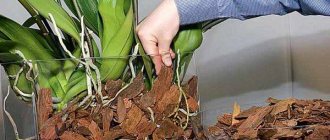
Planting and transplanting
For planting tidea, light, slightly acidic or peat soil is used. According to these parameters, a ready-made soil mixture for Saintpaulias, which can be purchased at a hardware or flower shop, is suitable.
You can plant the plant in a substrate composed independently from the following components:
- leaf soil - 2 parts;
- peat – 1 part;
- humus – 1 part;
- coarse river sand or vermiculite - 1 part.
These ingredients are mixed and a few pieces of charcoal are added. This composition is universal - it is equally suitable for transplanting adult plants and for rooting cuttings.
Tidea rhizomes grow not deeper, but wider than the pot, so it does not need a deep container. The flower is planted in wide and shallow containers or pots, having previously poured a drainage layer. The plant is replanted using the transshipment method, having prepared a pot slightly larger in size than the old one.
If you do not disturb the root system of the tidea and maintain the integrity of the earthen coma, transshipment can be done both in spring and summer. If, during transplantation, it is planned to separate the rhizomes or divide the bush for subsequent propagation, it is better to plan the transplantation work in the spring.
Transfer
Due to its slow growth, thydea is not often replanted - approximately once every 2 or 3 years.
It is necessary to enlarge a flower pot only if its roots have increased in size too much. The growing container must have holes in the bottom. An additional drainage layer up to 3 cm thick is also placed on the bottom of the pot. This will keep the soil moist for longer and will also allow excess moisture to leave the pot in a timely manner. Tydea's roots tend to grow laterally, and it can be grown in a fairly wide but shallow pot. But containers that are too large should not be used. In order not to damage the roots of the plant, replanting should be carried out using the transshipment method. The exceptions are adult bushes whose rhizomes are about to be divided, or diseased specimens. In this case, the roots of the flower will have to be completely removed from the ground, trying to do this as carefully as possible.
Tydea: care at home. Briefly
| Temperature | In the warm season, about +23°C, in winter - +15-+18°C. |
| Air humidity | Moderate or slightly increased. |
| Lighting | Moderate, diffuse. If there is too much, the leaves turn yellow, and if there is not enough, the tree does not bloom at home. |
| Watering | Abundant during the period of active growth (2-3 times a week), very scanty during rest (once a week or less). |
| Soil for tidea | A light, slightly acidic substrate of industrial production or a soil mixture of leaf soil, humus, peat and sand in a ratio of 2:1:1:1. |
| Feeding and fertilizer | During the period of active growth, 1 time per month with a weak solution of liquid flower fertilizer. |
| Tydea transplant | As the tubers grow. |
| Reproduction | Seeds, cuttings, dividing tubers. |
| Features of cultivation | In the cold season, the plant needs a period of dormancy; it can grow in winter, but in this case its shoots become very elongated, the leaves become smaller, and buds do not form. |
Awakening of tubers
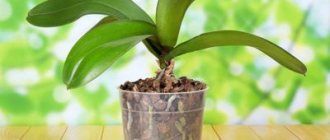
Gloxinia tubers begin to wake up at the end of February. At this point a transplant is required.
A tuber that has not yet awakened (there are no new growth points) cannot be planted in the ground and watered, it will simply rot.
If the tuber looks healthy, then it is given several weeks to wake up on its own.
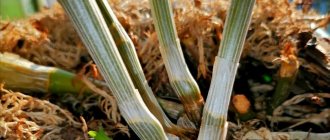
Healthy and rotten tubers
If this does not help, you need to wake up the flower:
- The tuber is treated with a growth stimulator and placed in a plastic bag with wet peat.
- The bag is tightly closed and kept under bright, diffused sunlight or under a phytolamp at a room temperature of at least 24°C.
- It takes 1-2 weeks for the tuber to awaken, during which time the bag is not ventilated.
A sign that the gloxinia tuber has sprouted and is ready for planting will be drops of water on the bag. When they appear, the tuber is immediately moved into the ground.
Sometimes the tubers rot during wintering or they cannot be awakened. This does not always indicate poor care for gloxinia at home.
Botanist's opinion
The reason for this is often that many varietal gloxinias sold in flower shops have weak roots.
Such varieties are selected by breeders for their highly decorative flowers and are intended for cultivation as annuals.
The same situation occurs if last year the flower was over-watered with growth stimulants.
If the tuber has sprouted but has lost its elasticity, it is also not planted in the ground. First you need to “reanimate” him. You can do this in 3 ways:
- hold in a solution of a stimulant, for example Zircon (10 drops per 200 ml);
- wrap in damp cloth;
- plant in moist vermiculite.
The tuber is placed in the ground only when it becomes elastic again.
Watering and feeding gloxinia when propagated by cuttings and seeds
Caring for gloxinia flowers grown at home also includes organizing watering. During the growing season, the soil should be moistened very abundantly. To do this, you should use settled water, the temperature of which is 3 degrees higher than room temperature. The liquid should be poured along the edge of the flowerpot or directly into the tray. You should be very careful with the last option: if water accumulates in the tray in large quantities, then the flower may rot.
For the summer season, optimal watering is 2 to 3 times a week. The soil should dry out between two waterings. If there is prolonged cloudy weather, then watering should be reduced to 1-2 times in 7 days.
According to proper agricultural cultivation techniques, as soon as the bush fades, it also needs to be watered less often. In winter, there is practically no need to water gloxinia; it is important to ensure that the soil does not dry out.
Rule No. 4 – watering: maintain light moisture in the substrate. Soften the water.
Any mixture “For flowering indoor plants”, which can be purchased in specialized stores, is suitable for feeding. You need to fertilize gloxinia once every week or 10 days, but there is one important nuance: the dose indicated by the manufacturer of the mixture on the packaging should be halved. When the flower is in a state of winter dormancy, its tubers do not require fertilizer.
Rule No. 5 – feeding: to continue cultivation, feed every week, except for the dormant period.
Transfer
It is recommended to replant the gloxinia tuber annually at the end of the dormant period (last days of February - beginning of March).
For gloxinia, take light and loose soil. Soil mixtures designed for violets or begonias are best suited. Recommended pH is 5.5-6.5.
I take violet soil and add perlite to it (about a quarter of the pot's volume). This makes the substrate more loose. Zemfira Khasanova, Novy Urengoy. 4 years of experience in growing gloxinia.
When preparing it yourself, mix leaf soil, sand and peat in a 2:1:1 ratio.
Scraps of polystyrene foam or wine cork, or eggshells are used as drainage. It is better not to use expanded clay. The drainage layer must be at least 3 cm.
To plant gloxinia, take a low but wide pot. Its diameter should exceed the size of the tuber by 5-6 cm.
Step-by-step instructions for transplanting gloxinia:
- The tuber is removed from the container where it was stored during the winter.
- It is cleaned of remnants of dead roots and inspected.
- If rotten areas are found, they are cut off with a clean tool and sprinkled with coal.
- If there are many sprouts on a tuber, the least strong ones are broken off. It is best when gloxinia has only one growing point.
- For additional disinfection, the tuber is placed in a solution of potassium permanganate for half an hour. For better germination - in a solution of a growth stimulator. But the top with the growing points should not get wet.
- Dry the tuber after soaking (about a day).
- Drainage and substrate are poured onto the bottom of the pot (about ⅔ of the height).
- The tuber is placed in the ground with the concave part up and covered with soil so that the growing points remain open.
- The flower is watered, covered with film and placed in a warm, bright place.
The tuber should not be completely buried at the time of planting. It is buried approximately ⅔. When the first leaves appear, add soil to the pot to cover the growing points.
The pot with the gloxinia tuber is ventilated twice a day, morning and evening. When leaves appear, the film is removed.
In the video below you can see how an expert from the Garden World channel plants gloxinias.
Garden twins of violets
Sometimes, passing by someone else's garden and seeing a clearing of beautiful small flowers, a person involuntarily wonders what kind of flower is similar to a violet, but not a violet - what is it called?
There are quite a lot of flowering plants in the garden that are similar in appearance to violets. Among these examples are:
- primrose;
- Turkish cloves;
- pansies (garden viola);
- petunia.
Primrose
This dwarf flowering herb resembles a violet with its neat, bright flowers and bush shape. The bushes are low and dense. Flowers can be the color of the sea, blue, white, red, sunny, etc.
Primrose.
According to gardeners, the plant is unpretentious and suitable for beginner gardeners. Primrose is grown throughout Russia and other countries. The main thing is to provide it with fertile, loose soil, which contains enough sand and peat. The pH level should be neutral.
In the northern regions, it is recommended to plant bright bushes in open areas where the sun shines. In the southern regions, they try to place primrose in the shade. And in the central part of Russia and the Urals it is planted in beds where the sun shines in the morning and there is shade in the afternoon.
Flowers prefer abundant but infrequent watering . It is best to organize the procedure once every 6-8 days. After watering, the soil is loosened and weeds are removed. In the spring, the soil under the bushes is fertilized with organic matter, and in early summer potassium and phosphorus are added. In the northern regions, the bed is covered with peat or dry leaves for the winter.
Turkish clove
A beautiful plant resembling a violet in the shape of its flowers. The flowers are round and consist of five petals. The coloring can be the most incredible.
Turkish cloves.
Breeders have developed varieties that have a gradient, iridescent color, interspersed petals, multi-colored fringe, etc. It can grow in any country, both with a temperate and cool climate.
Experienced gardeners recommend paying attention to the following points when growing:
- the land should be fertile, with a predominance of humus;
- Turkish cloves should not be planted in places where groundwater accumulates;
- the flowerbed is located in an open area, the plant is not afraid of sunlight;
- Watering should be regular: every 2-3 days. They try to pour water into the root zone;
- care consists of loosening and weeding. Feeding is optional;
- at the beginning of the season, the flowerbed is treated with drugs against pests and diseases.
Pansy (garden viola)
One of the most delicate flowers. The uniqueness of the plant is given by the different sizes of the petals, on which the patterned color is applied.
Pansies prefer to grow in areas with temperate to cool climates . You won't find them in southern countries.
The herbaceous plant is usually planted in a garden bed where there is slight shade. Watering should be moderate, not frequent.
Pansies are responsive to feeding with mineral mixtures . Nutrition procedures are carried out once every 30 days.
Pansies.
Attention! If you remove drooping buds in time, you can prolong the flowering of the crop as much as possible.
Petunia
Another flower like a violet - it resembles it with its petals and velvety leaves. themselves are more lush and funnel-shaped.
Petunia.
Petunia is native to the tropics, so the plant is unpretentious and easily tolerates drought . The ornamental crop is grown all over the world, with particular preference given to residents of warm regions and areas with a temperate climate.
Caring for petunia is simple:
- in summer it is fed 2 times with potassium-phosphorus fertilizers;
- To make flowering more abundant, faded flowers are cut off. The procedure stimulates the formation of new buds;
- watering is organized as needed;
- It is recommended to weed the flower bed with petunia on time. This will rid the plant of pests and diseases.
Problems when growing gloxinia
By the way gloxinia looks, you can guess what care rules the grower is violating.
The consequences of common errors are shown in the table.
| Problem | Probable Cause |
| Yellowing of leaves near veins | Nitrogen deficiency |
| Yellowing of the entire leaf blade | Overwatering Watering with hard water Sun fading Dry air |
| Falling buds | Sudden temperature change Draft Dry air |
| Leaf discoloration | Lack of lighting Lack of magnesium in the soil |
| Brown spots on leaves | Phosphorus deficiency |
| Curling leaves | Dry air Direct rays of sun Excess potassium in fertilizing |
| Rotting stems and buds | Waterlogging at low temperatures Too acidic soil Excess nitrogen |
| Drying leaves | Potassium deficiency |
| Spots on petals | Contact with water droplets |
| Serrated edges along the edges of leaves | Boron deficiency |
| Redness of leaves | Lack of potassium and phosphorus |
| Brown spots on leaves | Watering with cold water Draft Sunburn |
| Unopened buds | Lack of lighting |
| Green peas in place of a bud | Too cold wintering Lack of feeding |
Diseases and pests
Gloxinias are characterized by the same diseases and pests as most indoor plants.
Infection usually occurs through contaminated soil or dirty tools. But development is also facilitated by unfavorable conditions for keeping the flower.
| Photo | Disease | Signs | Provoking factor |
| Late blight | Brown spots on the leaves Mold on the back of the leaves | Stagnant water Dense soil Low temperature | |
| Fusarium | Leaves turn brown and curl | Air humidity more than 85% Lack of water and fertilizers | |
| Gray rot | The stem turns black There is a gray coating on the buds and leaves | Flower overflow | |
| Powdery mildew | White coating on leaves Deformed buds | Cold and high humidity | |
| Rust mushroom | Yellow spots on leaves Bubbles on the back side | Keeping in a musty and cold room during the growth period | |
| Anthracnose | Brown spots on leaves | Lack of phosphorus and potassium | |
| Phyllosticosis | Spots on leaves Leaf breaks at spots | Poor plant immunity |
The listed diseases, as well as root rot, are treated with fungicides (Topaz, Fundazol, etc.) Copper sulfate solutions are often used.
First remove the affected parts of the plant. Additionally, a transplant is recommended.
Gloxinia is considered quite resistant to pests. Occasionally she is struck by:
- spider mite;
- cyclamen mite;
- thrips;
- scale insect;
- whitefly;
- mealybug.
Signs of the appearance of insects are leaves that have lost their decorative properties, curling and drying out.
To control pests, insecticides and acaricides are used (Aktara, Fitoverm, etc.). The treatment is carried out 3-4 times.
Many pests live not only on the flower, but in the soil, so replanting or at least replacing the top layer of soil can also be useful.
FAQ
Is it necessary to replant gloxinia after purchase?
No, if you bought a plant that is already flowering. You need to wait until it goes into hibernation and only then remove the tuber from the pot.
What to do if gloxinia wakes up early
If the plant woke up before mid-January and the length of the sprouts has not yet exceeded 1 cm, the tubers can be left in hibernation for another 1-2 weeks. But you need to move them to a cooler place. If the shoots are longer and noticed at the end of January or beginning of February, then the plant is planted in the ground and cared for in the usual way.
How long does gloxinia live?
The average lifespan of a flower is 4-5 years. Some specimens live up to 10 years. It is believed that the older the flower, the more buds it has.
Why doesn't gloxinia bloom?
Gloxinia may not bloom due to lack of light, too low temperature, lack or excess of watering, or excessive nitrogen content in the soil.
Steps to propagate the tidea with your own hands
This delicate flower can be propagated by sowing seeds, cuttings or dividing the tuber, rhizome or mother bush. Usually, the overgrown tuber is divided, combining this process with transplanting the plant in the spring. The division is carried out into several parts, but each of the divisions must have at least one shoot and roots. The cut areas can be sprinkled with crushed charcoal or activated carbon powder. Planting is carried out in pre-prepared containers with drainage at the bottom and suitable soil. After planting, until the plants have adapted to the new conditions and show signs of successful engraftment, they should not be placed in a place that is too brightly lit. And only after several days (up to a week) can you move the tidea to the windowsill, to a permanent place. When dividing the rhizome, use a sterile, sharp knife to cut into pieces about 3–5 cm long. Then, such divisions are planted in a peat-sand mixture. Parts of the tidea are immersed in the substrate to a depth of 1–2 cm. Watering when caring for such plants is moderate. To speed up the germination process, it is recommended to cover the pot with cuttings with a piece of glass or transparent plastic film. As soon as such young plants take root, the shelter is removed and transplanted into more fertile soil. When carrying out a spring transplant, you can divide an overgrown bush into several parts. Each of these divisions should have 1–2 shoots and a sufficient number of roots. If the divisions are very small, then you can lose all parts of the plant. Planting is carried out immediately in pots with a substrate and drainage at the bottom. Previously, the most common and simple methods of propagating tidea, which are used by flower growers, were described, but there are two less popular ones - seeds and cuttings. Seed material is sown in January-February. In this case, a substrate based on leaf soil and sand is used. Seeds are scattered on the surface of such moistened soil and carefully dusted with a small layer of soil (you can do without this). Then the container with the crops is placed under glass or wrapped in polyethylene. It will be necessary to carry out ventilation every day. The temperature during germination is maintained at 22–24 degrees. When the seeds germinate and a pair of leaves unfold on the seedlings, they are planted in separate pots. Cuttings are cut from the tops of the shoots and then placed in a glass of water for 1–2 weeks. After this time, root shoots form in the cuttings. When their length becomes 1 cm, they are planted with a peat-perlite mixture or a couple of pieces immediately into a fertile substrate. This will help the bush develop into a more luxuriant plant in the future.