Lilies can be grown both in open ground and in flower pots. To grow beautiful flowers, you need to follow the rules for planting and caring for lilies in the open ground. This type of flowers is very sensitive to proper planting in the ground, since violation of this procedure can cause rotting of the bulb itself, death of the plant or lack of flowers.
It is important to know that lily bulbs are planted in a specific area for several years, since annual digging leads to weakening of the plants and a decrease in the size of the bulbs.
- Peculiarities
Planting lilies in the ground in spring
Both autumn and spring planting of bulbs is practiced. Experienced gardeners prefer to plant them in the fall. The reason is that the bulbs planted in the spring do not have time to become strong enough by the time autumn arrives, their roots do not perform their function sufficiently, so the plant is nourished only by the bulb itself, as a result of which its scales become thin, and the roots darken and begin to die . The second disadvantage of spring planting is the lack of children on the bulbs, which is important for propagation.
In addition, some bulbs may die during the winter, so some gardeners still prefer spring planting, citing a number of reasons:
- The desired variety can be freely purchased at any time of the year, so there is no need to propagate them by children.
- Bulbs dug up in the fall are preserved quite well in the refrigerator, which means they will not die in the winter as a result of getting wet or freezing.
- It is always possible to provide the proper conditions for the successful growth and flowering of a crop in a new place.
Considering all the advantages and disadvantages of planting lilies in the ground in the spring, we can conclude that the choice of time of year for planting should be based on the varieties and types of flowers.
Note: For example, late-blooming lilies will bloom much better when planted in the spring, but it makes no sense to plant North American varieties in the spring. In addition, the climatic conditions of your region may also affect the choice of planting time. So, if in the area where you live the summer is short and cold, then it is not recommended to plant in spring, since the crops will bloom only the next year. It would be much more rational to plant them in mid-autumn.
It is also not recommended to plant lilies in late spring - early summer, since the plants will be weakened and more susceptible to various diseases. The optimal time for spring planting for central Russia is April (Figure 1).
Figure 1. Instructions for planting lilies in the ground
Lily lovers are advised to place autumn and spring plantings separately, since the preparatory work on the ground, watering regimes and feeding characteristics are radically different for them. Remember that spring planting has its own nuances: soil preparation, pre-treatment of the bulbs, which will be discussed below.
The author of the video will tell you how to properly plant lilies in the ground in the spring.
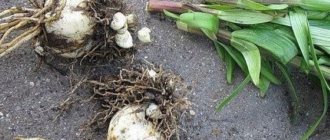
Selection and storage of planting material
Beautiful lilies can only be obtained from high-quality material. Therefore, when choosing planting material, pay attention to whether the bulbs bear visual signs of disease: rot, spots, mold; Are the roots dried?
Note: Ideally, all bulb scales should be the same color and texture, and the roots should reach a length of up to 5 cm. In addition, in the spring it is better to choose bulbs with small sprouts.
If you dug up the bulbs yourself in the fall, place them on the bottom shelf of the refrigerator and monitor their condition from time to time (Figure 2). Perhaps some of them will begin to sprout, then they need to be planted in pots and, with the arrival of spring, moved to open ground. To protect the bulbs from various types of pathogenic bacteria and fungi, it is recommended to carry out treatment for the purpose of disinfection. To do this, the planting material is first washed in plain water, then placed in a weak solution of potassium permanganate or fungicide.
Figure 2. Preparing bulbs for storage
Next, remove the damaged scales and thoroughly wash the bulbs in several waters. Treated in this way, the bulbs are planted in the ground, using cut plastic bottles as small greenhouses for young shoots.
Soil preparation and treatment
Lilies are quite picky about soil fertility. They do not tolerate heavy soils; for successful growth they need loose, fertile, well-drained soil. Therefore, it is so important to carry out the following preparatory activities several months before spring planting:
- Choose an area that is not flooded by spring waters;
- Dig the top layer of soil 40 cm deep;
- Arrange drainage using gravel or river pebbles to drain excess moisture;
- Add fresh soil if necessary;
- Enrich the soil with humus (do not use manure) or phosphorus-potassium fertilizer;
- Reduce the acidity of the soil by adding chalk or wood ash to it;
- Maintain soil moisture.
When all the preparatory work has been done and the ground has warmed up sufficiently, you can begin planting. To do this, holes are dug, the depth of which depends on the type of soil: the lighter it is, the deeper the hole. Low-growing flowers are planted to a depth of 8-12 cm with an interval between plants of 15-20 cm, and tall ones - 12-20 cm, with an interval of 25-30 cm. If there is a well-developed root system, add another 5 cm.
Primary and subsequent feeding
Regardless of what time of year you decide to plant lilies, you need to take care of their initial and subsequent feeding. So in the spring, additives such as ammonium nitrate, nitroammophoska, and wood ash are added to the soil (Figure 3).
Note: When fertilizing, you should pay close attention to the dosage, because an excess of minerals is just as detrimental to plants as their deficiency. Among the listed additives, wood ash occupies a special place. This substance can be applied up to 6 times per season; it not only creates a favorable environment for growth, but can also protect flowers from mold and pests.
In addition to the primary fertilizing, it is also necessary to re-feed the soil if the bulbs were planted in the spring. Thus, before the start of the budding period, it is recommended to add a solution of nitrophoska to the soil, and after the end of the flowering phase, a solution of superphosphate. The second feeding not only adds nutrients to the soil, but also helps the bulbs prepare for winter.
Figure 3. Feeding preparations
Simultaneously with feeding, it is recommended to carry out preventive measures, the purpose of which is to prevent various diseases. For example, in May it is recommended to saturate the soil with 1% Bordeaux mixture, and in mid-summer repeat this procedure several more times, spraying not only the soil, but the entire plant. If there are obvious signs of disease, fertilizing should be continued so that the bulbs receive additional nutrition and can resist disease.
Features of the watering mode
Even if you prepared and fed the soil correctly and in advance, but did not take care of its moisture from the moment of planting the bulbs, then all your efforts may be in vain: the flowers either will not bloom, or the color will be very poor. Therefore, immediately after planting, it is necessary to thoroughly moisten the soil, and then constantly monitor the level of soil moisture and carry out regular watering. At the same time, you should neither overdry the soil nor allow water to stagnate in it.
Disembarkation scheme
After the bulbs have been prepared, they can be safely planted in the ground. To do this, it is better to prepare individual dimples or long holes. If the soil is too dry, they can be slightly moistened. A drainage layer, at least made of sand, should be poured onto the bottom of each. Fertilizer is added directly to the holes. Then the onions are placed in them strictly vertically, bottom down, and covered with earth on top.
The density and density of planting may vary. Lilies are almost never planted alone; in groups they look more organic. A flower bed with frequently planted flowers looks better, but in this case the perennials will have to be replanted more often as they grow larger and the children grow. It is better to make the distance between the bulbs the same (from 5 to 25 cm), especially when planting linearly.
Another aspect that raises many questions is the planting depth. You can find completely different opinions on this matter. It depends on the following factors:
- variety – low-growing ones are buried by 10–12 cm, medium-height lilies – by 15 cm, tall ones – by 20–25 cm; There are certain varieties with low-lying leaves - they just need to be lightly sprinkled with soil;
- the size of the bulb - if it is small, then the depth can be reduced;
- selected area - in loose, soft soil, the holes should be deeper, this method is more reliable and retains moisture better, especially if we are talking about arid regions, but this may slightly delay the timing of germination and flowering.
Naturally, the landing should not be spontaneous. There are many ideas for designing flower beds, but they are all subject to the following principles:
for lilies, it is important to choose a good background - it can be fern, juniper or any other shrub of this kind, while tall varieties do not look at all against the background of low and sparse plantings - they will stand out excessively; on a rounded flower garden they are usually located in the central part; low-growing lilies will fit perfectly into any flowerbed, and are also suitable for decorating paths and highlighting areas in a personal plot; To make the flower area always look elegant, you can plant flowers next to them that bloom at different times, for example, phlox, peonies and gladioli; in addition to the size of the plant and the shape of the flower, you should carefully select the color scheme - flowers can contrast with others or emphasize similar shades; when allocating space for different types of flowers, it is necessary to ensure that the faded ones are at least partially covered by other plants; Different varieties of lilies are planted together with great care, since they may have different conditions of maintenance, and this will also prevent the spread of diseases from the most vulnerable varieties.
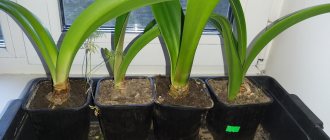
Planting lilies in spring with sprouts
When planting bulbs with sprouts, it is possible to get beautiful flowers in the summer. To do this, the sprouted bulbs need to be planted in the ground at the end of May, when the time of frost has passed. When planting, you should take into account the degree of development of the sprout: if it is still small, then the bulb is planted at the usual depth, that is, from 12 to 20 cm, depending on the size of the bulb itself (Figure 4).
If the sprout is sufficiently developed and has unfolded its leaves, then the bulb sinks into the soil shallowly: only up to the neck of the sprout, otherwise it will not be able to break through the soil layer and will rot. However, with such planting there is a risk of the bulb freezing in winter. Therefore, it is recommended to replant them in the fall to their usual depth.
The basic rules for planting lilies with sprouts are shown in the video.
Peculiarities
To learn how to properly plant lilies in open ground in the spring, you need to know some of the features of this process.
Spring planting of bulbs with shoots is complicated by the constant threat of frost. Therefore, the gardener must be prepared in advance for this situation. This is why it is practiced to plant sprouted lilies sideways. If you know that frost is approaching, take protective measures immediately. Plantings must be watered abundantly, possibly with the addition of epin. Wet plants and damp soil will absorb frost, and epin will help relieve stress from the plants.
Rules
It is recommended to plant lilies in prepared and well-warmed soil. For conditions in the Moscow region, this time begins in late April - early May.
Figure 4. Features of planting lilies with sprouts
As soon as the stems emerge from the ground, it is necessary to carry out the first feeding. The exception is chernozem, which has sufficient fertility.
Caring for lilies in the spring at the dacha
Planting and caring for lilies in the open ground largely depends on the season and includes a whole range of measures that will help maintain the viability of the plants.
Spring care consists of the following procedures:
- Cleaning the shelter under which the plants were kept in winter.
- Gently loosening the soil.
- Water and apply organic or nitrogen-containing fertilizers after germination.
- With the beginning of budding, add potassium-phosphorus fertilizer to the soil in the form of wood ash, superphosphate, and potassium nitrate.
- Weeding, removing faded buds.
- Regular, even watering. At the same time, it is important to protect the leaves from droplets of moisture getting on them so as not to provoke a burn.
It is also necessary to mulch the soil around the roots with organic materials (leaves, straw, sawdust, grass clippings).
Caring for lilies in autumn
Planting and caring for garden lilies in the fall is also carried out in accordance with certain rules. All these activities are aimed at preparing plants and soil for winter.
Autumn care includes (Figure 5):
- For better ripening of the bulbs by autumn, it is necessary to add superphosphate and potassium sulfate to the soil immediately after flowering.
- During prolonged autumn rains, the bushes should be sprayed with Bordeaux mixture to protect the plants from possible diseases.
- For successful wintering, add humus or rotted compost to the garden bed in a 10 cm layer.
- It is not recommended to trim the stems after flowering, since the plants will not have time to prepare for winter in this case. As a result, next year the color will be weak or there will be no color at all. But naturally dried plants should be cut at a height of 15 cm from the top layer of soil.
- It is in the fall that bulbs are dug up for replanting, propagation or storage. It all depends on the specific type of flower. For example, Asian hybrids need autumn replanting every year, and Oriental hybrids - once every three years.
- After digging, the bulbs are immediately planted or sent for storage.
- It is recommended to cover the bed for the winter with a layer of peat (sawdust) before the onset of frost. When frost touches the ground, it is necessary to additionally cover the bushes with fallen leaves or cover them with spruce branches.
- Late-flowering varieties also need protection from autumn light frosts; plants can be protected from them using cardboard boxes or film.
Figure 5. Features of autumn care for lilies
By following all the recommendations for autumn care, you will be able to preserve your flowers, which will delight your eyes next year.
Selection of planting material
In order for lilies to decorate the garden plot and delight with lush flowering, it is important to choose the right bulbs for planting.
Planting material must meet certain requirements:
- The bulbs should not contain traces of mold and rot - you should choose dense and clean specimens.
- The bottom should be intact, without signs of damage.
- The roots must not show signs of rot or dryness.
- It is better to choose a material whose size is 3-4 cm in diameter.
- Color does not affect the result, so it can be anything.
It is strictly not recommended to purchase bulbs if they have an elongated sprout.
They should grow exclusively in the ground after planting has been completed. It is not recommended to buy planting material whose diameter is less than 2 cm. This size is typical for bulbs after forcing, which can bloom no less than 3 years after planting.
The place for such a capricious flower must meet all the criteria
Lilies in pots: care
In addition to lilies suitable for growing in the country, there are also Oriental and Asian varieties that can be successfully grown in ordinary flower pots. At the same time, you can easily regulate the flowering period, receiving flowers as needed. You just need to choose the right time for planting and provide the plants with proper care.
After the first shoots appear, the first organic fertilizing is carried out. The second feeding is carried out a week later with the application of phosphorus-potassium fertilizers. Simultaneously with the first feeding, it is recommended to spray the sprouts with a solution containing growth stimulants. Such spraying is carried out twice a week. As a result, you will get beautiful large buds.
When the first stems grow to a height of 10 cm, you need to add soil to the pot up to its top edge. Further care consists of regular loosening of the soil to a depth of 5 cm and daily watering. In addition, flowering plants should be fertilized with mineral and organic fertilizers once a week. A lily should be accustomed to the open air gradually: the first time the plant in a pot is taken outside for half an hour, the second time for an hour, the third time for two, until the residence time reaches 10 hours. Hardening can be carried out only when the plant reaches one month of age.
Note: It is important to know that leaving a flower outdoors at temperatures below 10 degrees is not recommended, since low temperatures inhibit the process of flower bud formation.
Until the flowers appear, the leaves are also sprayed daily. If the flowers are outdoors, it is necessary to ensure that at the time of spraying and after it, direct sunlight does not fall on the leaves. And after the buds bloom, you should protect not only the foliage, but also the flower petals. Remember that moisture on the petals shortens the flowering period. If your lily blooms very profusely and its buds are heavy, install supports to support the stem.
Proper soil preparation
After choosing a place for planting, you need to move on to another stage - preparing the soil. Lily is a garden flower that prefers light black soil, so the gardener will probably have to make adjustments to the soil structure.
If the soil is heavy, it will not be possible to do without adding a peat-humus mixture mixed with sand. To prepare, you will need to mix the ingredients in equal parts and add them while digging. For depleted soils, the following composition is taken: 4 kg of humus/1 sq. m, and for podzolic soils - 8 kg/1 sq. m.
For lilies, neutral soils are considered the most preferable option, but there are species that require slightly alkaline or acidified soil.
To avoid making a mistake, when purchasing bulbs of a certain variety, you should consult with a specialist on this issue.
For soil rich in humus, replacing organic fertilizers is acceptable. So, the following mineral additives are suitable: 30 mg of superphosphate, 30 ml of urea, 15 ml of nitroammophoska per 1 sq. m.
As for digging, it is carried out to a depth of 40 cm. Soil preparation must be carried out in advance. If the work is planned in the spring, then fertilizer should be applied in the fall, and if winter planting is planned, then in the spring.
To enhance flower growth, it is recommended to use fertilizers
Garden lilies: planting and care
Some people like lilies in flower pots, while others cannot imagine their garden without these wonderful flowers. Garden varieties are so loved by many because they feel equally good in both shaded and sunny areas. Their only requirement is well-drained soil (Figure 6).
Note: In the summer, caring for garden lilies consists of regularly loosening the soil, weeding, controlling diseases and pests, watering and fertilizing. The autumn season is aimed at preparing flowers for winter: cutting off dried leaves, digging, replanting and storing bulbs, organizing shelters for plants - these are the works that are carried out in the garden on the eve of winter.
Although lilies are quite tolerant of shaded areas, you should not plant them in deep shade under trees or buildings. In the fall, plant them between low bushes, which will serve as protection for the flowers in the winter cold. In summer, it is recommended to plant ground cover plants under the lilies to protect the bulbs from overheating.
When planting garden varieties, preliminary soil preparation is required. Any soil is suitable except sandy or clay. The first is not very fertile, and the second is prone to stagnation of water. Therefore, if the soil on your site is heavy, add additional sand, as well as peat and humus, about a month before planting begins. Immediately before planting, the soil is dug up and potassium, nitrogen and phosphorus fertilizers are applied. The dug up and fertilized soil is watered and left until planting.
Figure 6. Stages of caring for garden lilies
The timing and depth of planting bulbs are determined by the varieties and characteristics of the soil. It is important to know that garden species are planted in the fall so that the bulbs have time to take root well. The planted bed must be watered and mulched with peat or humus to protect the top layer of soil from drying out. It is advisable to cover them for the winter using special devices or natural material, such as spruce paws or fallen leaves.
Caring for garden lilies consists of loosening the soil, weed control, watering, and fertilizing. Fertilization of the soil is carried out three times: during the period of emergence of shoots - with the help of urea and complex fertilizer, in the budding phase - with the addition of potassium sulfate and superphosphate, during flowering - with a solution of liquid mullein and nitrophoska. Do not forget that watering can only be done by the roots, so that waterlogging of the leaves does not lead to burns or gray rot. During periods of heavy rain, it happens that the bulbs begin to protrude from under the soil layer. In this case, the lilies must be sprinkled with fallen pine needles. If the purpose of cultivation is to obtain planting material, it is necessary to cut off the buds so that the plant does not waste its energy on flowering, but directs it into the bulbs. In this case, it is necessary to leave at least a third of the stem. It is recommended to replant garden lilies once every five years. This way they get sick less often and bloom better.
Transplant timing
Most lilies will need to be replanted approximately once every 3 to 5 years. But some varieties, for example, Martogon, are replanted once every decade. And common varieties of Tubular and Asiatic lilies are planted every other year, these hybrids grow so quickly.
Thickened plantings are planted in the spring or at the end of the growing season in the fall, it all depends on the climate and the variety of the lilies being grown. Flower growers prefer autumn replanting, when the bulbs are almost completely dormant.
But what to do with Asian and Tubular hybrids, which bloom a month before the first frost and simply do not have time to take root? In this case, replanting is carried out in the spring, when the soil warms up to a temperature of +10°C and the average daily air temperature is at least +15°C.
The growing region is also taken into account when calculating planting dates. In the middle zone, autumn replanting is carried out at the end of August - the first half of September, in the southern regions the work can be postponed to October, and in the northern regions it is carried out immediately after flowering.
Asian varieties are not at all limited in the timing of spring transplantation. They are replanted from the beginning of spring until flowering time. Water the lily generously after transplanting and tear off the buds to improve survival rate.
Pineapple lily: planting and care
Pineapple lily, also known as eucomis, belongs to the ornamental plants. The main advantage of this plant is that it is practically not susceptible to diseases, and eucomis blooms for a long time (Figure 7).
It is planted in the ground in the spring in the same way as gladiolus bulbs. This should be done after the soil has warmed up. For the central regions of Russia, this is approximately mid-May; for the Moscow region, it is the end of spring. Immediately before planting, eucomis bulbs are kept in an infusion of a root growth stimulator for two hours.
Figure 7. External features of pineapple lilies
Planting material is completely immersed in fertile soil and watered moderately. After germination, fertilize and continue to water, but more abundantly. To ensure that you get flowers after spring planting, it is recommended to select only large specimens that are dug up in the fall after the leaves have completely yellowed. Wintering of the bulbs occurs in a cool room at a temperature of +10+15 degrees in a box with sand after preliminary drying.
Lily Marlene: planting and care
Lily Marlene is capable of simultaneously producing up to hundreds of pink buds on one stem. Another interesting feature of this variety is the complete absence of the pungent odor inherent in all lilies (Figure 8).
Like other lilies, this species is quite unpretentious in terms of growing conditions and care. In open ground conditions it reproduces by both bulbs and bulbs. Larger bulbs are better suited for home growing. Autumn and winter plantings will produce flowers in early spring, spring plantings in summer, and from bulbs planted in early autumn you can get a beautiful flower in mid-winter.
Figure 8. Marlene lilies in the garden
So, to grow lilies at home you will need a flower pot, the diameter and depth of which correspond to the height of the plant. For example, if the lily is about a meter high, a container with a diameter of 35 cm and a depth of 30 cm is suitable. The bulbs are planted at intervals of 4 cm from each other, while maintaining a distance of 3 cm to the edge of the pot. If you want your indoor lily to bloom for a long time, plant 3-4 bulbs in one pot. Pre-planting material must be subjected to a stratification procedure, that is, a sharp change in temperature. For this purpose, the bulbs selected for planting are kept in the refrigerator at a temperature of +5 degrees for 15-20 days. Then they are soaked in a solution of potassium permanganate for 1-2 hours, then kept for 12 hours in a solution of a growth stimulator with the addition of a nutrient medium. Only after this the bulbs should be planted in the soil.
The soil also needs to be prepared accordingly:
- To do this, drainage in the form of river pebbles or expanded clay is placed at the bottom of the pot, and a layer of fertile soil 10 cm thick is placed on top of the drainage.
- The bulbs are laid out on top of the substrate with their sprouts facing up and sprinkled with a small layer of soil.
- The planted bulbs must be watered with warm water and placed again in the refrigerator (cool room) for a month so that the plant can take root.
- With the appearance of sprouts, the pot with the plant is transferred to a bright room with a temperature of +12+15 degrees.
- Starting from 1 month, it is advisable to harden the plant by taking it out into the fresh air, gradually increasing the period of stay outside from 30 minutes to 10 hours a day.
Lilies are light-loving plants, so it is better to keep pots with them on western or eastern windows, while avoiding direct sunlight on the leaves. If there is a lack of natural light, fluorescent lamps are used to extend daylight hours. Watering of young plants is carried out at intervals of three days; as they grow and flower, watering becomes more abundant and more frequent. In this case, it is necessary to ensure that there is no stagnation of water. On particularly hot days, when the air is dry, it is recommended to spray the plants. Remember that regular watering involves loosening to ensure air flow to the roots.
Note: As for fertilizing, the first is carried out immediately after germination of the seedlings using organic fertilizers, the second - during the period of foliage growth by applying nitrogen-containing fertilizers, and the third - with the appearance of buds, when the plant needs phosphorus-potassium fertilizing. If you want to increase the number of buds, treat the plant twice a week with growth stimulants.
Marlene lilies bloom 80 days after sprouting. This process can be accelerated by increasing the temperature in the room, organizing additional lighting and increasing watering, and slowing it down by moving the plant to a cold place. In the third year after planting, the Marlene variety produces the most beautiful and strong inflorescences, and after 5-6 years of growth, the plant needs to be renewed.
As the buds fade, they must be removed so as not to deplete the bulb. After the plant has completely bloomed and the stems have turned yellow and dried, they begin the process of preparing for winter. To do this, watering is reduced to once a week, adding mineral fertilizers at the same time. Two weeks after the last leaf has dried, the bulbs are dug up, kept in a weak solution of potassium permanganate for half an hour, dried, placed in sawdust and stored in a dark, cool place. It is extremely rare for the Marlene variety to produce babies. In this case, it is better to immediately plant them in a separate pot.
How to trim
There are several rules that will allow you to trim lilies without harming the plant:
- It is permissible to cut flowers either in the morning or at dusk. During the daytime, it is possible to make a cut only in cloudy weather.
- The cut can only be made using a sterile instrument. To treat it, you should use alcohol or a pharmaceutical solution of iodine.
- Do not cut the stem at the base. It is better to leave its third part and adjacent leaves in order to provide the bulbs with adequate nutrition.
- You need to use the tool at an angle - in this case, after watering or precipitation, stagnation of water in the stem will be eliminated.
If you pour water on flowers, they may stop blooming later.
Amazon lily: care at home
Among flowering indoor plants, the Amazon lily (eucharis) is particularly beautiful. Caring for a flower is not particularly difficult, because this plant can successfully grow and bloom in any room (Figure 9). The main condition for it is good lighting, so try to place the pot with eucharis closer to the window. Make sure that in summer the leaves of the flower are not exposed to direct sunlight. The optimal temperature for growth in summer in indoor conditions is considered to be +18 +22 degrees, and in winter – from +15 to +17 degrees.
Note: It is also important to properly organize watering of the plant, because stagnation of water can be detrimental to the Amazon lily. Therefore, it will be enough to water eucharis when the soil under it is completely dry, and after flowering, watering stops completely, and the plant prepares for a dormant period. This stage is very important for the development of the plant, because it needs to gain strength for subsequent growth. Therefore, you need to remove the dried flower stalks, leaving the leaves intact.
Figure 9. Planting characteristics of Amazon lilies
Eucharis remains dormant for approximately one month from April to October. With the appearance of new shoots, watering must be resumed. Fertilizing is carried out only during the period of active growth, preferably in summer. In this case, the fertilizer applied to the soil should not contain too much nitrogen.
An interesting feature of this plant is the fact that eucharis fully develops and blooms only in a cramped pot. Therefore, the plant can be replanted no more often than once every three years.
Indoor lily: care at home with photos
Lovers of indoor flowers willingly grow home lilies of different varieties (Figure 10). Among them, Asian hybrids are called the most unpretentious. They grow equally well in the sun and in the shade, require moderate watering, are resistant to disease, and the flowers come in a variety of colors. The only drawback is the lack of smell.
Figure 10. Types of indoor lilies
Curly and snow-white hybrids are also grown at home. The former prefer shade and moist soil, the latter are rather capricious and demanding of care. House lilies bloom briefly and infrequently, but it is possible to increase the flowering period by changing the dormant period of the plant. After flowering, it must be placed in a cool, dry place or replanted in new soil with the addition of ash. During active growth, you can feed the plant and increase watering to achieve longer flowering.
When caring for a house lily, the following points can be highlighted::
- Regular moderate watering of the plant from the moment the sprouts appear until the leaves dry.
- Spraying the plant in dry air conditions.
- Loosening the soil while simultaneously adding peat, wood ash, humus or leaf soil.
- Removing weeds.
- Installation of supports for flower stalks.
- Liquid fertilizing after the appearance of sprouts, at the stage of bud formation and after flowering.
- Wet cleaning of leaves.
- Store bulbs in a cool place.
It is recommended to remove formed buds in the first year of growth so that the plant gains strength. Subsequently, buds are removed only from weakened plants.
International classification of species
In general, the list of names of this garden plant includes more than 6 thousand species, divided into 100 hybrid groups. The main varieties are:
- American;
- Asian;
- long-flowered;
- snow-white;
- tubular;
- curly;
- eastern;
- hybrid, that is, obtained by crossing previous options.
It is customary to include varieties of natural growth in a separate subgroup, but they have nothing to do with our topic of growing garden lilies.
The eighth group has its own classification, and it is advisable to familiarize yourself with it before the envelope with the bulb has already been purchased: the correct interpretation of the labeling will allow you to avoid making a mistake with the choice of variety.
Hybrid species of garden lilies:
- LA - long-flowered with Asian;
- OT - eastern with tubular;
- OA - Asian with Oriental;
- OL - long-flowered with Asian
Lily flower shape
The main type of flower is indicated by one of eight Roman numerals. The letter designation will help you imagine the final type of bowl: such knowledge will help you aesthetically plan the look of the future flower bed. Markings about the type of bud of a particular variety look like Latin letters written with a slash after the designation of the main group. The first of them suggests the direction of the bud:
- up - a;
- to the side - b;
- down, that is, hanging like a bell - c.
The second letter indicates the type of bowl:
- tubular - a;
- cup-shaped - b;
- flat - c;
- turban-shaped - d.
Accordingly, the variety marking may look like this: I b/a for a tubular American plant directed towards the side, or VIII (OL)c/a for a long-flowered Asian hybrid with bell-shaped buds.